Podcast Lighting Setup: How to Look Good on Camera Without Spending a Fortune
Podcasters often invest countless hours examining microphones and cameras, however they almost always neglect lighting. And, in general, that overhead fluorescent or desk lamp casting an unflattering shadow under your eyes is not helping you.
Fortunately, you don't need a crew of Hollywood professionals or a large budget to obtain a suitable lighting setup for your podcast. A couple of well-positioned LED panels can easily elevate your video from "that awful webcam conference with your boss" to something viewers would actually enjoy watching. The Elgato Key Light is currently the go-to for many podcasters and it's easy to see why. However, there are several other options that may meet your requirements and budget.
Why Lighting Matters More Than Your Camera
When you first begin a video podcast, everyone forgets to tell you one very important detail. While a nice camera with good lighting will generally appear better than an expensive camera with poor lighting. This holds true every time.
Your webcam or mirrorless body can only process the amount of light that is actually striking your face. Therefore, while having a great sensor is wonderful, nothing beats that sensor if the light falling on your face is shining from directly above or a window behind you. Lighting on your face that is flat and evenly distributed removes harsh shadows and provides enough light for your camera to focus properly, thereby eliminating any distractions from a wandering autofocus and giving you clear images.
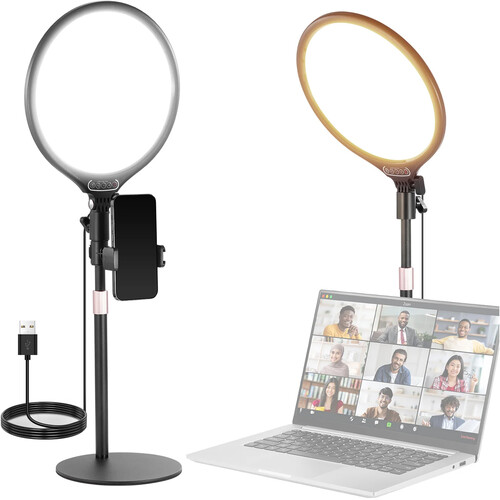
Podcasters commonly make the same four major errors in their lighting. They place themselves with a bright window behind them so their face becomes a silhouette. They use overhead room lights that create raccoon eyes. They utilize ring lights that flatten everything and place that obnoxious circular catchlight in your eyes. Or they simply fail to consider lighting altogether and wonder why their footage appears dull and grainy.
A simple 2-3-light setup corrects all of these issues and you can accomplish this setup in approximately 10 minutes.
The Key Light: Your Main Light Source
Your key light accomplishes the majority of the work. This is the primary source of lighting for your face. Position it about 45 degrees to one side of you, slightly above eye level. This produces some of the natural shape of your face without producing too many shadows.
Angle matters here. Position the light too high and you produce additional shadows below your eyes. Place it too far to the left or right and part of your face disappears into complete darkness (this can look nice in movies but terrible in a weekly podcast on marketing).
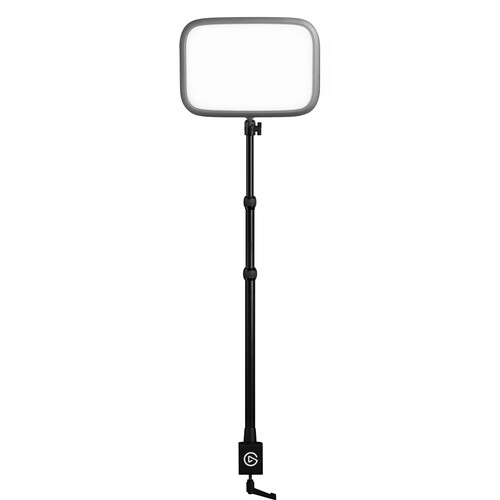
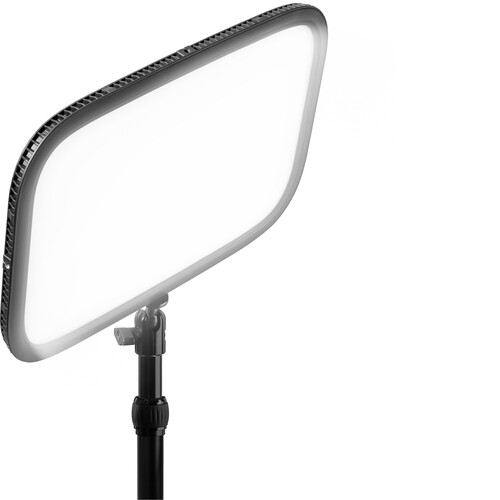
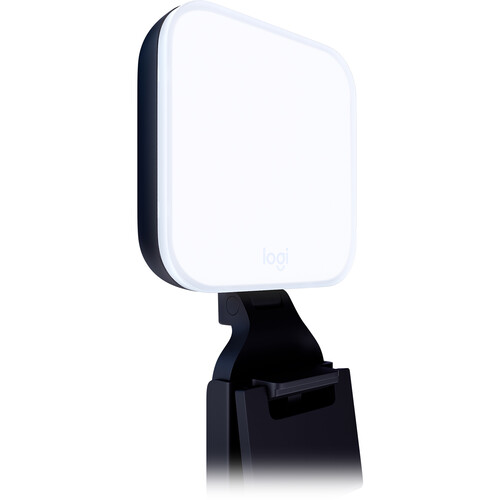
Elgato designed their Key Light specifically for this type of desk mounted setup. The device produces 2800 lumens of soft, evenly-distributed light using 160 Osram LEDs placed behind an Opal Glass Diffuser. You therefore receive a soft, even light pattern without requiring a separate softbox.
Color Temperature ranges from 2900K to 7000K, allowing you to match the color temperature of the Elgato Key Light to the color temperature of your existing ambient lighting whether that includes warm tungsten bulbs or cool daylight pouring through windows. CRI scores at 92 percent, providing sufficient accuracy for rendering skin tones on camera for this price range.
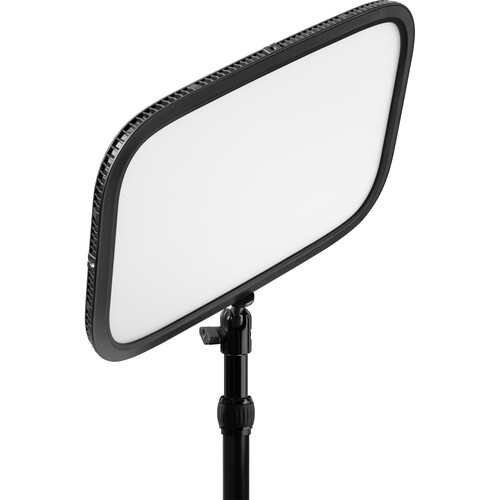
The desk mount and telescope (reaches 22 to 49 inches) provide ample clearance for everything off the ground, particularly when you're recording in cramped quarters. No light stands take up valuable desk space.
Reviewers at B&H frequently reference the build quality and overall light output of the Elgato Key Light, with numerous reviewers citing how much better their live streaming and recorded content appear since replacing their ring lights with the Elgato. Users continually comment on how softly and naturally lit their faces appear when utilizing the diffused panel versus harsher point-source lights.
The Wi-Fi Issue You Should Know About
However, the Elgato Key Light has one major drawback that has been documented by numerous user reviews: frequent Wi-Fi disconnections. As reported by several B&H reviewers, controlling the Elgato Key Light using Wi-Fi and connecting to your network via the Elgato Control Center app or a Stream Deck can cause intermittent disruptions in Wi-Fi connections.
While occasionally reconnecting can be frustrating, some reviewers have experienced prolonged periods of difficulty reconnecting (as long as 30 to 60 minutes). Numerous users have cited instances in which assigning a static IP address did not eliminate the disconnections entirely.
There are no manual controls on the light itself. Once the light loses Wi-Fi connectivity, you cannot alter any settings manually. If you possess a reliable Wi-Fi network and are willing to troubleshoot occasionally, the superior light output of the Elgato Key Light easily outweighs any drawbacks. However, if instant-on reliability is a higher priority for you than features, you might wish to know this prior to purchasing.
Fill Light and Background Separation
Using a secondary light (fill light), positioned on the opposite side of your face (i.e., opposite the side where your key light casts shadow), helps soften the contrast between light and shadow areas of your face. A well-lit fill contributes toward creating a polished appearance similar to TV broadcasts.
To achieve adequate fill light effects, your fill must be less intense than your key light, ideally around 50-60% of the key light intensity, to maintain some of the natural definition of your facial structure without appearing overly flat. An additional Elgato Key Light would suffice, although you would likely find yourself wasting money.
Providing depth perception beyond your illuminated foreground is another critical element contributing toward making your video look like a professional production. Utilizing a minimal-sized LED panel positioned behind you, either facing against the background (such as a wall) or toward a shelf/bookcase, adds visual depth and removes that unpleasant feeling of viewing a floating head in a dark void.
You needn't purchase anything advanced for this purpose, simply acquiring an inexpensive LED panel with adjustable brightness will suffice.
A Practical Three-Light Setup
Now let us discuss how to assemble this equipment. Position your key light at approximately 45 degrees to one side of you and just above eye level. Position a dimmer fill light on the opposing side of your face (farther away from your face). Finally position a small LED behind you aiming toward the background area. That's it. With three lights placed thoughtfully positioned, your podcast will instantly appear more professional. All components combine to generate approximately 100W total and consume significantly less desk space than you would expect.
Alternatives Worth Considering
While the Elgato Key Light is our number one recommended product, there are alternative products based upon budgetary constraints and preferences that offer competitive performance. You can also check Amazon if the B&H website is sold out.
Elgato Key Light Neo
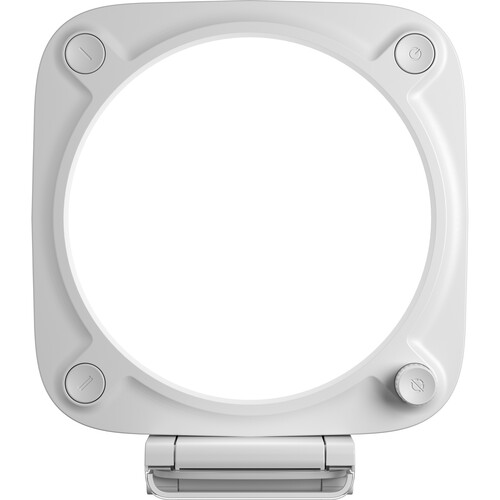
The Elgato Key Light Neo offers comparable capabilities to the full-size Elgato Key Light, albeit in a smaller package and at nearly half the cost. This unit can function well as both a key light in tighter setups or as a fill light due to its reduced power output. Like its larger counterpart, it utilizes Elgato's Control Center app and can be integrated into Stream Deck units. B&H ratings indicate 5/5 stars, though there aren't yet numerous reviews. Also available on Amazon.
Logitech Litra Glow
Logitech's Litra Glow represents our entry-level option for podcasters seeking an extremely straightforward solution at an extremely affordable price point. The Litra mounts directly onto your monitor via clip, thus consuming absolutely no desk real estate. The Litra Glow outputs significantly less light than the Elgato Key Light, but surprisingly delivers respectable results within webcam distance (just a couple of feet from your face). It's powered via USB cable only, so you'll only need one wire for this entire unit.
B&H reviewers average 4.5 out of 5 stars for the Litra Glow. The biggest limitation is its limited output, it simply cannot illuminate an entire room, but for standard talking-head style podcasts it delivers perfectly acceptable results. Given its low price point, you could reasonably acquire two Litra Glows and establish a rudimentary key-and-fill combination for just what one Elgato Key Light costs.
Neewer Basics R10
Lastly we have the Neewer Basics R10, an incredible bargain at an equally unbelievable price point. The R10 is a 10.5-inch bi-color LED round panel with a desktop stand included. Quality-wise, it cannot compete with Elgato or Logitech, nor does it include app-based control or Smart Home compatibility. Nevertheless it emits usable, variable-intensity lighting at an almost unbelievable price point. In reality, you can practically buy three of these models for less than one Elgato Key Light, establishing a fully-functional three-point setup from day one, making this an attractive option for anyone starting out who is unsure if video podcasting will remain viable for them.
Common Mistakes to Avoid
There are two common mistakes made by beginning podcasters regarding their lighting. The first involves color temperature inconsistency. When your key light is set to 5600K (daylight equivalent) but your room has warm-colored 3000K Tungsten bulbs installed, you end up with this odd split where parts of each frame appear orange while others appear blue. To avoid this split effect either disable any overhead room lighting or ensure that your LED panels are matched to whatever existing ambient light exists in your environment.
Second, avoid positioning a light directly behind your monitor where it shines directly on your face. Doing so is essentially identical to placing a ring light, flat and unattractive. Side placement is always preferable.
Third, watch for any reflective surfaces nearby including glasses, shiny desks and picture frames behind you that will reflect back some portion of the light emitted by your lights creating distracting hotspots. Basic diffusion kits can aid somewhat in reducing these hotspots, but typically moving objects around (or removing them) is easier than attempting to mitigate them.
Additionally, if you're capturing video using a capture card and routing your camera through HDMI, make certain to lock down Auto White Balance on your camera before commencing your recording session. Some cameras will attempt to continuously modify white balance as they sense variations in their LED panels warming up or changes in ambient light levels occurring during your recording session, and such minor color modifications can be troublesome to fix later in post.
Frequently Asked Questions
How many lights do I need for a podcast?
Two lights is the practical minimum for a good-looking podcast setup. A key light at 45 degrees and a fill light on the opposite side. Three lights (adding a background or hair light) takes it further, but two will get you solid results. Many successful podcasters run just a single well-placed key light and rely on ambient room light for fill. Start with one good light and add more as you see what your specific space needs.
Can I use a ring light for podcasting?
You can, but it's not ideal. Ring lights produce very flat, shadowless lighting that makes faces look two-dimensional on camera. They also create that distinctive circular catchlight in the eyes, which some viewers find distracting. A panel LED positioned off to one side gives you more natural-looking dimension and is generally more flattering. If you already own a ring light, try moving it to one side instead of mounting it around your camera lens.
What color temperature should I set my podcast lights to?
Start with 4500 to 5000K as a baseline, which is a neutral white that works in most environments. If your room has warm tungsten overhead lights, you might want to go warmer (3200 to 3500K) to match. If you're in a room with lots of daylight, go cooler (5600K). The key is consistency. All your lights should be set to the same color temperature, and ideally matched to whatever ambient light is in the room. The Elgato Key Light lets you dial this in from 2900 to 7000K, which covers basically any situation.
Do I need a softbox or diffuser for podcast lighting?
If you're using a panel LED like the Elgato Key Light, the answer is probably no. Panel LEDs have a large surface area relative to their size, which naturally produces softer light than a bare bulb or point-source LED. The Elgato's opal glass face acts as a built-in diffuser. If you're using a smaller, more intense light source, then yes, a softbox or diffusion panel will help. But for most desk-mounted podcast setups, a good panel LED is already diffused enough right out of the box.
How much should I spend on podcast lighting?
You can get a functional setup for under a hundred dollars with budget panels like the Neewer R10. A mid-range setup with an Elgato Key Light as your primary and something cheaper for fill runs around 200 to 250 total. Going all-in with two Elgato Key Lights and a background light might push you past 400. The sweet spot for most podcasters is that mid-range tier. You get reliable, good-looking light without overspending on features you might not use.
Where should I position my key light?
Place it about 45 degrees to one side of your face, slightly above eye level. The exact angle depends on your face shape and the look you're going for. Closer to the camera axis (more frontal) gives flatter, more even light. Further to the side creates more dramatic shadows and dimension. For podcasting, you generally want something in between, enough angle to create dimension but not so much that half your face is in deep shadow. Start at 45 degrees and adjust from there based on what looks good on your specific camera feed.