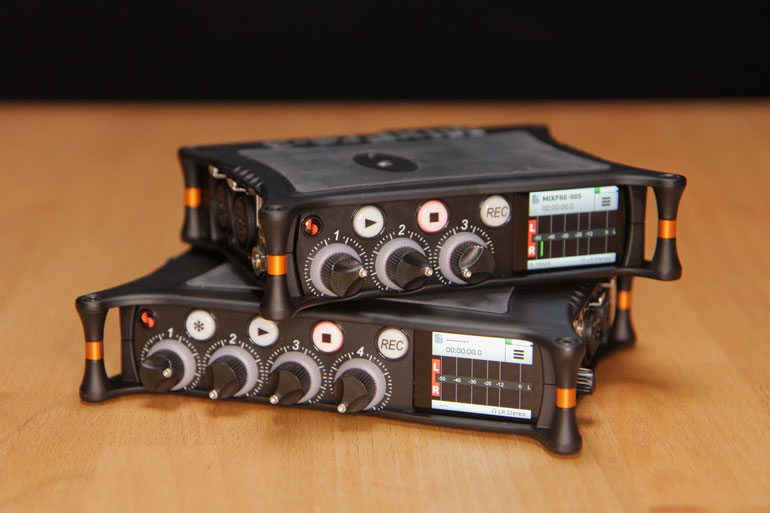
Sound Devices Mix-Pre 3 and Mix-Pre 6
In some ways, we’re always excited about new and innovative technology in the videography world. In other ways, we constantly yearn for simplicity, for something that just gets the job done, and doesn’t steal any more of our attention than necessary.
It turns out, simplicity in gear design can be the hardest thing to achieve. Everything has to be well thought out in terms of user experience, sometimes features have to be left behind in the name of better design, and often the overall cost tends to be higher than the competition.
But at its core, simplicity means the piece of gear just has to work. Without frustration. Sometimes it takes a long time to get there. But once there, you can end up owning and using that piece of filmmaking equipment for the rest of your career.
So at last, we’ve arrived at a piece of gear that fits this description. A simple audio solution for video production interviews.
Interview audio? Is that still an issue?
Believe it or not, yes, for the majority of videographers it’s still a constant battle. Even for us, having interviewed 300-400 people the last few years alone, quality interview audio is never a given.
The Sound Devices MixPre-3 and MixPre-6 are made for people like you and us - news, documentary, event, and corporate video producers who operate as a one man band or small crews without a dedicated audio crew. One of these mixer/recorders belongs in every gear bag.
Don’t get us wrong - the MixPre's can and will be used by audio professionals, as backup systems to more advanced mixers and recorders, or as affordable gear for up and coming audio people who are building out their gear.
But Sound Devices is a smart company who realizes there is a huge niche of videographers who are not audio experts, but need a good solution for dependable audio outside of the direct-to-camera approach. In fact, they’ve invested a whole area of their company to video, called Video Devices. So it makes sense that they get our people.
The question is, why has it taken so long to get here?
TL;DR: The Sound Devices MixPre-3 or MixPre-6 should be in every documentary, news, or corporate filmmaker's kit.
Audio Recording Before DSLRs
Before DSLRs, interview audio was typically recorded in one of two ways. In documentary and ENG news environments, camera operators would often move their cameras close to the subject and let the on-camera microphone pickup the audio.
Although it’s not always the most ideal way to interview a subject, for practical reasons, it works. An on-camera shotgun mic placed a few feet away from a subject will do an adequate job.
More advanced shooters would find ways to get their shotgun mic closer to the subject, either by holding it out with their free hand, or placing it on a stand, or by giving the mic to a reporter, producer, director, etc. That, or they would attach a wired or wireless lav to a subject, often in a visible place not hidden underneath clothing.

The thing to remember is these were video days, where the “look” of local news and broadcast documentaries was not a huge priority, and so the audio just needed to be relatively good.
If there was audible room humming, street noise, nearby music, or any other annoyance, it wasn’t a major concern because the priority was capturing real, authentic video stories, and the reality of the environment was allowed to show through.
More upscale documentaries and corporate or branded content might have been shot on film, or at the very least would feature a crew, and a dedicated audio professional would be on set. They would bring the mics, mixers, recorders, and audio accessories to get the job done.
So for the most part, you would see either an audio professional capture audio at a quality that matched the high level of production, or you would see a solo camera operator record audio direct to camera using a handheld mic or one attached to the top of the camera.
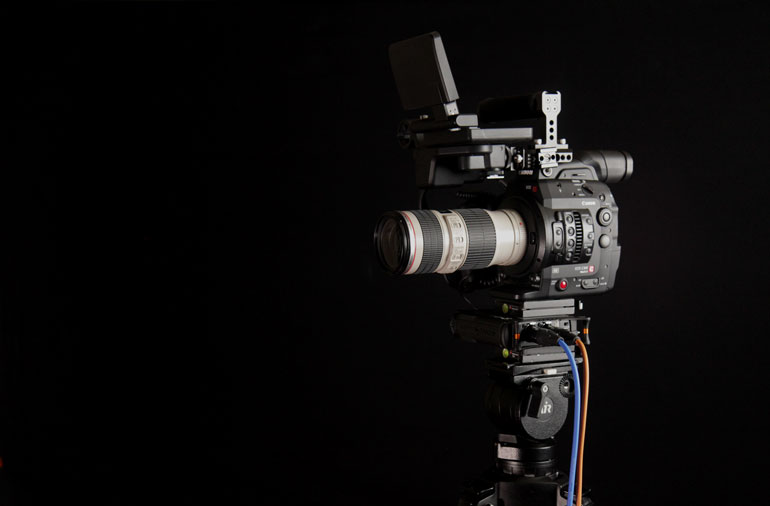
When DSLRs hit the scene, however, suddenly "dual system sound" became a household term. Primarily because the early DSLRs were photo cameras and did not have audio components like pro mic inputs or even headphone monitoring.
But even as DSLRs and cinema cameras began to develop the same kind of on-camera XLR inputs that camcorders and ENG cameras have long featured, the DSRL ethos or ambition for cinematic imagery - even in news and documentary settings - continued to promote the use of professional audio capture through dedicated preamps, mixers, and/or recorders.
Except there was no longer an expectation to have a dedicated audio professional on the crew.
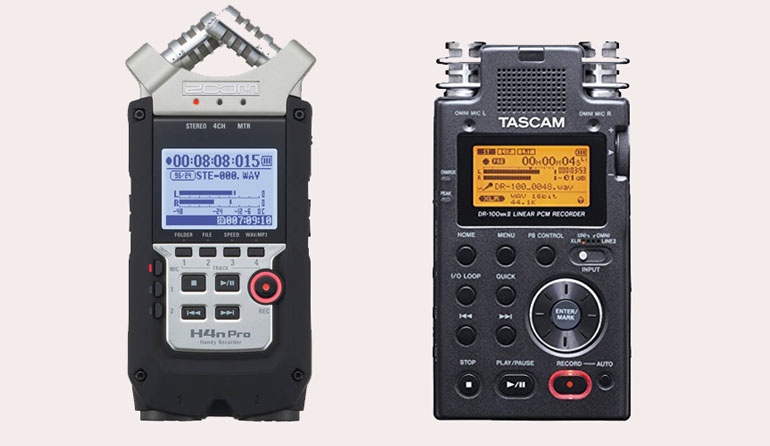
And so, the portable mixer/recorder/mic industry birthed a couple darlings that became the de-facto standard for DSLR shooters. The Zoom H4N and the Tascam DR100.
Zoom H4N and Tascam Dr100 recorders
If you’ve been around in video long enough, chances are you owned (or still own) one of these two pocket recorders. The H4N specifically has taken on legend status in the DSLR filmmaking community.
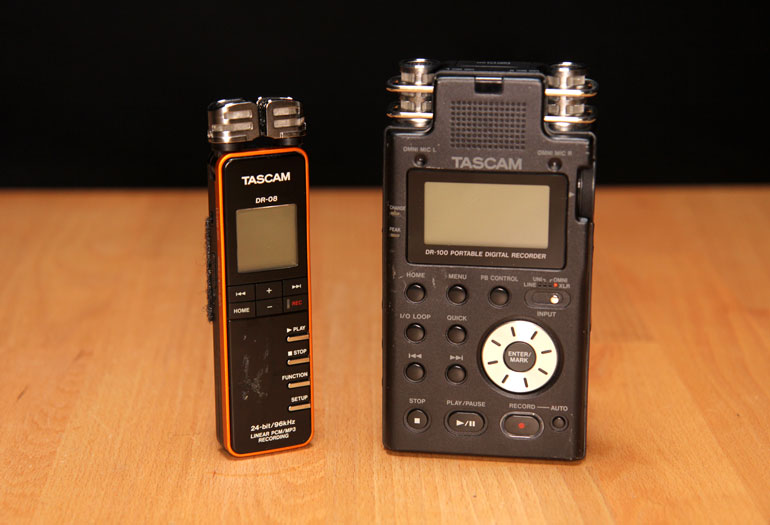
There were also smaller and more lightweight models from Zoom and Tascam - recorders that actually fit in a pocket. The Zoom H1 Handy Recorder was immensely popular because it could also serve as an on-camera microphone, in addition to a pocket lav mic recorder.
At the radio/TV station where we worked, we had the Zoom H2n for audio stories - maybe because it wasn’t as absurd looking as the H1 for professional radio use? - and we had a few Tascam DR-08 and DR-100 recorders for video.
The issue with the little recorders is they were never dependable. When you mic a subject with a lav connected to a Tascam DR-08, for example, you can’t monitor the audio, and inevitably there would be rustling or other problems. For us, the mics would simply come unattached from the recorder during a production, and that was that.
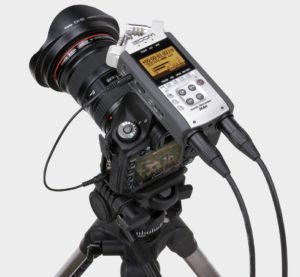
The Zoom H4n and Tascam DR-100, however, were different because they had XLR inputs with phantom power.
Finally, professional audio interfaces for DSLR video productions.
There were shortcomings, of course, like the XLR inputs weren’t locking, the channel gain had to be adjusted in the menu (on the H4N), they were a little tricky to mount to a camera, and they also had those unnecesary built-in microphones that video people rarely used.
But most of all, it’s the battery life that killed the H4N and DR-100 for us. Still does, too. We keep taking the DR-100 out for jobs and 9 times out of 10 the batteries run out at an an inconvenient time.
Like when we setup the recorder at a DJ booth at an event, maybe an hour or two before the start of the occasion, just to be safe. And then after the event we go to check on the Tascam and find that the battery ran out minutes before the start of the event. That has happened several times.
So when it came to using these recorders for interviews, we opted instead to run audio directly into our DSLR and cinema cameras - at a loss in quality for sure, but at least we could depend on that setup not running out of batteries in the middle of the interview.
Zoom and Tascam target filmmaking equipment
Since the era of the Zoom H4n and Tascam Dr-100, both companies have released numerous new products aimed squarely at videographers. Zoom came out with the H5 Handy Recorder, which now had detachable and interchangeable top microphones, and then the Zoom H6 following that.
The Zoom H6 Handy Recorder is actually a decent solution to the video interview. It has physical pots - or knobs - for gain control, there is an easy to read color display for metering, 4 XLR channels, and those interchangeable top mics that you can now leave at home.
But most video producers skipped the Handy Recorder line entirely once Zoom started to release prosumer Preamp / Mixer / Recorders. The Zoom F4 and its bigger brother the Zoom F8 are forces to be reckoned with. We’ll take the F4 for example.
Not only is it fully capable of mixing in with a typical camera setup, the F4 has features in it that satisfy up and coming audio professionals who are using it full time on daylong productions. And it’s priced right.
The main problems with the Zoom F4 are what you would expect from an insanely popular company making consumer or prosumer products aimed at pleasing everybody.
The placement of hardware and software settings are frustrating at times. And as a product that’s made for both camera operators and audio professionals, it misses the mark for both, not fitting perfectly in a camera environment or in an audio mixing bag.
Tascam Recorders
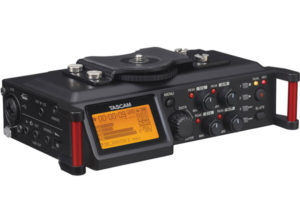
In some ways, Tascam has been even more aggressive at targeting the video crowd. When the Tascam DR-60D came out, we bought a few and recommended it to every producer we knew. It was like the DR-100 except it was meant to actually fit under a camera.
In use, however, it was actually quite frustrating to fit a couple quick release plates on top and bottom, and there were annoying menu settings that foiled a few producers.
One time, we went out to record an audio-only interview and could not figure out why the 60D would stop recording after a few seconds of every take. Back at the station, it turns out someone had unknowingly turned on “Auto Record’ somewhere deep in the menu, which had the absolutely unusable characteristic of stopping record anytime a subject would go silent for half a second. Like in between sentences.
But just like the previous Tascam recorders, our main gripe with the 60D was the battery life. Even if you put in a fresh pack before every interview, you couldn’t guarantee that it would last a whole hour. We went through a disgusting amount of AA batteries during the time we used the 60D.
Tascam did release a mark II of the DR-60D which fixed a lot of the complaints people had, and also supported external powering via USB.
But at that point, the 60D was considered dead to a lot of videographers, and no amount of discounting would change that opinion. Also the 70D came out.
The Tascam 70D was finally everything everybody wanted, and it was cheap! It was built in a shape that actually fit under a camera. The 60D was boxy and made any camera incredibly forward-heavy with an interview lens. The 70D was thinner, wider, and had better read outs and gain adustment knobs.
More importantly, the DR-70D was built with cameras in mind, with the right placement of the camera mount on top, and you could actually reach the tightening knob even with a quick release plate or a camera mounted on top of it. Really, it did a decent job for many people.
But still the battery issue prevented serious use. And Tascam has a way of missing the mark on other user experience issues along the way. Like Zoom, they’re trying to please a huge swath of people, while keeping a product cheap and profit margins high. That doesn’t leave a lot of room for design priority.
As an aside, Tascam did update the 70D a year ago and called it the DR-701D, becoming their “flagship audio recorder for single-shooter video production.” It’s worth checking out, but it still doesn’t fix our main gripe, which is powering the thing outside of AA batteries, an AC adapter, or an external USB battery.
Sound Devices
It’s not that Sound Devices hasn’t had any professional alternatives to the Zoom and Tascam prosumer recorders during this time. On the contrary, Sound Devices has had a series of mixers that were a little too professional for our crowd. Which is ironic because when Sound Devices originated, they produced gear that was intended as affordable alternatives to the industry standards.
But nonetheless, Sound Devices quickly became the industry standard. For a few years now, if you asked a field audio producer what they recommended for a small video crew to use as an audio mixer, they would point you to the Sound Devices 302 3-Channel Compact Field Production Mixer, or the Sound Devices 633 6-Input Field Production Mixer. You could maybe even afford it if you found a used copy on ebay.
These portable mixers were certainly an investment, but the argument is they are dependable, will last many years of daily use, and if you’re going to spend a few thousand dollars on a camera (maybe every couple years even), why not invest in a proper audio mixer for your paid video production jobs?
Well, because many videographers weren’t sure if they needed something so sophisticated for simple interview audio, where going direct to camera worked decently most of the time anyway.
So Sound Devices came out with the MixPre-D, a compact field mixer under that had it all, but cost less than a grand. It even had a mic level output that was marketed as a perfect connection to DSLR inputs.
But the ongoing problem with these field mixers is they didn’t have record functions. And practically every Tascam and Zoom model did. Even some on-camera shotgun mics began offering record functions, as a way to avoid going through the clunky audio interface that many DSLRs and mirrorless cameras still suffered from.
And if videographers weren't expecting record functions in their mixers anyway, then why not build simple preamps for the camera crowd?
In fact, there were a couple companies who marketed preamp/mixers specifically for DSLRs and small cameras. How many of you have owned a Beachtek or Juicedlink camera preamp? We have, and every one we know has had one. They’re only a couple hundred dollars and they get the job done, without extra bells and whistles.
So at this point, it’s been a few years since anything exciting has come our way in the form of audio mixing/recording solutions for documentary, news, and corporate videographers. We’ve all continued to use some form of Zoom, Tascam, or a Juicedlink Riggy or Beachtek preamp. Some low-budget shooters have even adopted incredibly cheap Saramonic camera preamps.
The Interview
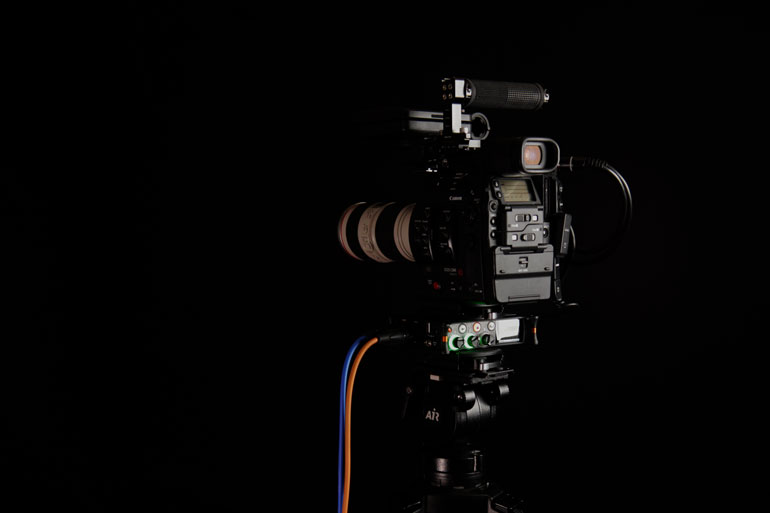
For us, we’ve just gone back to bringing our interview audio sources directly into the camera. Both the C100 and C300 have fairly good XLR inputs, and they’re simple to use. For every interview, we run a boom mic into Channel 1, and a lav mic into Channel 2. If we have multiple subjects, we add a camera (which provides 2 more audio inputs).
That’s been our go to solution for quite some time now, but we’re never satisfied with the preamps built into the Canon Cinema cameras. Not only are they difficult to reach for gain control during an interview (although the C200 sort of fixes that with rear-placed audio control), but the preamps just can’t deal with quiet talkers.
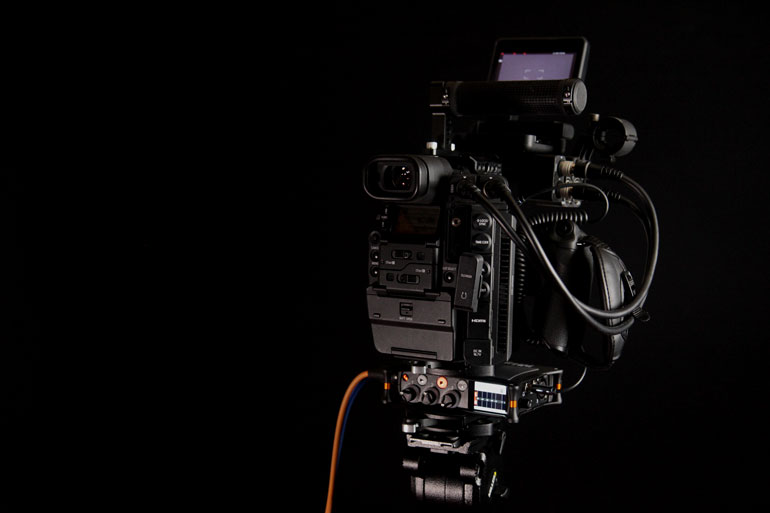
For a regular speaker, on the C100, C300, and their mark IIs, we’ve learned to sort of ignore the audio meters and run the audio hot. The meters are about 6DB conservative. If the audio meter says -12DB, our audio is going to be -18DB in post, and by the time we increase the gain to a decent level in post-production, the room and preamp noise will go out of control.
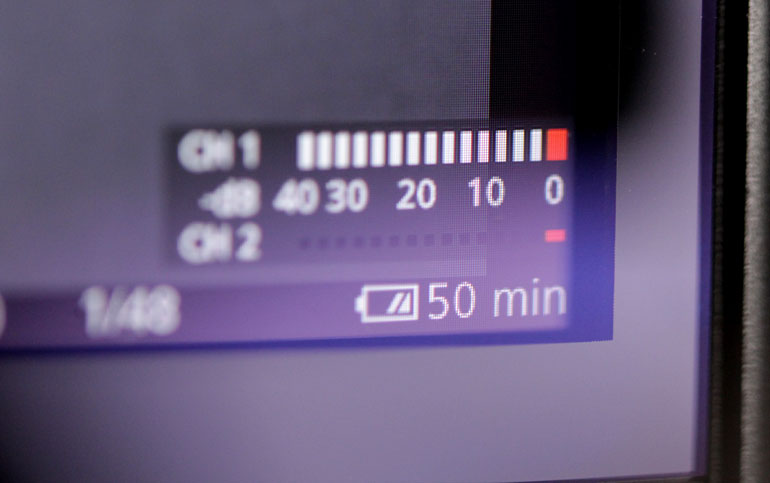
So we try to keep the audio level at -6DB on the screen, while letting the meter hit the red square occasionally. That’s supposed to mean it’s clipping, but really we find that it hits -6DB or so, during louder moments of speech. Of course there’s no metering once the red square lights up, so it could be anywhere between -6DB and clipping.
The major problem is when our subject varies his or her tone from super quiet to medium loud. We end up with audio that is way too low and becomes incredibly noisy when increased in post, or we get clipping. The limiters aren’t that great and are quite noticable when you hear it.
It’s also very difficult to keep up with the constant changes in the subject’s varying levels, with the audio controls uncomfortably placed high above where we can’t see it. We conduct our interviews standing up, so the camera is typically at eye level for the subject, putting the audio controls on the C100/C300 above where we can't see it.
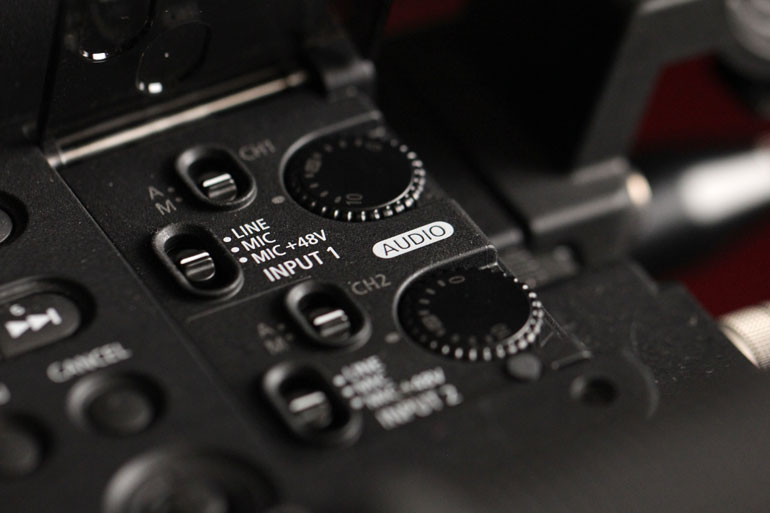
And so by default we set the levels to a conservative value where we don’t have to monkey with it throughout the interview. And for quiet speakers who vary their speech levels, we simply have to deal with noisy tracks in post. And by deal we mean use noise removal software like Izotope RX-6, which has a specific dialogue noise removal tool that works pretty well.
But it’s nonetheless frustrating to have to use software noise removal tools, forcing our interview audio to sound distorted, in everyday interview situations where we have complete control of the room noise, multiple mic sources, and a crew of two or more. We shouldn’t have bad interview audio ever.
And additionally, we should have secondary record sources in addition to what the camera provides, because even if we switch SD/Cfast cards before an interview, an entire job is lost if the camera’s media card gets corrupted (which happens uncomfortably often with Cfast 2.0 cards, actually). We can’t make a documentary or corporate video without an interview - that’s what drives the audio story.
Whereas if we have the interview audio recorded to a separate source, we can still cut a video together with the uncorrupted B-roll, and either no talking head shots at all, or a proxy-generated interview talking head shot that’s only visible for a few seconds at a time. It’s a just-in-case scenario, but it’s better than losing a job altogether.
the MixPre-3 and MixPre-6
Sound Devices announced the MixPre-3 and MixPre-6 right before NAB, and whereas the webosphere got a little excited, many people were still keeping their hopes up for more out-of-this world innovation and products to be announced by other manufacturers.
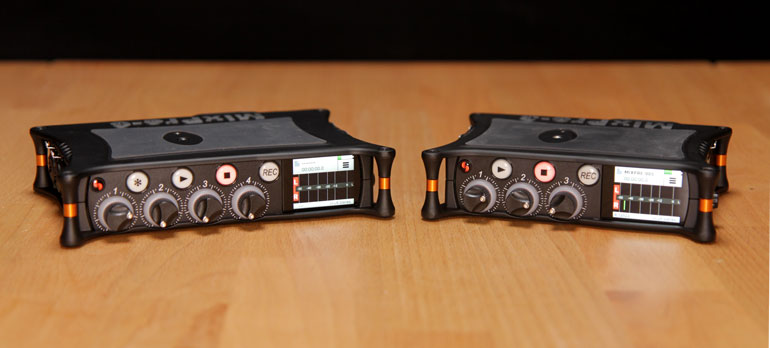
Well, we went to NAB, and here’s what everyone was talking about: a new tripod head from Manfrotto, an everyday camera monitor from SmallHD, and most of all, the new Sound Devices MixPre’s. Yes, this is the show where everyone realized what the start of this article proposed, that ultimately the most exciting gear is the brilliantly designed simple pieces of filmmaking equipment that just works.
At the time, Sound Devices couldn’t even keep up with the demands for review or demo copies from reviewers like ourselves. Everyone wanted to try it out, because the best way to experience a Sound Devices product is with your hands, not with a spec sheet.
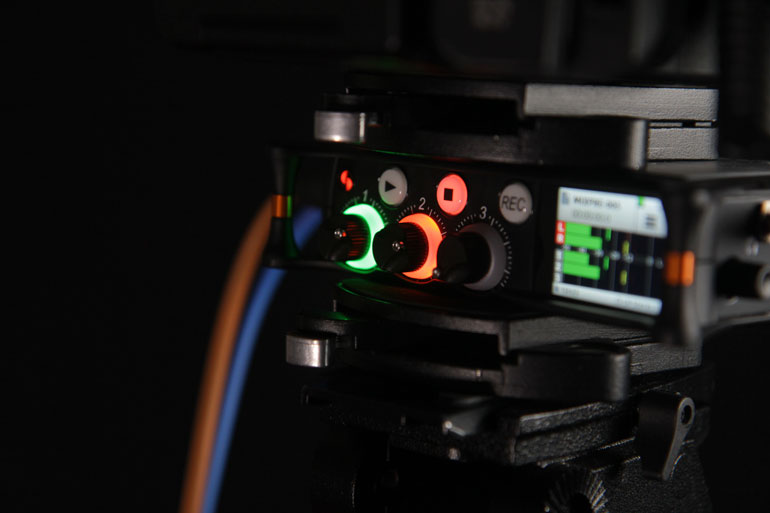
Recently our friends at B&H Photo/Video loaned us the MixPre-3 and MixPre-6 for this review, and it’s been a pleasure using these units in real productions.
There are already plenty of reviews out there that outline the MixPre specs, so we’ll just focus on a few things that really impress us. First up, the powering options.
Powering with Rechargeable AA Batteries
This is the one component that has ruined Zoom and Tascam mixer/recorders for us in the past. If you can’t get through one interview without changing batteries, then you can’t depend on it in an everyday video production environment.
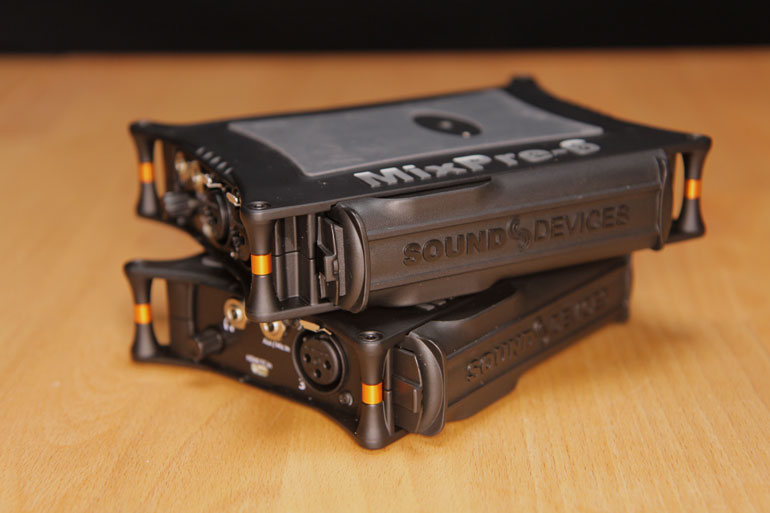
Luckily Sound Devices knows this already and offers a few different ways to power the MixPre’s. The included 4 AA battery sled is super easy to use and access for quick battery changes. If you use standard Eneloop rechargeable AA batteries with one phantom powered microphone, you can get about 2 hours of record time, less if you’re powering two mics. But still usable for a long interview with a boom and a lav. Plus, you can turn down the brightness of the LCD screen to conserve battery power.
Sound Devices sells separate AA battery sleds, so you can have replacement sleds ready with batteries in them already for quick changes. And if you’re going that route, you should probably just get the Sound Devices MX-8AA, which holds 8 AA batteries for both the MixPre-3 and MixPre-6.
Using Sony NP-F L-Series Batteries
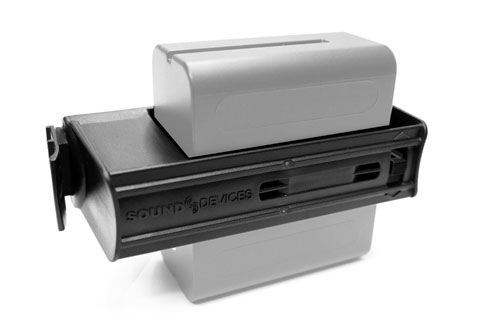
Alternatively, you can power the MixPre’s with Sony L-series type batteries that we all have dozens of. The Sound Devices MX-Lmount is quite affordable, and we believe it’s an essential accessory to the MixPre units. It can house two L-series (a.k.a. NP-F batteries) of any size, and they’re hot swappable, so you can continue recording even while you’re changing batteries.
The fact that you can use any size battery means you can pick the battery that you think is appropriate to the time you want to record. And of course, recharging Sony L or NP-F batteries are a breeze with our favorite Watson charger.
Again, this is a huge deal for us, and quite possibly the entire reason to get one of these MixPre’s. Finally we don’t have to worry about carrying dozens of AA batteries and chargers and trying to keep track of which ones are fresh.
Two decent sized L batteries will last many hours, enough for all the interviewing we can muster in a day’s work.
As a bonus, if you’re shooting with a V-mount or Anton Bauer camera brick, you can always use a Sony NP-F dummy battery with a D-tap terminal. Just another option.
USB Battery portable power
If you run out of Sony batteries or want an even different source of portable power, the MixPre’s can also be run by USB batteries. Both the MixPre-3 and MixPre-6 come with a Y-cable that has two USB-A connections on one end - one for running into a computer, and the other for power (don’t worry they’re labeled), and the other end is a USB-C connection that goes into the MixPre.
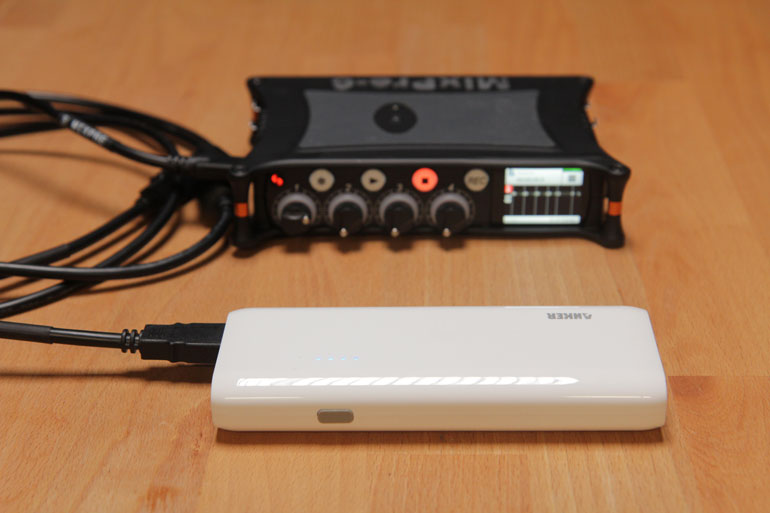
The reason for the mondo USB connection is because the MixPre requires over 7v to power fully, which you can do with a third party USB brick like this. We also tried the included cable with an older USB battery and it still works even with 5V of juice, but the MixPre will only run in “power saving mode,” which means it can only run phantom power to 2 inputs.
Two phantom power inputs is enough for us for most occasions, so we’re quite happy about the USB power option even without investing in a new cable or battery. The only thing about USB power is you’ll need to find a way to attach or hang the USB battery, since there’s no custom battery sled that Sound Devices makes for USB batteries.
Computer Inputs and Smartphone Control
One of the nice bonuses about investing in either the MixPre-3 or the MixPre-6 is it’s future proof with the USB-C connection. You can be confident that for years to come, your MixPre will serve you for just about any computer mixing and recording needs, whether you’re capturing voice overs, recording a podcast, or creating your own music beds with real instruments.
Another situation you may run into is recording a live stream - for Facebook, Youtube, etc. It’s something that’s becoming more and more the norm for working videographers. The MixPre’s work as a USB audio interface in addition to its function as a recorder, so you can mix various channels into the computer while also recording separately into the MixPre itself.
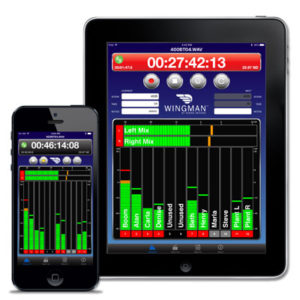
The “Wingman” bluetooth app is also a nice way to control the MixPre’s remotely.
We can see that being useful for a two-person crew, where the MixPre sits under the camera, and while the camera operator is busy interviewing and running the camera, another crew person can be monitoring the audio and taking controls.
This would be a just in case scenario to assist the camera operator. But it’s another confidence booster that makes interview recording a lot less stressful, knowing that multiple people can monitor and control the audio.
The Preamp and Limiter
Outside of the power and UX features, probably the main reason why a videographer would choose a MixPre over a Zoom or Tascam is because Sound Devices has a better preamp and limiter than anything else in its class.
The preamps, which Sound Devices calls “Kashmir,” offer cleaner records with low noise floor, perfect for those times when the subject is a quiet talker with occasional bursts of loud speech.
That’s when you end up capturing a track with a conservative approach to the gain level, and you end up having to boost much of the audio in post. The difference in the noise floor between an in-camera preamp and the Kashmir preamp is alone worth the cost of the MixPre.
But the limiter is the number one reason you should stop what you’re doing and order a MixPre-3 or MixPre-6 right now.
Check out this video that shows you what a software limiter in a Zoom recorder does to audio that is clipping. Literally, it just reduces the volume of anything above 0db, which doesn’t prevent the audio from sounding completely destroyed. It’s like taking a bad audio clip that’s clipping, going into the EQ, and reducing the top end.
What the Sound Devices MixPre’s do is something quite different. They have hardware limiters, and as soon as the audio input goes near the 0db range, the unit reduces the input gain automatically to ensure that the audio doesn’t clip at all. The tester in this video is quite literally yelling into the mic and the MixPre adjusts accordingly and records a beautiful track.
It’s nothing short of amazing.
But what’s really remarkable is that it’s taken this long for videographers to finally have access to a working limiter in an audio mixer/recorder built for our market.
Basic and Advanced Modes
One of the ways in which Sound Devices has made the MixPre an even more attractive unit for videographers is by including a “Basic” mode, which sets the MixPre up to record a normal scenario without having to go through dozens of menu options. The advanced options are still there for pro audio people - or when you want to venture into more technical adjustments - but for most video people the Basic mode gets the job done.
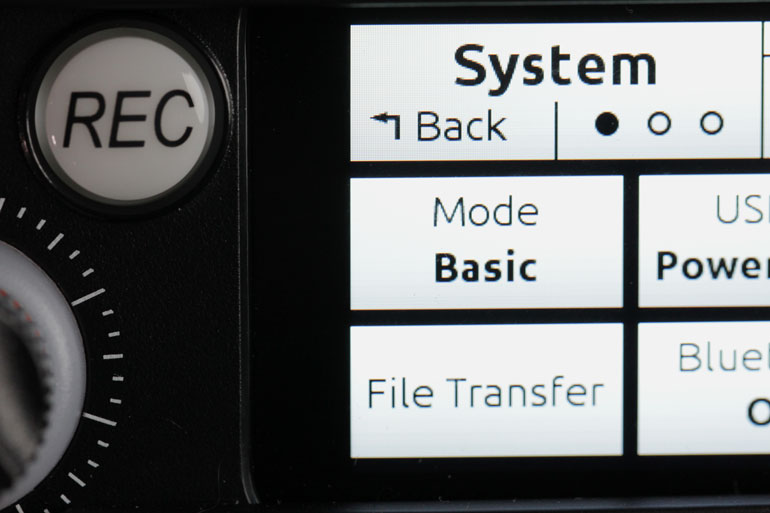
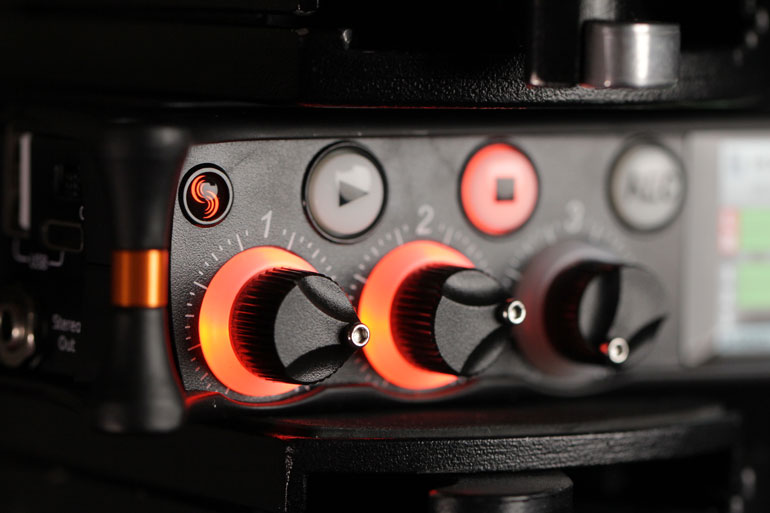
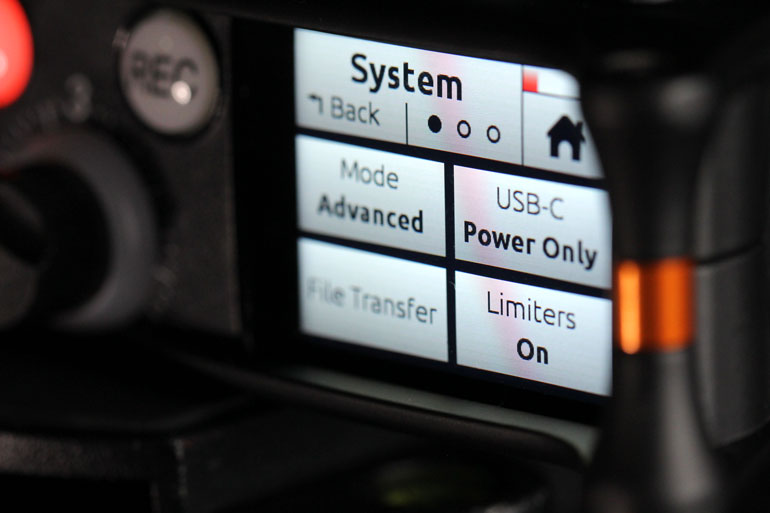
By default, however, the MixPre’s come setup in Advanced Mode, and that has foiled a few video people out there in the webosphere. That’s because in Advanced Mode, the pots are actually set as Fader knobs, rather than channel gain. What’s the difference? Here’s the run down.
Let’s say you’re recording two channels, a boom and a lav mic, both with phantom power. You would press in each channel knob, go into the gain, and then increase it until it sounds good. It takes a while pressing the Up button over and over again, but if you’re in the channel gain option you can simply use the physical headphone gain knob on the right of the unit, which turns into a channel gain control temporarily.
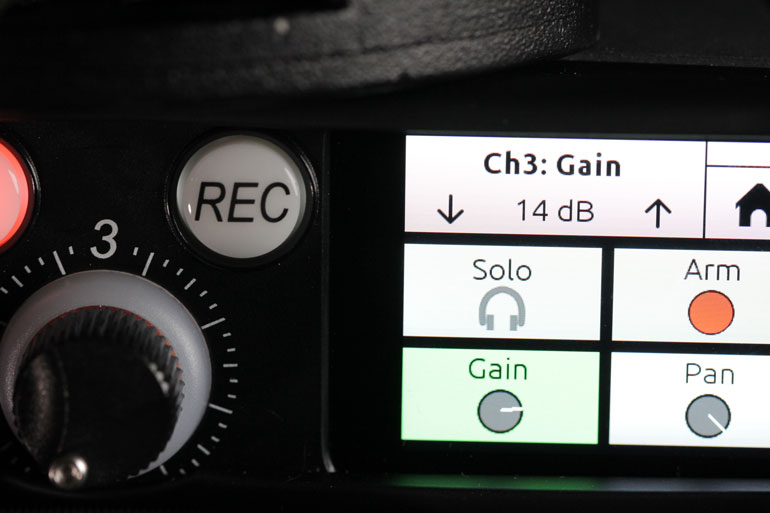
The kind of annoying part here is that you have to exit the menu to see the meter readout, and then go back into the gain control to make adjustments, exit back, and so on, until you can get the gain to where you want it. Essentially you want the mic gain at slightly less than the ideal record volume. (By the way, Sound Devices knows about this annoying flaw in the gain readout and will hopefuly fix it later).
Anyway, once you have the gain set, the knobs become fader controls, which increases or decreases the output levels for the final mix. Stay with us here.
So let’s say you have those two channels, and you want them both to be recording at their ideal recording levels, but you want the final mix to slightly favor the Boom mic. So you decrease the lav fader, and the stereo, headphone, and record output will reflect this decision to mix the boom at a higher fader level.
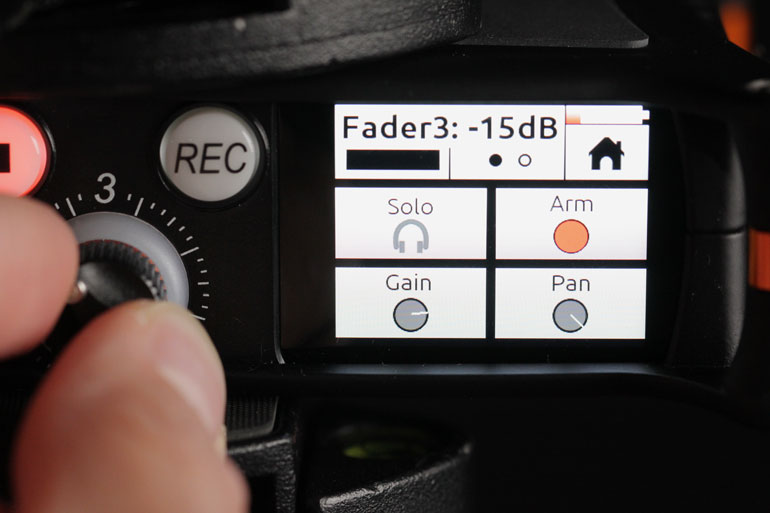
But as a bonus, the Sound Devices MixPre will also record the channels with just their original gain levels, before your fader adjustments. That way you’ll have all the channels recorded at their ideal recording level, even if at the moment you decide you want to mix the channels slightly differently.
Got it? We could see that being a useful tool for interviews, where we output a mixed signal to the camera, but record an untouched output directly into the Sound Devices SD card. Actually, you can choose if you want the stereo out to be pre-fade (so the channel knob has no effect), or post-fade, where the knobs control the levels going into your camera.
However, for all intents and purposes, we’ll stick to the Basic Mode. To make the switch, you go into the Menu, head over to the third dot, change System from Advanced to Basic, and now the knobs become standard gain control. Done.
monitoring the camera's audio recording
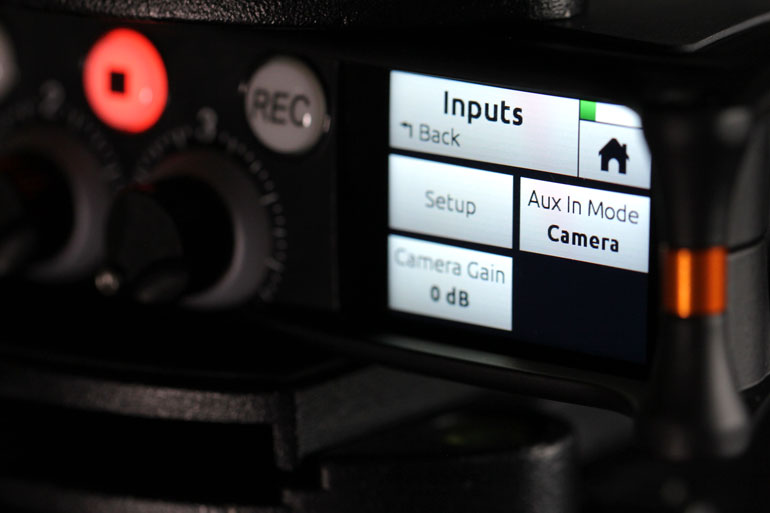
If you’re using the stereo output to go from the MixPre into your camera, you can go the extra mile and route a stereo cable from your camera’s headphone out, back into the MixPre’s aux-in.
That way you can monitor the camera’s audio recording to make sure it’s noise and distortion free. You can even select “Camera” in the MixPre menu, as the input for the aux-in.
Gain Levels From Audio Source to Sound Mixer to Camera
Now that you’re adding another source of gain control in between your mic and the camera, how do you keep it all in check so that each part of the path records at an optimal level?
For one, there is a tone feature in the MixPre, and if you set your MixPre and camera inputs so the tone reads about -20db, you’ll be relatively safe.
But here’s the process we use anytime we have multiple sources of input control along the path from mic to capture.
First, try to keep gain knobs and control settings around the middle of whatever their total settings. So on a camera that has 0-10 audio level adjustments, we try to keep it around 5. Do that with your wireless lav transmitter and receiver too, and now your preamp/mixer as well. Something is bound to be distorted if one of your pieces of gear is set at a super low gain, and another is set really high.
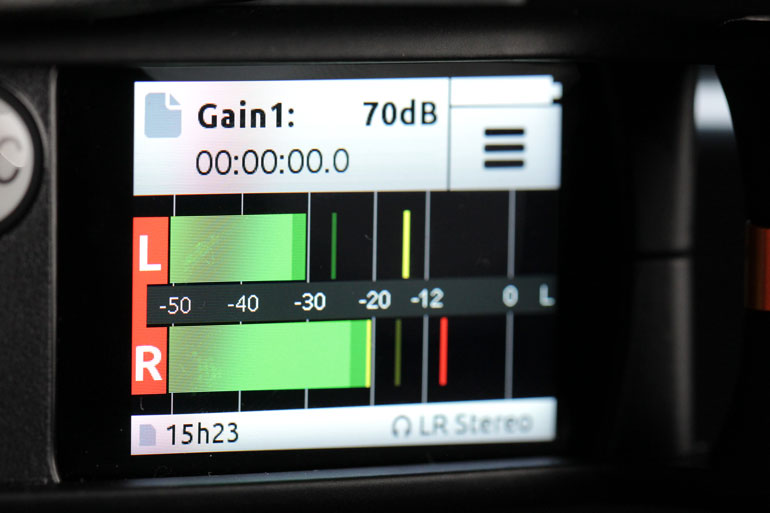
With the MixPre, we start by having the knobs all set to 0, or the silver button pointed up, in the middle of the dial. Then after turning it on and plugging in the mics, we adjust the gain until the average input reads -12db on the meter.
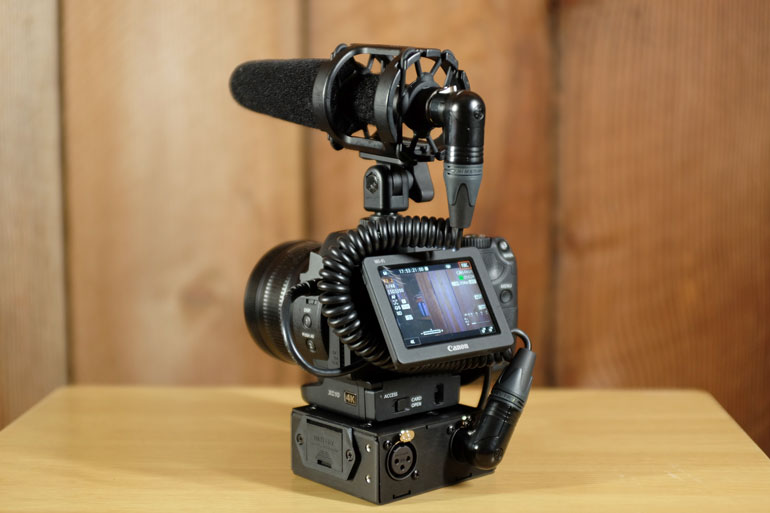
Next, we move on to routing the MixPre into our camera, in this case the Canon C300 mark II. You have a few different ways of doing this. First, you can use either the 3.5mm stereo output on the MixPre, or the headphone/line output. The disadvantage of the stereo output is there’s no output gain control, so you have to have a way to control the output level on the camera’s end.
If you’re going into the XLR input on your camera, where there’s an easy gain control, then you can probably get away with the stereo output on the MixPre. Keep in mind that if you have two or more mics plugged in, and you want to use the XLR inputs on your camera, you’ll need to get a Y-splitter so you can plug into both Channel 1 and Channel 2 on your camera.
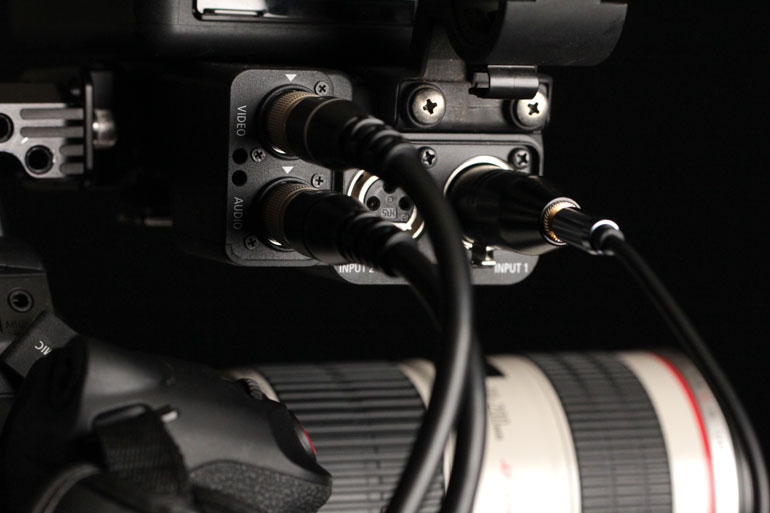
In addition, you’ll need to get a 3.5mm to XLR adapter, like the one Rode makes. Better yet, get a few of them, you’ll need them for all sorts of purposes.
Warning! Make sure that your camera’s phantom power is off before plugging in the cable from the MixPre (or any mixer) into your camera. There’s all sorts of discussions out there about people who have ruined their gear this way.
So there you have it, now you can adjust the gain on your camera’s audio controls so that they match the signal on the MixPre. Better yet, since the MixPre is recording onto its SD card, you could set your camera’s record to + or - 6db, giving you a safety track or something that aligns closer to your camera’s recording input (like we discussed earlier, with the Canon C100/C300 recording everything at about -6db than what it reads at).
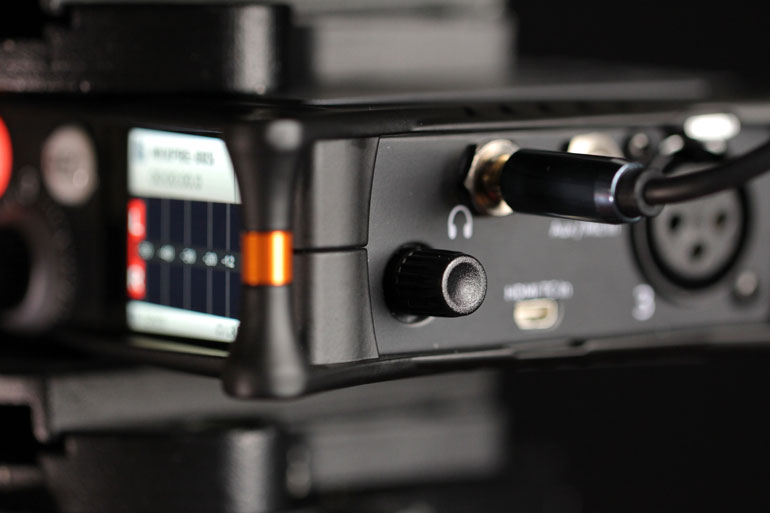
If your camera has a 3.5mm stereo input, you can skip the XLR adapters and go straight from the MixPre into the stereo jack on your camera. This is where we prefer using the headphone out, rather than stereo out, because you can control the levels better. On many cameras the internal mic record level settings are buried in the menu.
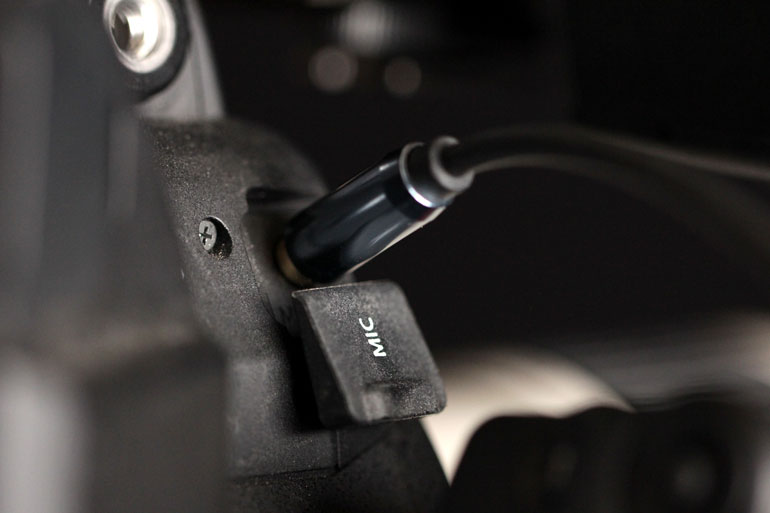
So after we set our mic gain level on the MixPre, we then set the headphone output gain to 50 (it goes from 0 to 100, so we pick the middle), and then we set the proper mic input level on our camera. On our C300 mkII, we do that by turning Mic Attenuation On, then setting the record level to 30.
XLR Outputs
This is one area where Sound Devices had to remove a feature in order to simplify the MixPre’s for the videographer market. The original MixPre’s didn’t have record functions, but they were proper mixers in that they had balanced XLR outputs. You could then use any audio recorder or take the individual preamp’d and mixed channels from the MixPre into your camera’s XLR inputs.
But hey, those features are still available on Sound Devices more professional mixers, some that cost 2-6x the cost of the MixPre-3, so we can accept the limitation. Plus, more outputs would mean an increase in size, and there are enough bulky mixers out there that are not properly designed to fit under a video camera.
Quick Release Plates
One area that Sound Devices gets right with the MixPre is the tripod mount - or in our case, the quick release mount. Tascam, Zoom, Juicedlink . . . they’re all imperfect when it comes to attaching under a camera, whether that’s with quick release plates or directly under the camera or onto a tripod. By the time you rotate the unit around the screw, tighten it, the unit is facing an entirely different direction then the back of the camera.
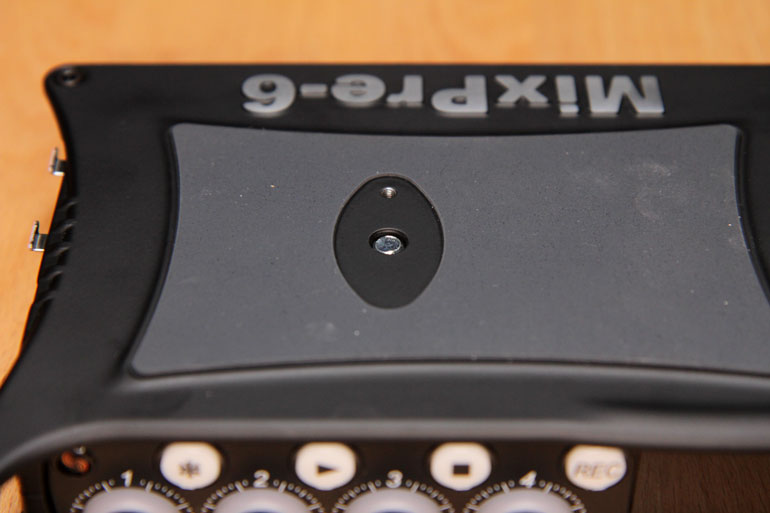
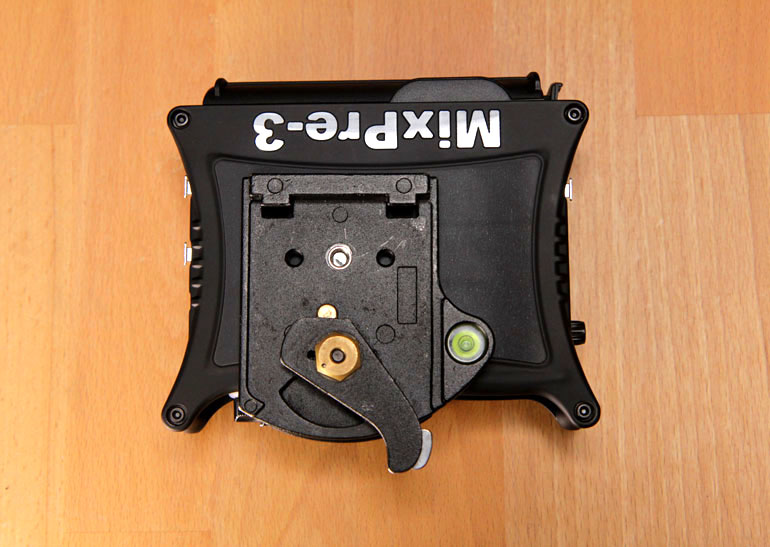
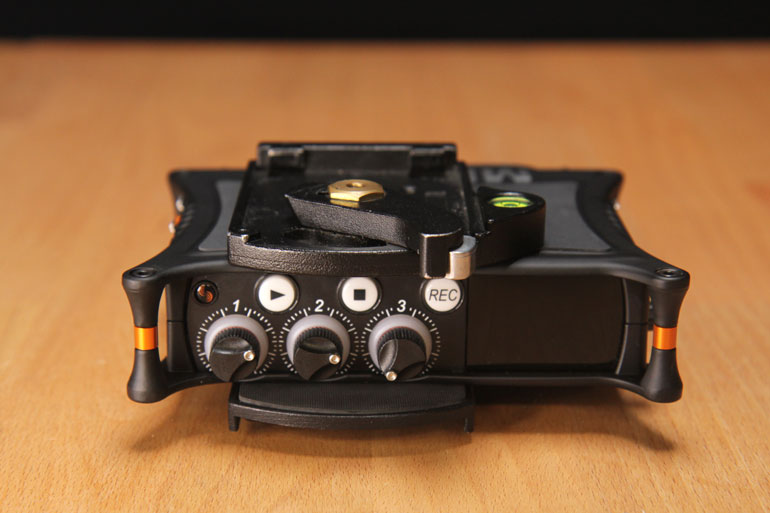
The MixPre’s come with a little hex key that can tighten the 1/4-20” thread from the other end of the MixPre, which means you can keep the unit facing the correct way while you secure the quick release plates.
Better yet, Sound Devices have built a little place for the hex key to stay inside the unit - near the SD card input, accessible when the battery sled is removed. It means you never have to look around for a hex key when you want to tighten or loosen a plate or camera from the MixPre.
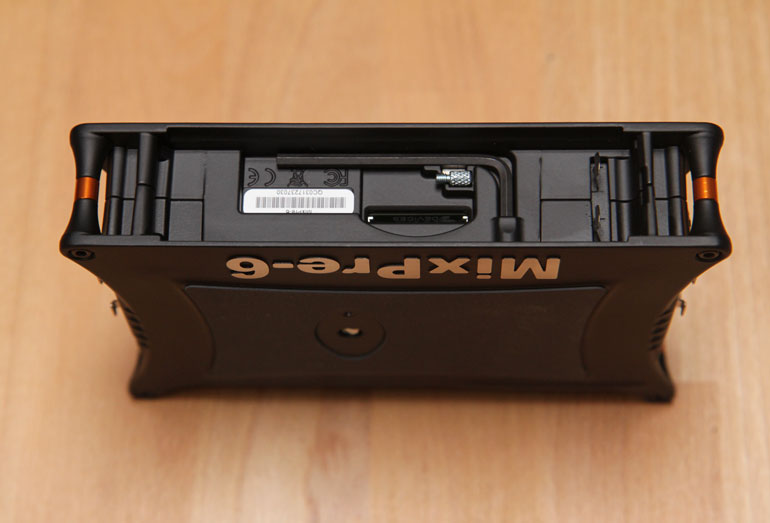
And as a bonus, the 1/4-20” screw is retractable. So if you want it, it’s there, if not, it hides conveniently below the surface, allowing the unit to sit flush on a table or in a bag next to other gear.
By the way, we use and recommend the Manfrotto 394 quick release plates for everything. We have probably a dozen of them and order a new one anytime we add a piece of equipment that will go on a tripod or beneath the camera.
HDMI Timecode
The MixPre’s have timecode. What more is there to say? If you need it, it’s there. We don’t use a mixer for anything other than interview audio, so we never have to bother with timecode. But it’s nice to know it’s there when we want to go full audio guy on a production.
More importantly, the HDMI input can receive record triggers from many cameras, making it one less thing to worry about when you’re setting up for an interview.
Auxillary Inputs
Both the MixPre-3 and MixPre-6 have a 3.5mm auxillary input in addition to their XLR inputs. So if you have a MixPre-3, you can run 3 XLR phantom powered mics, plus a dynamic non-powered, or a battery powered microphone into the 4th input. The MixPre screen gives you a nice layout of all the input levels, and you can choose which input is routed to which headphone side.
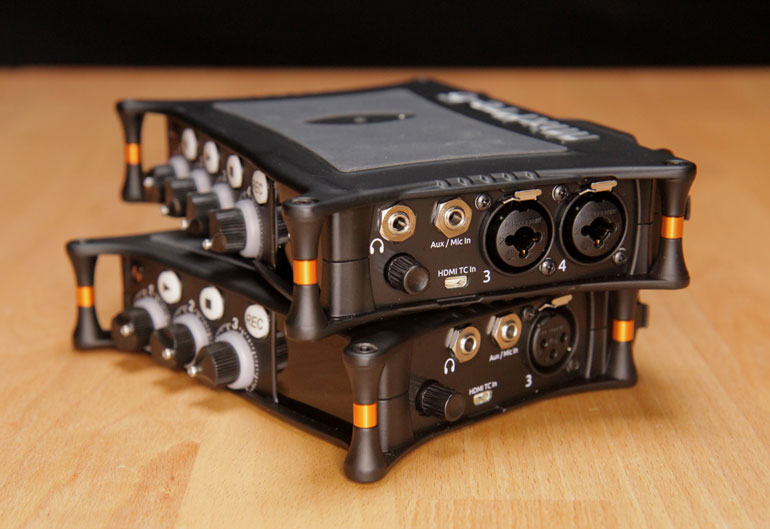
Recently we had a shoot where we needed to record 3 people talking into one camera. Luckily for us they spoke one at a time, so we didn’t need to worry about multitracking issues, but we still needed to mic everyone independently.
We connected two subjects with wired lavalieres - our favorite Sennheiser MKE2 mics, connected to a MZE 900P phantom power adapter - and since we ran out of wired lavs, we mic’d the third subject with a wireless Rodelink kit. Then for a 4th source, we held a boom over the subjects and pointed it to whoever was speaking.
If we had a MixPre at the time, this job would have been cake, and we could have used the MixPre-3 with its aux-input for the Rodelink. But what we did was run the two wired lavs into the C300 mkII, and the wireless lav and boom mic into a C100 next to it.
We didn’t need the video feed from the second camera because we were recording 4k on the C300 and were going to cut it on a 1080 timeline. But since we were using the C100 anyway, we set it to record closeups.
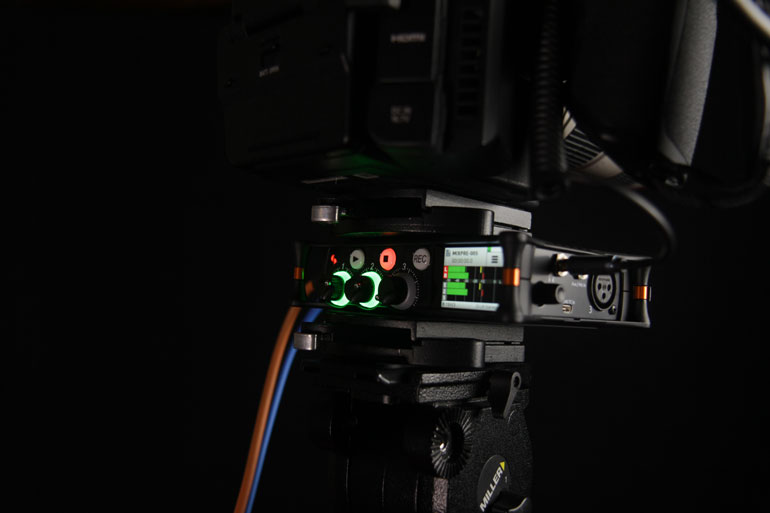
So there’s a situation where it would have been nice to have the MixPre-3 available. These kinds of jobs happen occasionally, where you have to shoot a little outside of your normal situation. Maybe it’s a multiple person interview, or a conference room discussion, or you have multiple subjects with wireless lavs and you need to leave them running all day, even if you’re only using one camera to point it at one subject at any given time.
There are lots of times like this, outside of interviews, where having a preamp/mixer/recorder is necessary as a working videographer. The question is, for those occasional atypical gigs, do you think it’s beneficial to have the MixPre-6 and its extra inputs, just in case?
MixPre-3 vs MixPre-6
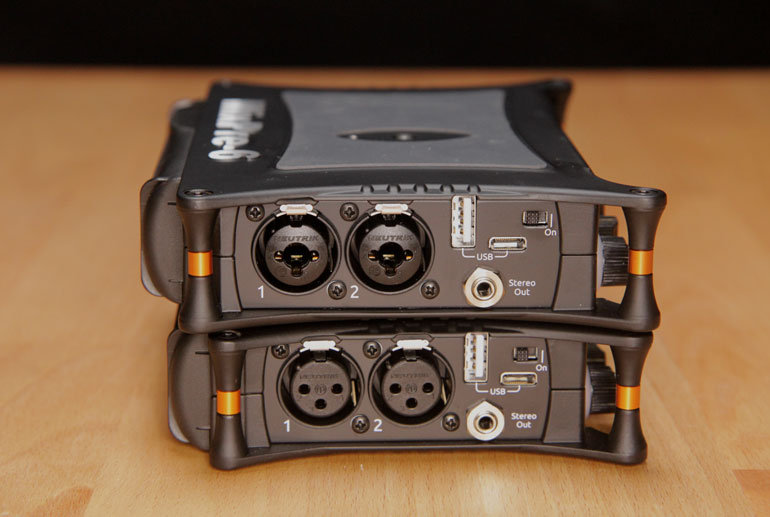
Here’s what the MixPre-6 offers over the MixPre-3. There are 4 locking XLR/TRS inputs. That means instead of using an XLR input, you can also plug any mic or instrument that has a phono or 1/4” jack - or anything that has a common 1/8” jack plus a 1/4” adapter.
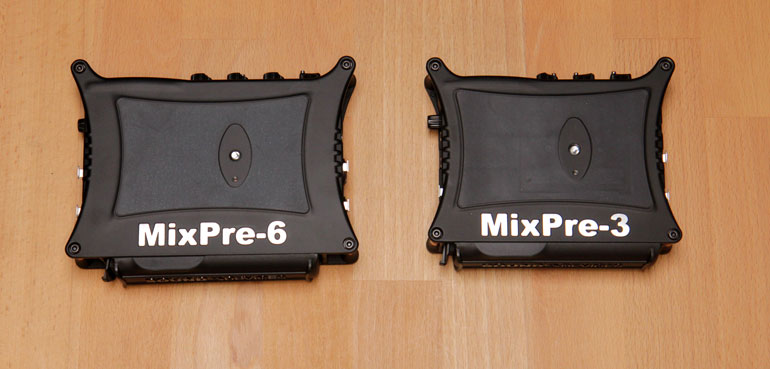
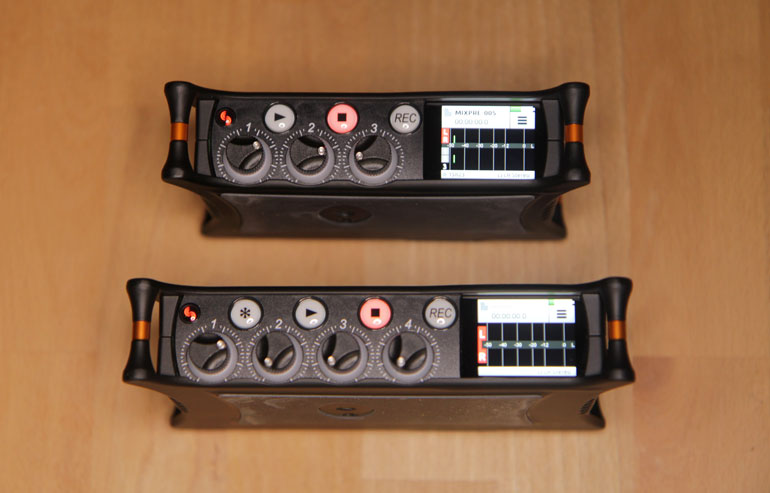
For example, if you have 4 subjects with wireless mic kits on them, you can plug all 4 receivers into the MixPre-6 with adapters. Of course, most wireless mic receivers have a 1/8” jack, so you can either use a 1/8”-1/4” adapter, or a 1/8” to XLR adapter (like this Rode one). So either way, you’re adapting.
But the MixPre-6 has an additional 1/8” - aka 3.5mm - auxillary stereo input, just like the MixPre-3 does, so there’s another wireless mic receiver you can connect.
In addition to the extra inputs, the MixPre-6 has a few extra bells and whistles in the advanced menu that should be interesting to pro audio people. But for typical videography use, the main difference between them is deciding how many inputs you may need.
Could you envision yourself on a job where you may need all of the MixPre-6’s inputs? It’s really not that much bigger than the MixPre-3, so it’s not like you have to carry around a much bigger unit. If you think it could happen, then the MixPre-6 is a solid investment.
However if you’re only using it for interviews, and the most you’ll ever need is 4 inputs (potentially 5 actually since the Aux-In is a stereo input), then the MixPre-3 is a screaming deal.
Like we said in the beginning, one of these should be in every video producer’s bag. We ended up buying the MixPre-3, by the way.
Sound Devices MixPre-3 - B&H Photo / Amazon
Sound Devices MixPre-6 - B&H Photo / Amazon
