Rode Wireless GO: Review and Lav Mic Comparison
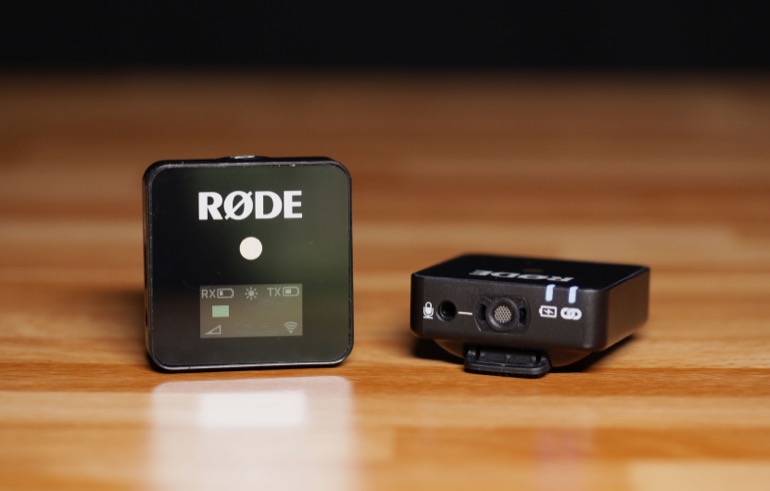
In the words of reviewer “Ted” at B&H Photo’s product page, the Rode Wireless GO is a “triumph of miniaturization.” We agree, it’s definitely the smallest, lightest, most portable wireless mic system out there.
Although it’s turning out to be an exciting year for filmmaking gear, we’re starting to think the Rode Wireless GO might end up being the most memorable product of the year. It’ll certainly top everyone’s year-end wish list (if you haven’t already bought one), and looking back, you may wonder how you lived without it.
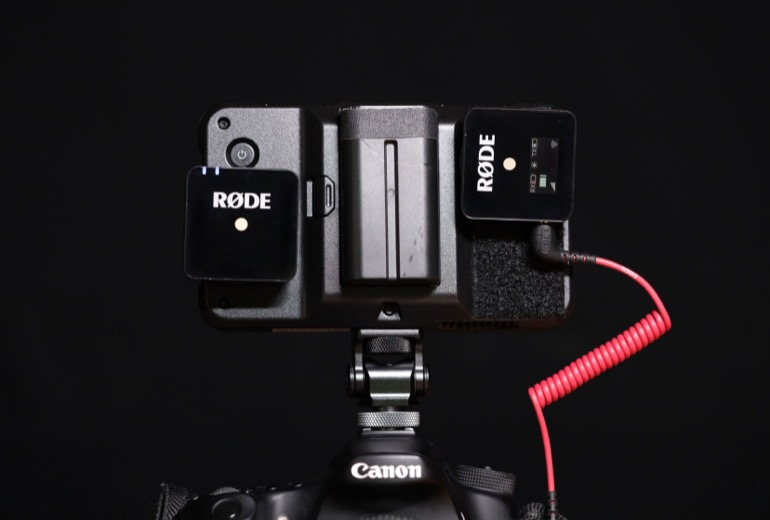
We believe it’s one of those essential pieces of filmmaking kit that never leaves your bag. In fact for us, we have it semi permanently affixed to our camera or Atomos Shinobi monitor, so that it’s always available, anytime we’d like to capture audio on a shoot. Which is often, right?
But don’t ditch your RODELink or preferred wireless lav kit just yet.
Rode Wireless GO vs other Wireless and Wired Lav Mics
Before we go through all of the features of the Wireless GO, as well as our opinions on its pros and cons, we wanted to do a little test to listen to the Wireless GO versus other mics we had with us. Put on a pair of headphones and give it a listen.
In the video, we compare the sound of a Rode Wireless GO with its built-in mic, a RODELink wireless system with the default lav mic, a Countryman B3, Instamic, Sennheiser ME2, and a Sennheiser MKE2 Gold. We spread the channels out into a Sound Devices MixPre-3, a Tascam DR-08, a Roland R-07, and the Instamic records to itself.
There’s a lot of variables with this many moving parts, so we expected something to go awry. Luckilly most things worked as expected, except our MKE2, plugged into the MixPre-3 using a Sennheiser MZA 900 P.
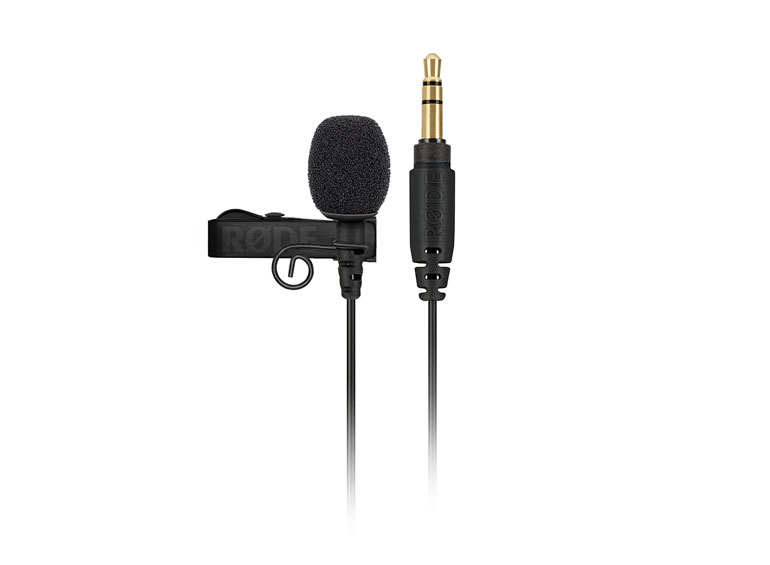
Sennheiser MKE2 Gold plugged into the Rode Wireless GO
This is actually our go-to high end lav system, but in this recording there was some kind of RF buzzing or ground loop interference. Unfortunately we didn’t have enough time to troubleshoot the issue and just had to move on with the video, assuming that our readers are familiar with the MKE2 and know that it’s a pro-level mic whose sound quality is not under question.
Also, the demonstration of the Rode VideoMic Pro+ at the end is not meant to illustrate how it sounds at all. Here, it’s sitting on the Canon EOS R about 6-7 feet away from the subject, and that’s simply too far for a dialogue recording with a shotgun microphone.
So instead of using an on-camera shotgun for any kind of shoot where a subject is more than a couple feet from the camera, this is the beauty of the Rode Wireless Go. Just clip it onto your subject, and you’ve instantly got a huge improvement over any on-camera microphone. Without needing to hide or neatly arrange a lav mic, or deal with wires and adapters or a mixer.
Rode Wireless GO vs RODELink Filmmaker Kit
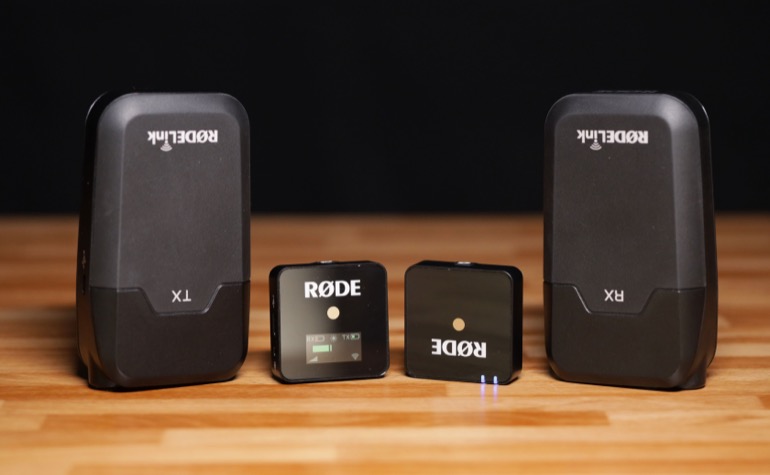
As a wireless transmitter and receiver for a lav mic, it’s hard not to compare the Rode Wireless Go to the RODELink Filmmaker Kit, which came out a few years ago and has been a popular alternative to the standard radio transmitters.
The Wireless GO uses a new secure Series III 2.4 GHz transmission, at a range of up to 230 feet. The RODELink uses a Series II transmission, but goes up to 330 feet. Many of us were at first concerned that the 2.4 GHz system would run into interferences in a WiFi crowded environment, but thankfully that’s not been the case. In fact our RODELink has been more reliable than the previous wireless system we were using, the Sennheiser Evolution G3.
The main advantage of Rode's 2.4 GHz system is that it automatically connects, and continually scans and shifts channels to maintain the best signal. You don’t have to do anything to find a signal, but you do have to ensure line of sight and that you don’t get too far from the transmitter.
Of course the biggest difference between the Rode Wireless GO and the RODELink is size. The difference is incredible. Both the GO transmitter and receiver are each 1.7 x 1.7 x 0.7 inches, and weigh just one ounce. You no longer have to worry about hiding the transmitter on a subject’s body somewhere. It will be invisible, whether you place it in a pocket, or gaff tape it to the inside of a shirt.
Rode Wireless GO Audio Levels and Gain
Most wireless mic kits have gain adjujstment on both the transmitter and the receiver, so you can setup your gain staging according to the particular shoot, before the signal goes into your mixer or camera.
In some cases, that means sending a low level signal to a mixer with a really good preamp. Or if your subject’s volume may dramatically shift while you’re far away, you may want to run the transmitter hot, so you can reduce the levels as needed on your receiver side, but still have a decent level to work with if the subject turns quiet.
That’s the case with the RODELink, which has 0, -6db, and -12db pads on both the transmitter and the receiver. For cinema camera shooters where you have a decent preamp on your camera, you may not end up changing these levels often. But if you’re shooting on a DSLR or mirrorless camera, you want to use as little of the camera’s preamp as possible.
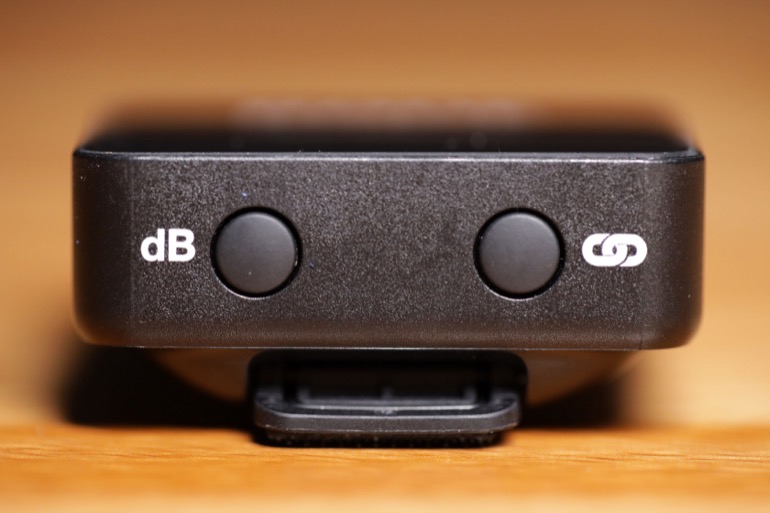
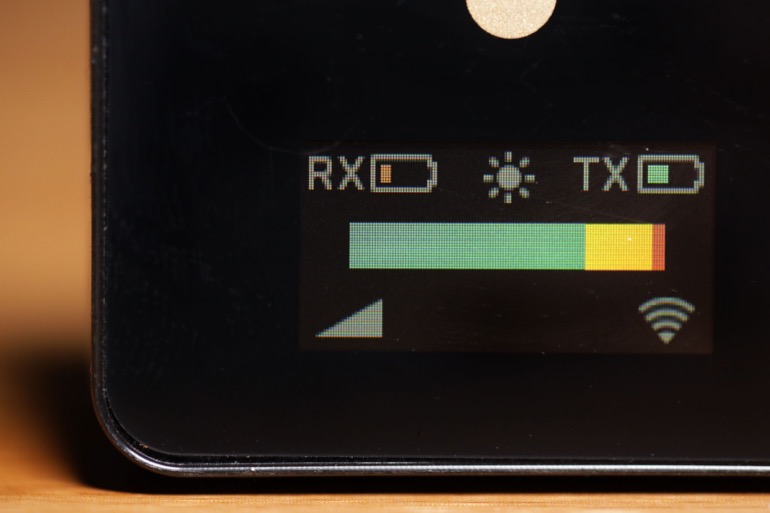
With the Wireless GO, you only have gain adjustment on the receiver, with a 0db, -6db, and -12db pad. They’re visible as a simple triangle with 3 levels, and you run through them by clicking the DB button on the bottom of the transmitter. Easy enough.
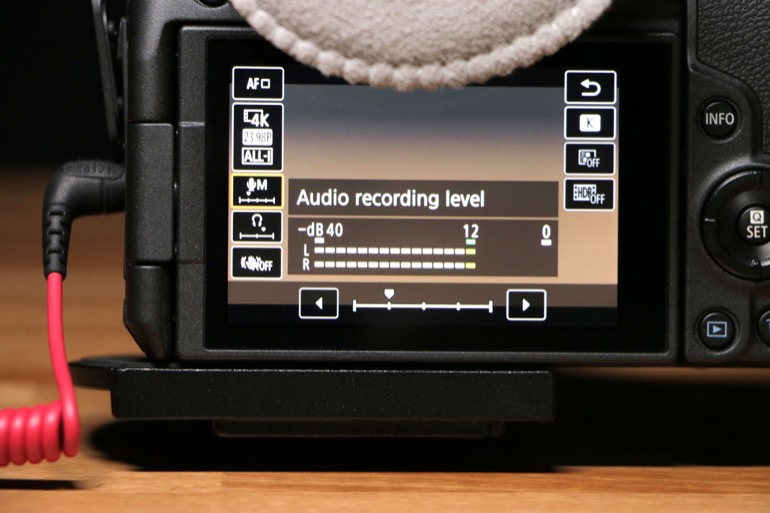
On our Canon EOS R, we found that at maximum volume, at 0db, and speaking at a typical volume for an interview, we had to push our camera’s preamp to 25%. That’s higher than what we would prefer, which is to set the camera’s input level only a few notches above zero, to limit the amount of digital gain applied.
RODE Wireless Go Built-In Lavalier Mic
The main advantage of the GO over just about any wireless mic kit - apart from the size of course - is the fact that it has a lavalier microphone built into the transmitter, as an alternative option to plugging in an external lav mic.
We think it’s the same mic capsule that comes with the RODELink - though be sure to listen to our video test above to see if you hear any differences.
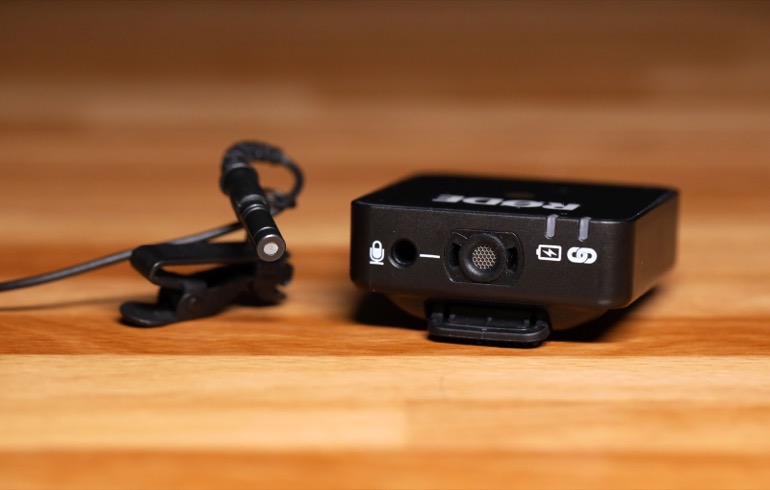
This is what makes the GO an essential component to any kit, and why we don’t take our camera anywhere without it now. At any point, if you are shooting something that is over a few feet away from your on-camera mic, and you want to capture some better audio, all you have to do is place this little gizmo near your sound source, walk back to your camera, and you’re rolling.
It's like being able to take your on-camera mic and place near your subject, and then go back and film your scene with intimate audio.
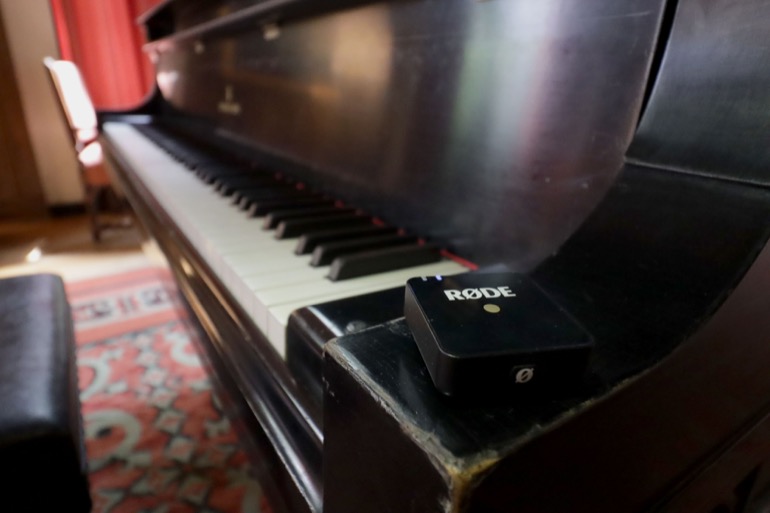
We’ve been using it in this way for a variety of productions, like placing one on a lecturn when filming an event. The GO is so tiny that no one even notices it’s there. It used to be we would wrap a lav mic around a pocket recorder or wireless transmitter for a similar effect, but it became an ugly and noticable object, especially on a table where people could see it.
But with the GO, depending on the shoot, we cover up the logo and LED lights with some gaff tape, set it down, and it becomes completely unnoticeable to anyone.
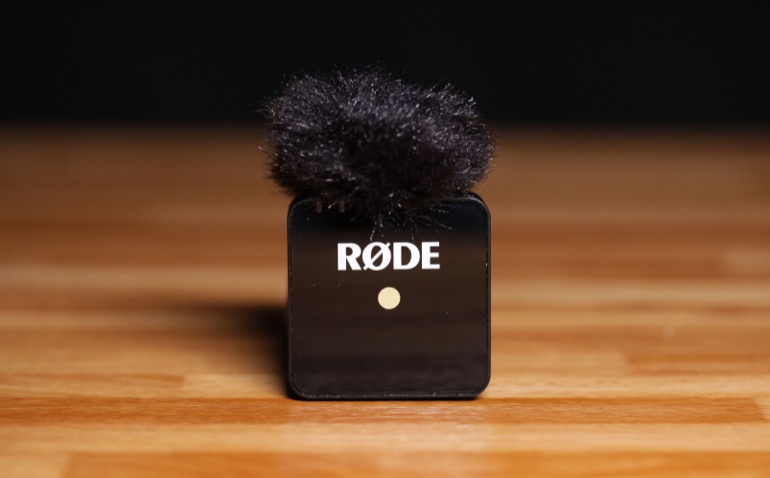
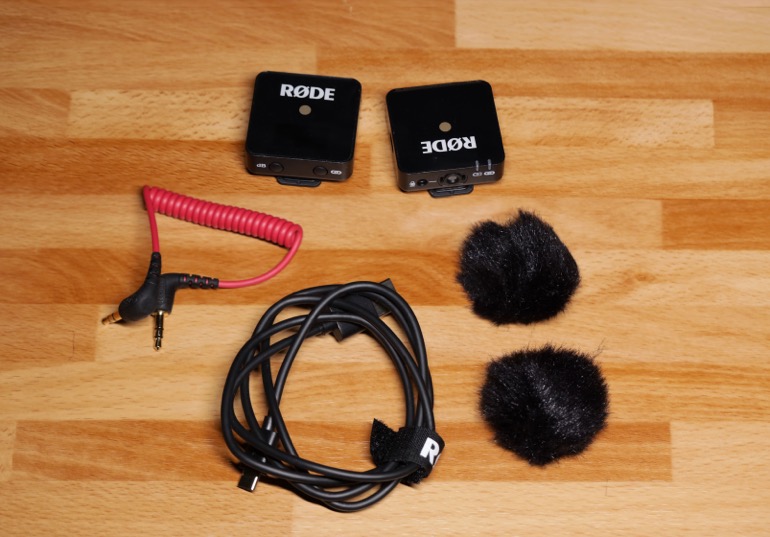
For outdoor use, the GO comes with two furry windshields. They can be clipped over the built-in mic, with a custom made solution that at first seems to fall off really easily. In fact, it’s baffled many early users out there. Thankfully Rode has released a more thorough tutorial for how to attach the furry windshield:
Attaching the Rode Wireless GO to a Shirt
While the GO is conveniently now an audio source that you can set anywhere near your subject, no matter what you’re filming, it’s of course built primarily for speech. And most likely, it’s meant for everybody videographers, vloggers, and video producers who want a simple clip-on mic.
You don’t have to figure out how to hide a lav using vampire clips or moleskin or whatever (and still likely to get rustle), and you don’t need to run a mic cable inside your shirt to hide it. Or worse, show the mic cable in the shot.
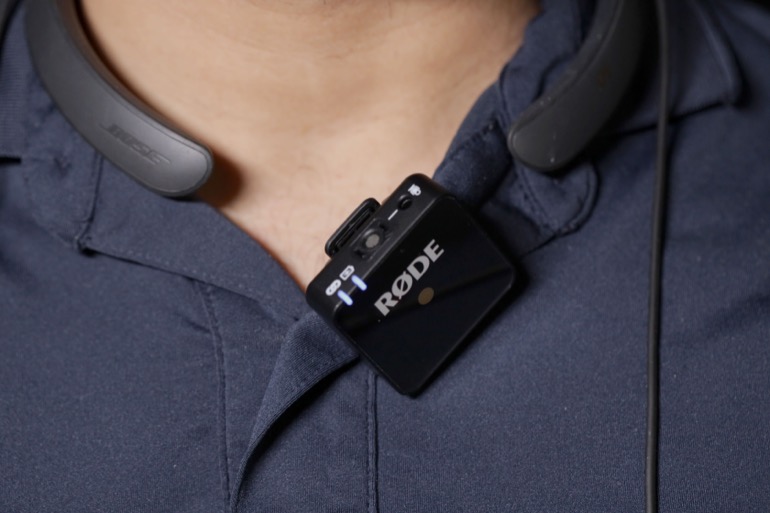
With the GO, you can clip it onto your shirt, and that’s it. We can see this being appealing to just about anyone, even pro filmmakers who have access to a suite of other mics or wireless kits.
There are two ways to clip it onto a shirt - with the transmitter facing out, which looks pretty clunky, or with the clip facing out.
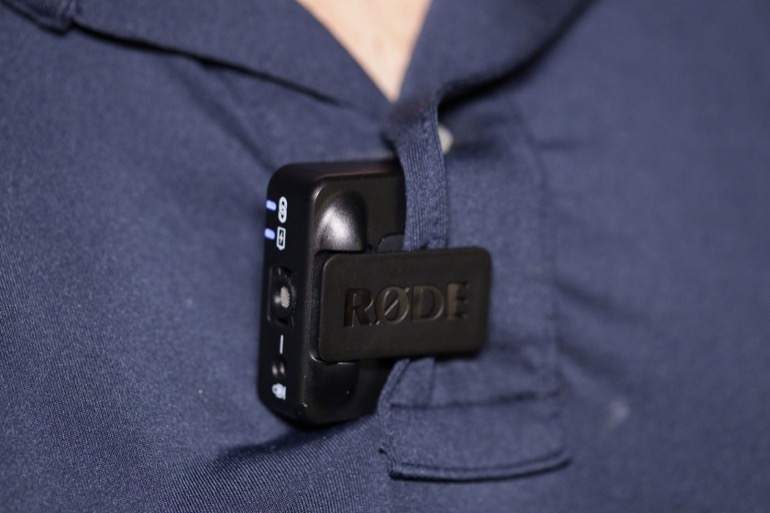
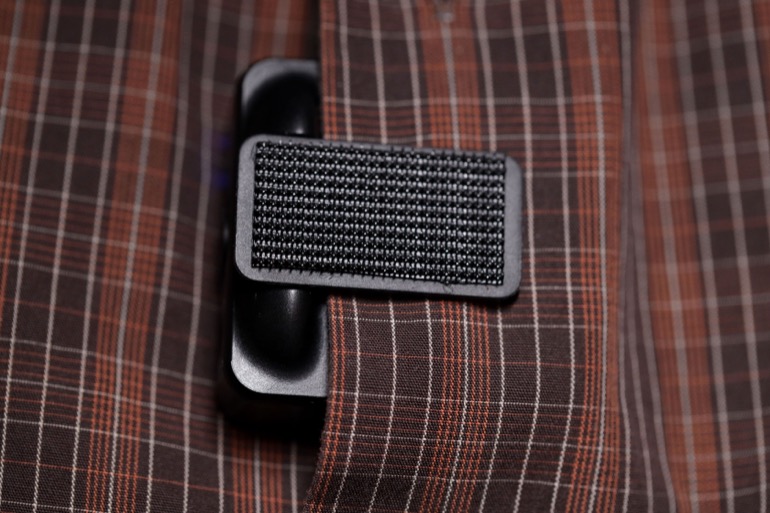
Rode is clever to have fashioned their logo onto the clip - if the GO is widely adopted, the little Rode clip will be as ubiquitous as Beats headphones. But we prefer to cover up the logo with extra strength velcro (sorry, Rode). The velcro not only prevents light from reflecting off the shiny plastic, but it also makes it look kind of like outdoor gear, rather than wearable electronics. Or maybe not?
Also the velcro does one other important thing, and that’s to stick to our camera monitor when we’re not using it.
Mounting The Rode Wireless GO on camera
In an interesting design solution, the Rode Wireless GO has clips on both the Transmitter and Receiver, and conveniently, the clips are sized to fit perfectly in a camera shoe. Of course many of us filmmakers have shoes attached to all sorts of cheese plates and camera cages, not just on top of our cameras.
Mounting the GO receiver in a camera shoe is pretty smart, but having the ability to carry along the transmitter elsewhere on your camera cage when not in use - that’s really good. All you need is another shoe adapter (like this SmallRig) somewhere on your camera.
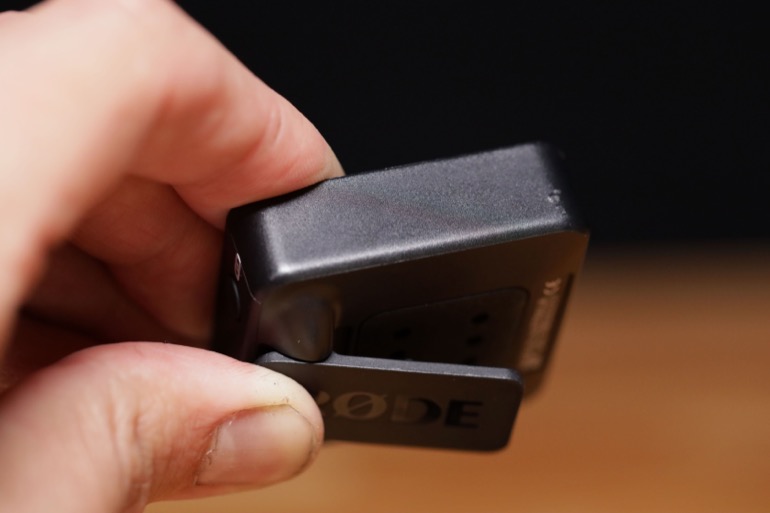
For us, the GO is so weightless (1 oz) that we found it holds onto industrial strength velcro decently enough for most shoots. If you swing your camera around violently, ok, maybe velcro is not gonna work.
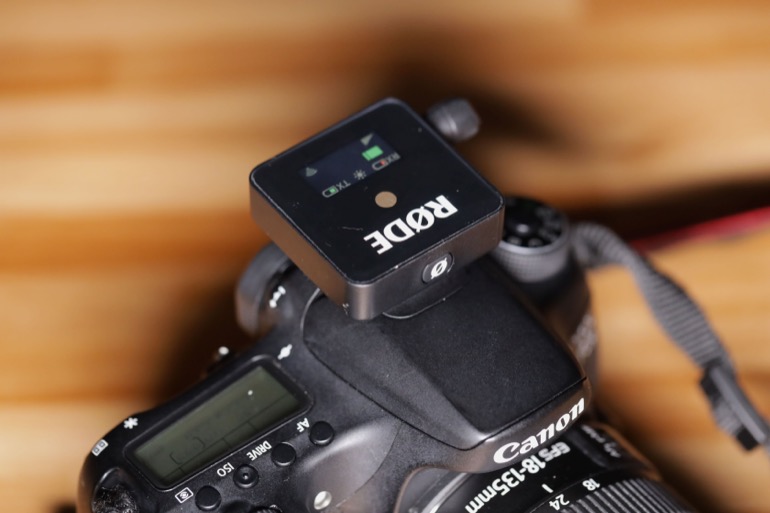
But for us, we found a nice spot on top of our Canon EOS R where we velcro the GO receiver. Then, our camera shoe is still available for other accessories, like a Rode VideoMicro on-camera mic, or a monitor. That way we don’t have to use a camera cage or a multi-shoe adapter. Remember these things on top of our DSLRs? No thanks.
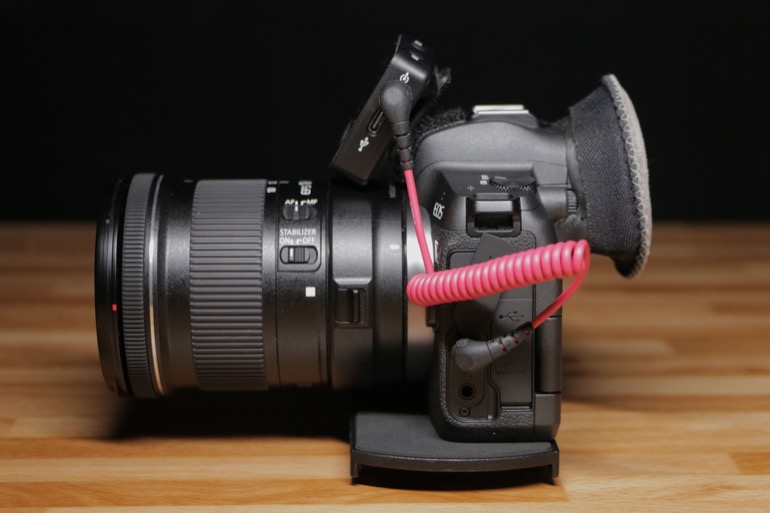
When we use our Atomos Shinobi monitor on top of the Canon R - which is near always - we’ve also found it perfectly ok to velcro the Rode Wireless GO to the back. In fact, we have enough velcro that we can carry both the GO receiver and transmitter when it’s not in use.
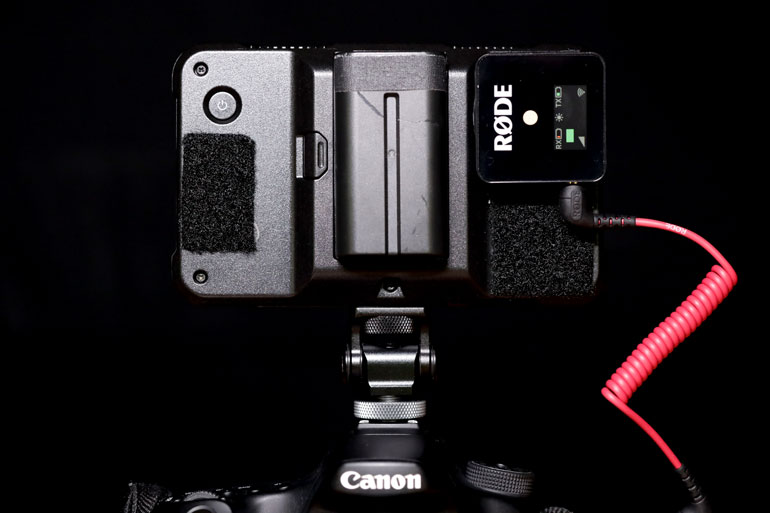
To be honest, until recently we only used cinema cameras in our day-to-day productions because we hated the top-heavy rigging that was typically required when shooting videos with small DSLRs or mirrorless cameras.
But this kind of lightweight pro video kit is finally possible, thanks to the miniaturization of the Wireless GO, along with the very lightweight Atomos Shinobi. To keep it small, we only use Sony NP 550 batteries (we got two of these combos with chargers), a Sanho HyperThin Mini-HDMI to HDMI cable, and this little monitor swivel mount. It looks to be exactly the same as this AndyCine mount, but at less than half the price.
Powering the Wireless GO
We’ve always said that the development of batteries will be what enables better tech and gear. That’s certainly true with the Wireless GO, which has internal lithium batteries that can run for seven hours, despite their tiny size and feather weight.
The battery levels are easily read on the reciever’s display. And if you want to conserve battery power, you can press the power button once to reduce the screen brightness.
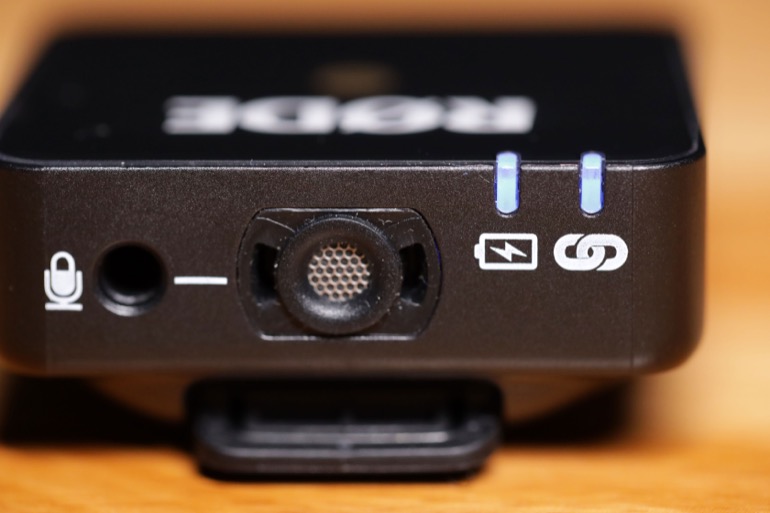
The transmitter and receiver can be recharged via their USB-C ports. Rode is kind to include two USB-C to USB-A cables, so you don’t have to go out and purchase them separately.
And thankfully, you can connect the GO to a USB battery and it’ll continue to run while charging. That’s great news to our ears. We were actually a litle hesitant at first about using a wireless mic system with internal batteries.
If you’ve been on productions, you know there are a hundred different items that require batteries and something is bound to have a low charge. It’s one thing if you’re preparing for a shoot at home or work - at least you can setup a battery charging station or some kind of system. But if you’re traveling, your hotel room probably has five tentacles coming out of every outlet, and you’ve gotta get up several times during the night to change what’s charging.
This is why we’ve always preferred using rechargeable AA batteries on audio gear, whenever a Sony NP input wasn’t available. This way, we can start every day with a fresh pair of batteries, without taking the risk of half depleted batteries running out during the day. And because they’re rechargeable, we don’t have to throw away batteries that are only partially used.
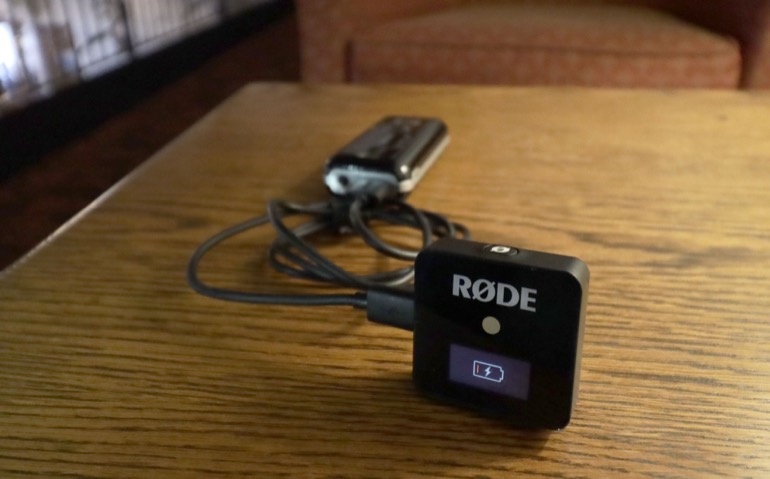
So given our preference for swappable batteries, we were a little weary of the Rode Wireless GO's internal batteries before we tried it. But to our surprise the batteries last longer than we expected.
And for those situations where we are leaving the transmitter somewhere for a while - like by a lecturn - we can attach a tiny USB battery to it just in case. Together it’s still smaller and less profile than a RODELink with a lav wrapped around it.
The one issue we've run into with the Wireless GO is that the power button on the receiver is a little finicky. You have to press it just right. But that could just be our unit.
Rode Wireless GO vs Instamic
We could compare the GO to the Instamic - and you can hear each of them in our video above - but there are notable differences. The Instamic is a microphone and recorder built into one little unit (we previously reviewed Instamic). That means you can attach it to your subject, turn it on, and walk away. But of course, you can’t monitor the audio for levels for rustling.
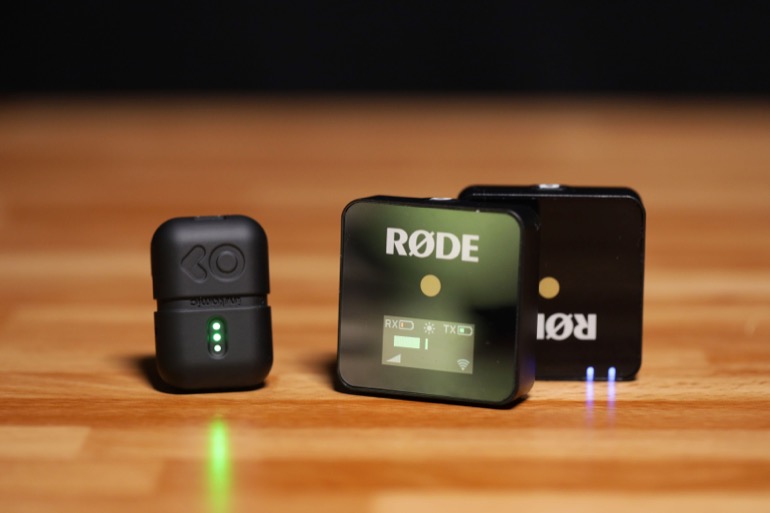
After using gear without display screens (or battery indicators at the least), we’re always a little nervous about using something like the Instamic in a professional environment. You’re never really sure what’s happening - all you can depend on is memorizing a series of events that leads to a recording. Press and hold the on button, press once quickly to start recording, watch the 3 little LEDs for levels and hope it sounds ok, and then do it all over again when you’re done.
If something goes awry and the lights start flashing a different pattern than you’re used to, are you going to google the directions? Probably not - you’re just going to not use the thing. We’ve put a lot of gear away on shelves after it’s failed us once, whether it’s user error or a malfunction, it doesn’t matter. If you can’t depend on it during a very chaotic production, then you can’t depend on it.
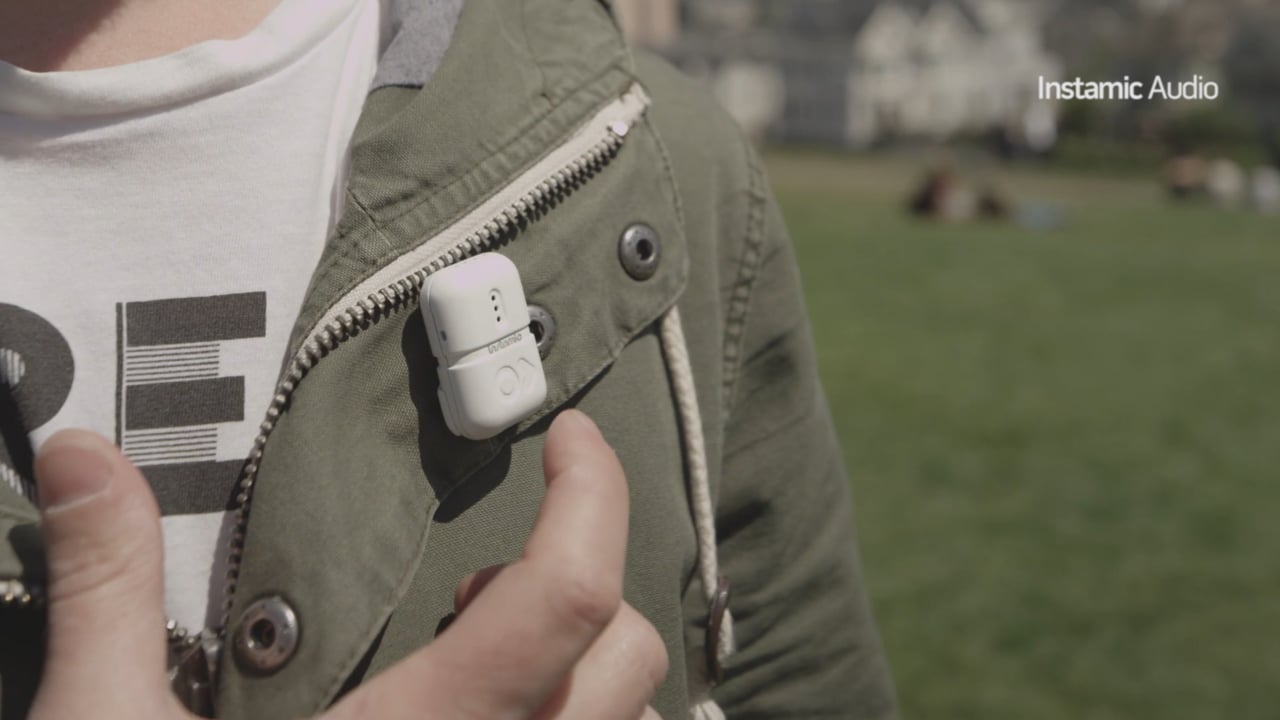
Don’t worry, we're still using the Instamic quite a bit as a backup mic, or when we want to place a mic on a secondary subject, or for hiding in inconspicous places. In fact, as you can hear in the video test, the Instamic sounds pretty good, similar to other lav mics.
But if we’re shooting a main subject, we want to be able to monitor audio, and we want to see on the screen that everything is going hunkydory, and that there’s enough battery power to go.
THE WIRELESS MIC DREAM: RECORD while transmitting
Now, there’s this ever revolving wish in filmmaking circles that what we all really want is just a wireless mic transmitter that ALSO has a record function on the body unit. Seems like a no brainer, right? Your camera or mixer receives the audio that you’re monitoring, but in case of interference, bam, you’ve got a wired backup.
Unfortunately for many of us, there’s a well maintained patent for this combination of wireless transmitter/recorder, owned by Zaxcom, who does make a product like this but it’s not well suited for the budget conscious run-and-gun solo shooters. You may recall the Juicedlink Little Darling, which was a pocket recorder with limited wireless monitoring - it turns out it infringed on the patent and was shutdown, and the company folded.
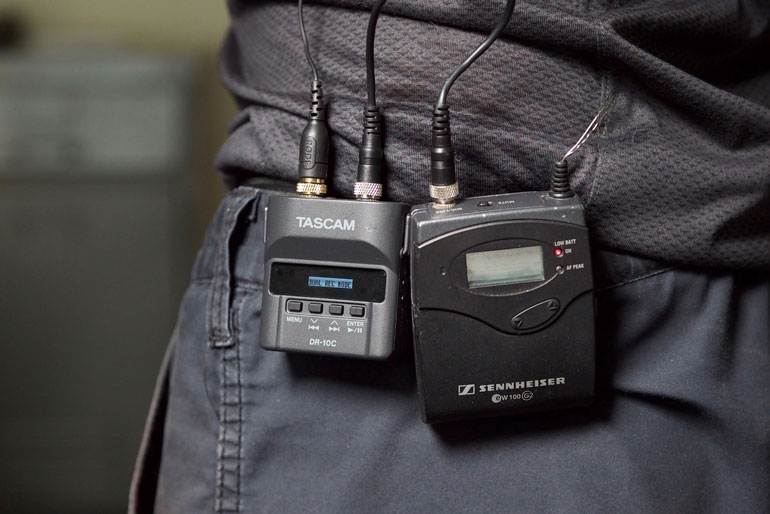
Image from Newsshooter's Tascam DR-10C Review
So what have filmmakers been doing instead? A few years ago Tascam came out with the DR-10C, which was intended to work alongside a wireless transmitter like the Sennheiser G3. You plug the end of your lav mic into the DR-10C, which recorded a couple safety tracks, and then passed along a high quality output to the G3 transmitter, which sent the signal to your camera, and off you go.
The Tascam DR-10C also was stamped out by the Zaxcom patent, so it was no longer available in the US. In its place, Tascam released the DR-10L, which was almost exactly the same as the 10C except that there's no longer pass through audio to a wireless kit.
So for now, most filmmakers have found themselves in one of two camps: either they’re shooting all wireless, or they’re outfitting their subjects with wired audio recorders that have superb limiters or safety tracks. For a shoot that features only one or two subjects, a wireless or wired mic to your camera is not a problem. But if you are shooting a scene with 4-8 subjects - sometimes a series of wired lav mics is the only way to roll sound on that many people for hours on end.
One solution is to use the headphone jack of a portable audio recorder, and send that signal to your camera via the Rode Wireless GO. It's such a tiny addition to any pocket recorder, that until now this hasn't been a feasible choice for filmmakers.
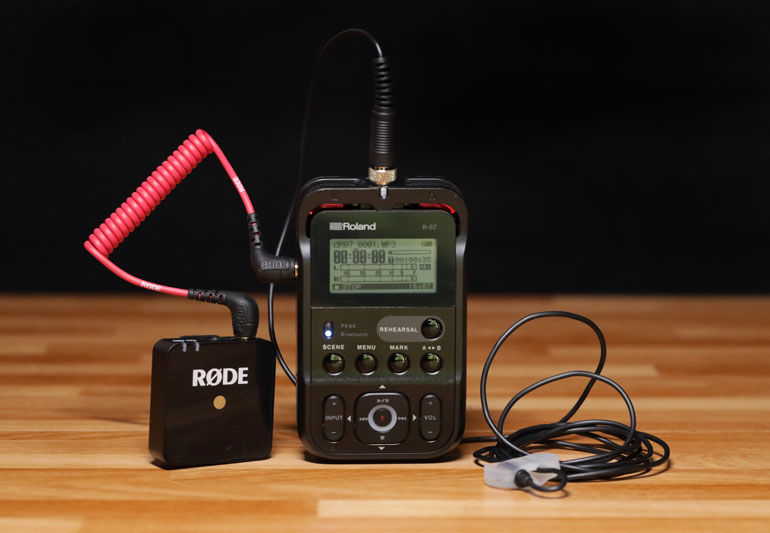
For example, here we have a lav mic going into the Roland R-07 (check out our Roland R-07 review). It's about the size of a pack of cards. So as you can see, adding the Wireless GO to the mix is not much of a compromise.
Now you can have a wired recording but also be able to wirelessly monitor the audio for rustle. The headphone out signal is not going to be quality enough for a pro recording, so you'll only want to use it for monitoring. If a portable audio recorder had high quality out, it would be getting into the patent infringement territory like the pass-through audio on the Tascam DR-10C.
Rode Wireless Go Review Conclusion
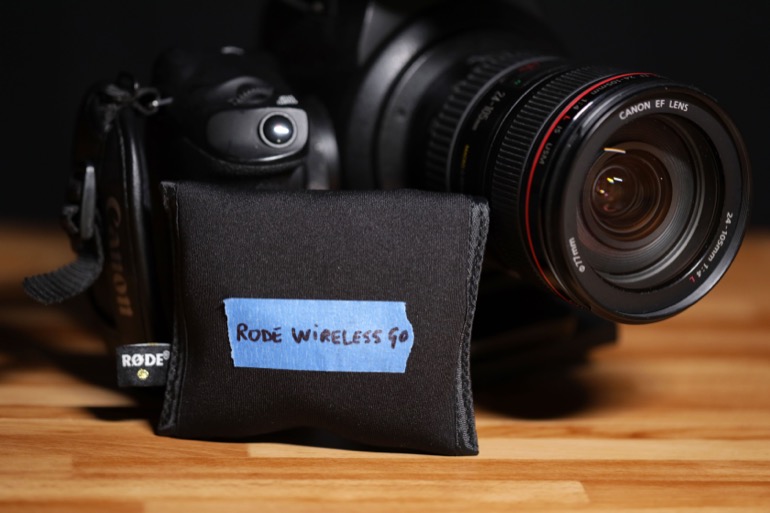
The wireless audio kit has been begging to be made smaller for a long time. But batteries have long been the buzz kill. AAA batteries don't last long enough, and AA batteries are, well, they're AA size.
So with the Rode Wireless GO, we're thrilled to see a tiny wireless audio solution that has good battery power, plus the ability to use plug-in USB power for longer shoots. In fact, that makes it a no brainer for many video shooters.
You can now get through the day without having to power off a wireless transmitter or receiver to change the batteries. Now you can simply add some power with a small USB battery.
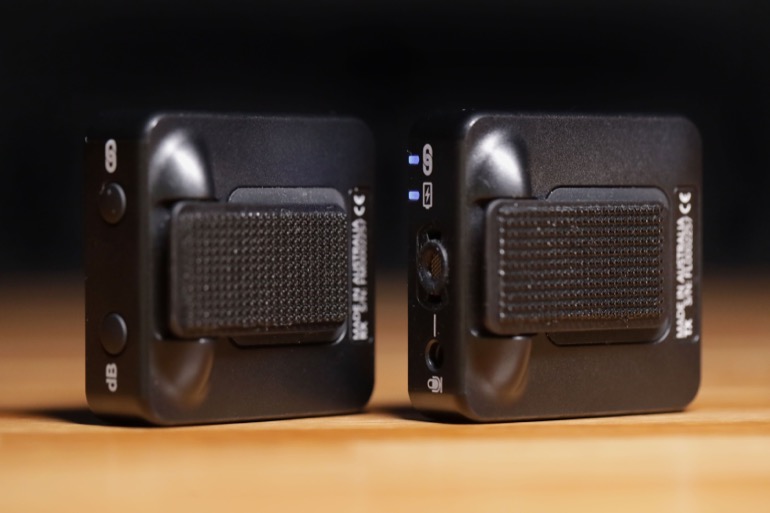
In addition to the size and power, we love that we can be versatile when mounting it - both the transmitter on the subject, and the receiver on the camera. We've found a little industrial strength velcro is all it takes to add these little units somewhere on your camera.
For professional video shooters who already have other wireless kits, like the RODELink Filmmaker Kit, there are good reasons to hold onto your current system. First, the Rode Wireless GO only has 3 stages of gain adjustment, and for some cameras, you may need to ramp up the digital gain in order to record at a decent volume.
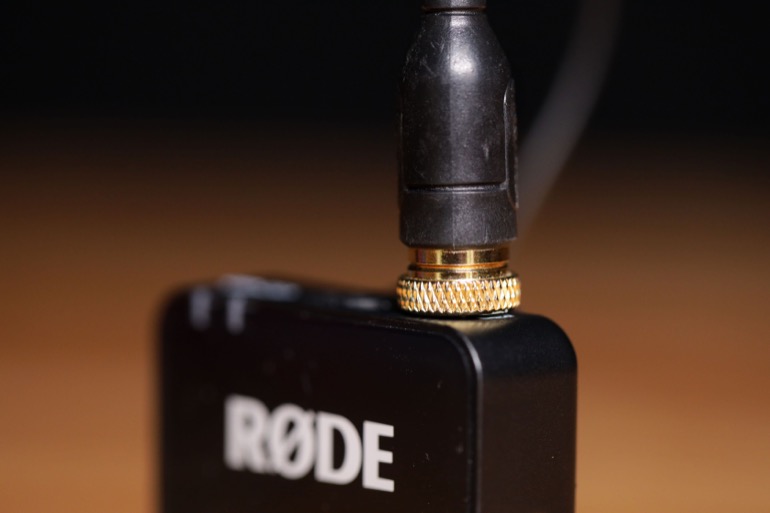
The other limitation is that the Rode Wireless GO does not have a locking thread on the 3.5mm mic input. That alone can be a deal breaker for many filmmakers. It's very easy for subjects to accidentally pull on their mic cable.
But we can see how a locking thread and gain adjustments on the transmitter would require the unit to be made larger. And when you're miniaturizing something, there are always compromises.
For us, we'll continue to bring our larger wireless kits on certain productions, but the Rode Wireless GO is never leaving the camera.
RØDE Wireless GO 2-person System with Stereo Y Cable
Update: Rode Wireless Go Accessories and a White Version
Since this review was first published, Rode has released a few new updates to the Wireless GO system that add even more value to owning one.

Interview GO Handheld Mic Adapter
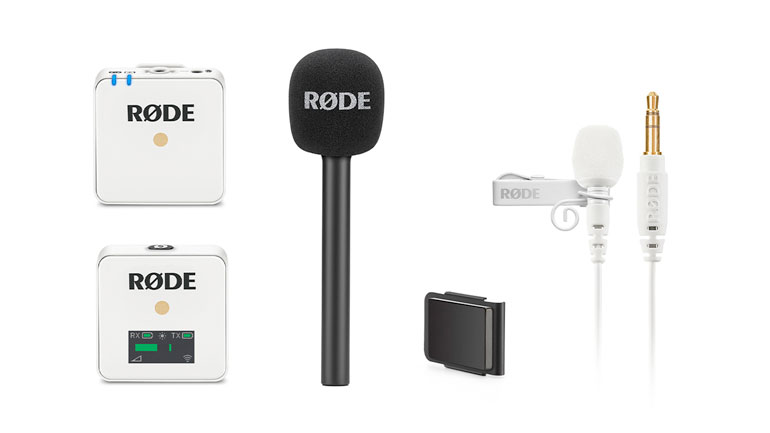
First up is the Interview GO Handheld Mic Adapter. Very simply, it replaces the need for a handheld dynamic microphone for interviews, events, church services, or anywhere where a stick mic is useful. With this adapter, you simply slide the Wireless GO transmitter into the top end, cover it with the foam windshield, and voila, a wireless stick mic.
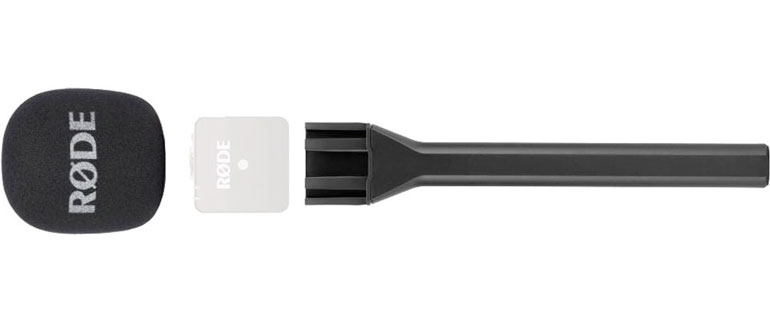
We love this accessory not only for those times when you may want a stick mic, but as an alternative to a boom mic, or for hanging (or rigging) places where we want closer B-roll audio in a scene, or at least closer than what our on-camera shotgun mic can capture. It weighs 3 oz, practically nothing, and the cost is so low that you may as well keep one in your Wireless Go kit just in case.
MagClip GO
The MagClip GO is another no-brainer accessory for the Wireless GO. It's simply a magnetic clip that attaches to the GO transmitter. This way you can attach the mic under all kinds of clothing, and in discreet places, rather than only at the lip of clothing with the mic's clip. The magnet can also be placed on metal objects or anything that is magnetic, for easy B-roll audio.
Wireless GO White and Lavalier GO White
Specifically created for wedding videographers, the Wireless GO White is the perfect companion to the black version. It's the same exact wireless system, but the outside is all white, including the furry windshields.
And if you prefer to use lav mics instead of the built in microphone in the Wireless GO, Rode has also released a companion Lavalier GO in white. While the all-white system is perfectly suited for weddings, it's also very handy for any subject who wears light clothing, or for hiding in a scene that has light colors and textures. They also have a Lavalier GO in black.
These updates came a year after the release of the Wireless GO, after Rode listened to user feedback. They make the already great Wireless GO system even better. Enjoy!
