Parabolic Microphone: Soundshark
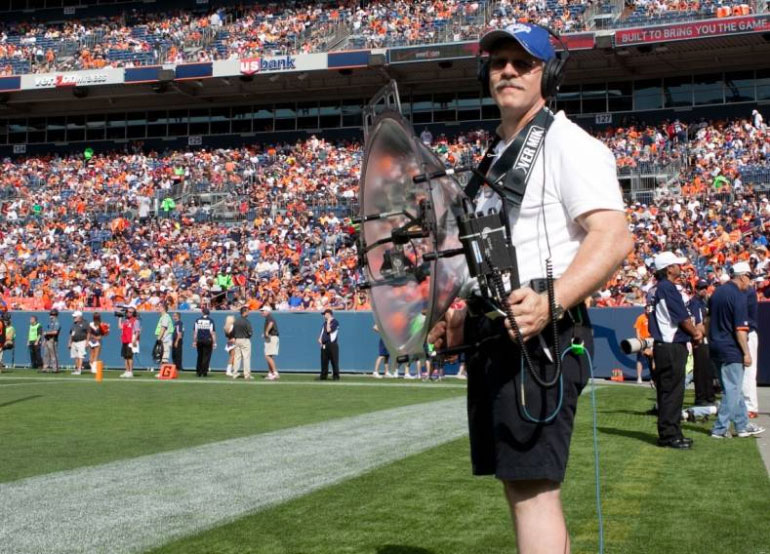
For many videographers, watching sports is an exciting past time. But not for the thrill of the game. We watch for the brief, behind-the-scenes moments where we can spot a camera crew in action, trying to guess what gear they’re using.
Along the sidelines, you’ve probably noticed the large, see-through domes that sound recordists use to capture audio from across hundreds of yards. That's a parabolic microphone, and it's been a popular tool for sports audio gathering for many years.
If you’ve ever wondered how NFL Films can capture the sound of bones cracking during a tackle, parabolic microphones is how.
There are many other uses for parabolic microphones in video production, outside of just sports, but for the most part they’ve been reserved for niche operators. Recently that’s all changed.
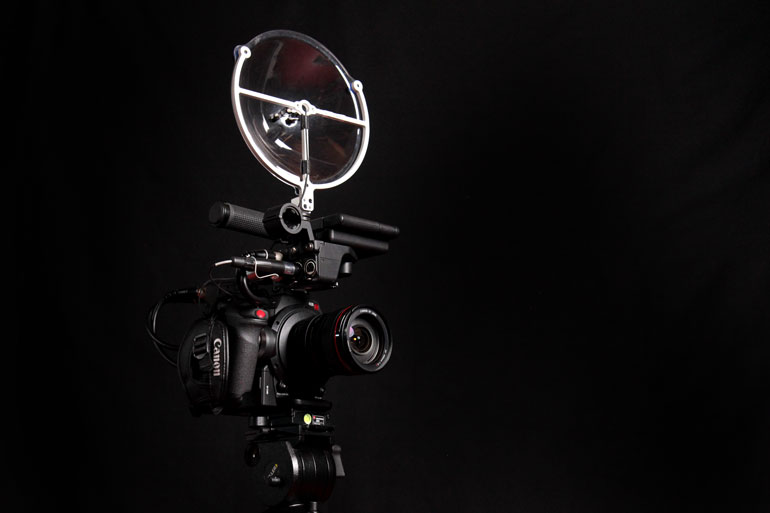
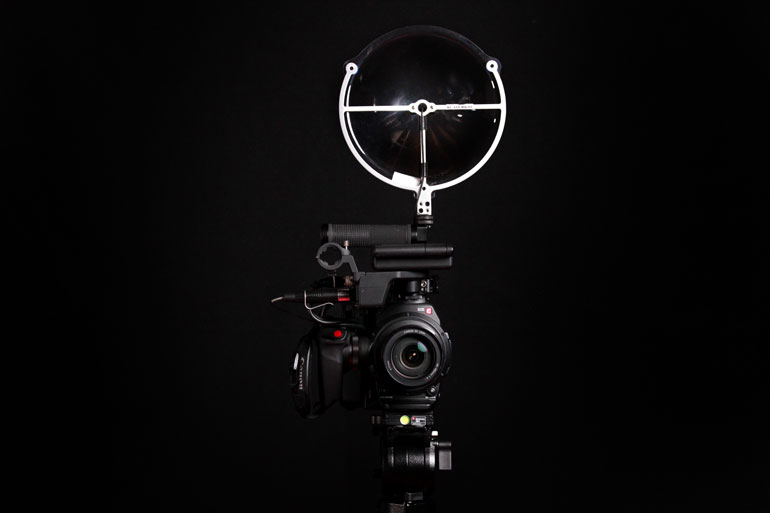
Now, with the Sound Shark parabolic microphone, which is also sold in a slightly different configuration as the Klover MiK 09, parabolic audio capture is an option for many one-man band operators and small video production crews. It’s as simple as attaching one to the top of a camera shoe.
But how does it compare to other types of long range audio capture, like using a traditional on-camera shotgun microphone?
What is a Parabolic Microphone?
The first thing to know about a parabolic mic is that it isn’t actually a microphone. It’s a dish - or a parabolic - shaped signal receiver - which focuses sound into a single point in the center. The exact shape of the dish is very important, as well as the size of the dish, in order to achieve a precise, mathematical formula for distant audio capture.
Now if you place a small microphone into the center of the parabolic dish, you’ll be able to record the focused audio signal in a way that makes it sound like it’s many times closer to the subject. For example, a voice 100 feet away can sound like its being recorded from 10 feet away.
Klover Products, the maker of both the Sound Shark and the MiK 09, produces a few different sizes of parabolic microphone systems.
In addition to the 9-inch dish, they have a 16-inch collector, which can record audio from 200 feet away, as well as a 26-inch collector, which can record audio from 500 feet away.
For each of these parabolic collectors, you install your own omnidirectional lavaliere microphone into the center of parabolic housing.
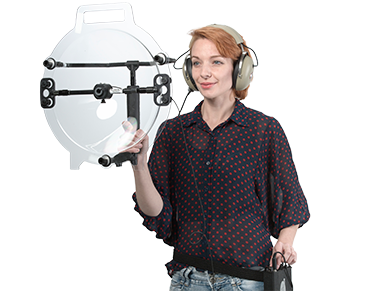
The microphone faces the reflector surface, and sound captured by the parabolic reflector bounces toward the microphone.
That’s why we want to be clear that parabolic microphones are not actually microphones - they are dishes which have a place for users to install their microphone of choice.
Klover does, however, sell combination kit packages that include the lavaliere microphone already installed into the parabolic housing (as does Sound Shark). You can choose between a few of the industry standard lavs, such as a Countryman B3, Sennheiser MKE-2, or a custom-built lavaliere that comes with its equalization pre-adjusted for parabolic sound capture.
But anyway, for the purposes of this article, we’re just going to keep calling them parabolic microphones. Rather than parabolic collectors, reflectors, dishes, etc.
How does a Parabolic Microphone Work?
Let’s let the experts describe a parabolic mic for a moment:
A parabolic microphone uses a parabolic reflector to collect and focus sound waves onto a receiver, in much the same way that a parabolic antenna (e.g. satellite dish) does with radio waves.
Parabolic microphones have great sensitivity to sounds in one direction, along the axis of the dish, and can pick up sounds from many meters away.
Typical uses of this microphone include nature sound recording such as recording bird calls, field audio for sports broadcasting, and eavesdropping on conversations, for example in espionage and law enforcement.
By focusing on a narrow source of audio at a particular frequency, the parabolic microphone acts as an acoustical fiilter, which rejects off-axis sound and amplifies what it’s focused on.
And just like satellite dishes, the bigger the dish, the greater the range. Klover’s MiK 26 can focus its reception on such a narrow axis of sound, it can capture normal, conversational audio from 500-600 feet away, without having to boost the audio levels.
When we first spotted Klover Products at NAB this year, we got an opportunity to try out the Klover MiK 26, and it’s incredible.
In the extremely loud exhibit hall filled with thousands of people, we could point the parabolic mic far across the large space toward a group of people talking quietly among themselves, and their conversation was as clear as if they were standing a few feet away.
Now clearly, a large parabolic microphone like the MiK 26 could be used for shady or even illicit purposes, but that’s neither here nor there.
We’re talking about video production, and for that, there’s nothing else out there that can do what a parabolic microhpone can do. After all, audio capture is a game of physics, and a large parabolic dish excels at physics.
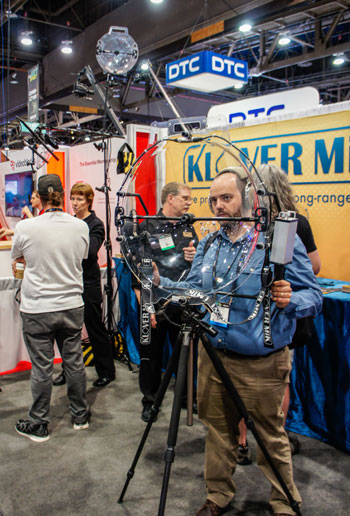
But for most of us in this industry, we’re never going to find ourselves holding a large disc on the sidelines of an NFL game, or in a bird sanctuary, or from inside an FBI van.
Even the Klover MiK 16 is not really practical for many videographers to carry in their gear bags, or use in documentary or corporate productions, unless you have a dedicated sound person. One man band shooters have to keep their gear kit light, carrying only the essentials.
But then there’s the Klover MiK 09, a parabolic microphone small enough to fit on top of a camera’s shoe. It’s practically made for the solo video shooter. It seems like something everyone on the planet might want to keep around.
In fact, there’s even a completely separate product line called the Sound Shark, which Klover also manufacturers, but has more friendly marketing toward non-professional camera users (check out their website here). Non-professional camera enthusiasts make up a massive group of consumers, and before long we may start seeing many of them with a Sound Shark on their cameras.
But wait, what is the difference between SoundShark and Klover MiK 09?
SoundShark vs Klover MiK 09 Parabolic Microphone
There are indeed a few physical differences between the Sound Shark and the Klover MiK 09. First, the Sound Shark has a more user-friendly method of mounting the microphone inside the dish. Here’s a video showing how to mount the mic inside a Sound Shark, versus this video demonstrating the Klover MiK assembly.
For a casual user who wants to use their lav mic for other scenarios, being able to easily install and remove the microphone from the Sound Shark parabolic dish would be quite handy. In fact, the fact that you can use one lavaliere for both interviews as well as on-camera makes it very attractive for this target audience, and we’ll talk more about that in a bit.
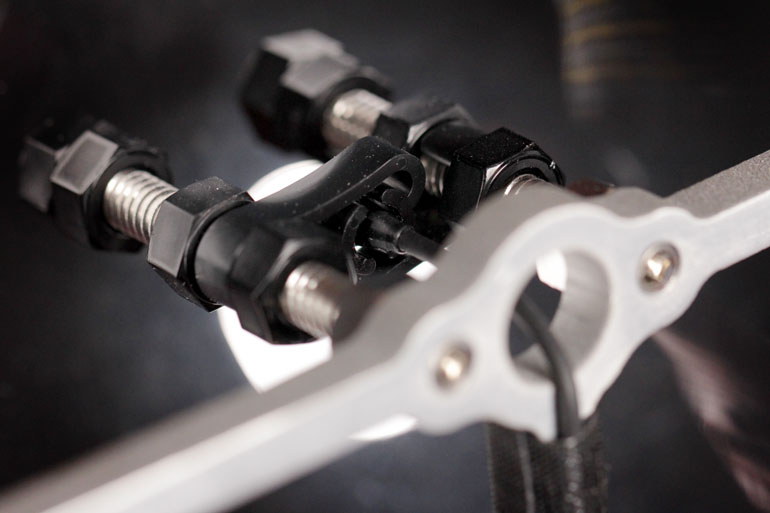
The lav connection inside a Klover MiK 09
For the more professional shooter, however, it might be beneficial to keep a dedicated lavaliere inside the MiK 09. And although it takes more work to install, the MiK 09 hardware keeps the lav mic more secure, which makes it more dependable for the professional who doesn’t want to worry about re-adjusting the mic position.
There’s also a decal in the center of the Sound Shark dish, which is aimed to help users aim the mic. We can see how that could be helpful if you’re using the Sound Shark handheld, with a pistol grip, for example.
Or if you place the Sound Shark on a ball head/shoe adapter, allowing you to adjust the microphone direction independent of where the camera is pointing.
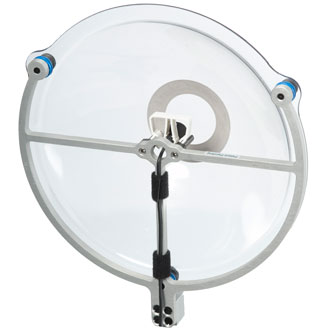
But if you’re just placing the microphone directly on your camera’s shoe, wherever you point the camera is where the microphone is going to point. In this case, having an aiming guide may not be necessary.
But thankfully both the Klover MiK 09 and the Sound Shark come with a removable shoe adapter, which reveals a ¼-20” thread on the underside of the dish housing, allowing you to mount the microphone any which way you choose, using any accessory mount you have on hand.
Apart from the physical differences, and small variations in price, the biggest difference between the Sound Shark and the Klover Mik 09 is simply marketing. Klover Products are geared toward audio and video professionals, whereas the Sound Shark is very cleverly aimed at a hobbyist camera crowd.
Billed “The Zoom Lens of Audio,” the Sound Shark is looking to reach potential users such as wedding videographers, bird enthusiasts, video hobbyists, indie filmmakers, and regular people with cameras such as parents shooting their kids’ events, family moments, and so on.
Here's an example of Sound Shark's videos that speak directly to regular people, using everyday language:
The Sound Shark website is especially friendly for people who aren’t that savvy in audio or sound recording terminology. This could be frustrating for knowledgeable videographers who are looking for informational specs and demos, but we think it’s actually a breath of fresh air to see niche gear being presented in a non-intimidating manner.
There are people out there who haven’t shot a single wedding, but they’re enthused enough to buy a camera, volunteer to shoot a friend’s wedding, and start looking at audio gear. Why can’t they have access to good equipment, just because they haven’t put in hundreds of hours in researching and learning about audio recording?
At any rate, that’s why it’s smart of Klover to separate the MiK 09 and the Sound Shark into two distinct markets, even though the microphone itself is nearly identical. The professional user will feel right at home with a Klover product, and the amateur will feel a lot more comfortable speaking with a Sound Shark representative about their needs and experience.
Klover MiK 09 initial impressions
For our review, we’re using a Klover MiK 09 with a custom lavaliere that comes with its EQ pre-adjusted for recording with a parabolic dish. The lavaliere came installed in the dish, which is pretty convenient, although the installation directions don’t seem all that difficult to follow.
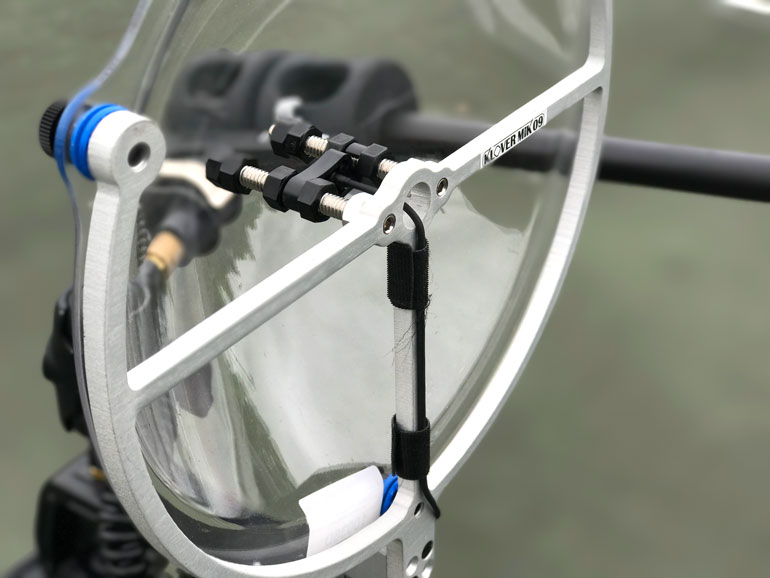
At first glance, the MiK 09 looks and feels like a solid piece of equipment. There aren’t any loose parts, and it feels very durable, like holding a mini satellite dish in your hands.
Attached to the top of a camera, it definitely does stand out, probably because we’re not used to seeing parabolic mics on top of cameras. We can imagine it would be a popular conversation starter when used in public - for better or for worse.
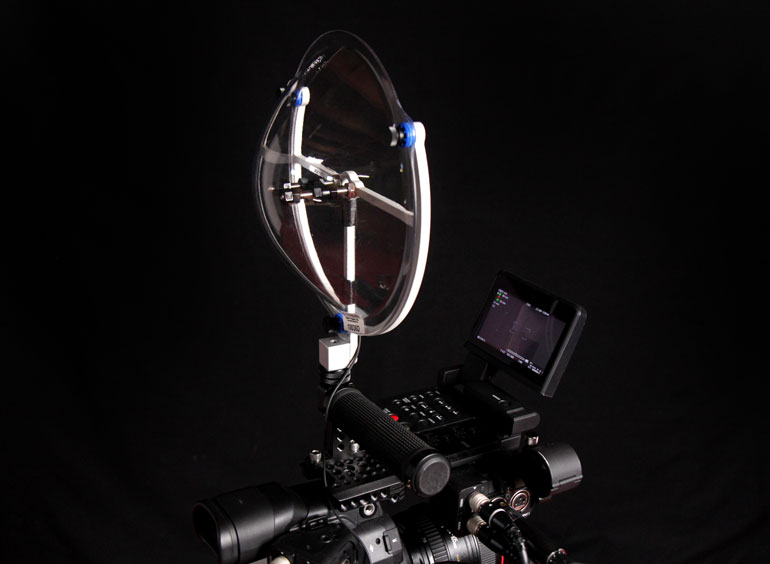
One of the aspects of documentary and event filmmaking we’re always sensitive about is keeping ourselves and our gear out of the limelight. It’s harder to capture people in authentic moments when they are blatantly aware of your presence.
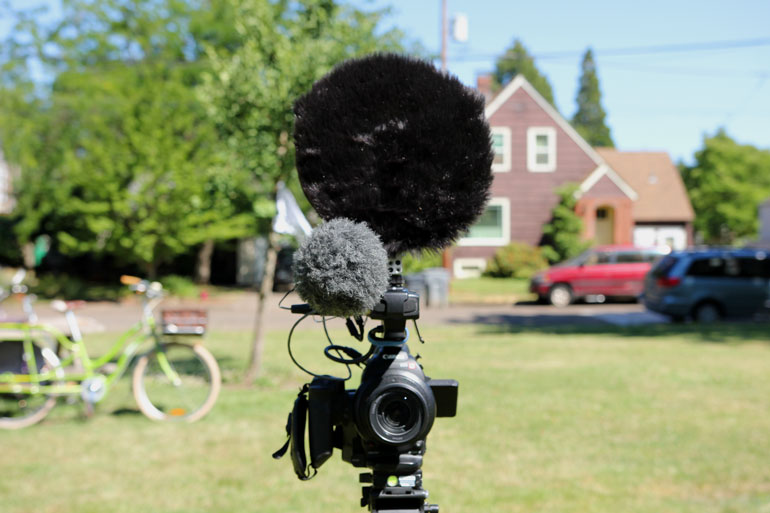
For this reason, we highly recommend the wind cover accessory. It’s easy to wrap the wind cover around the parabolic dish, attach the back with velcro, and it’s ready to protect the audio from wind noise. It handles that job superbly.
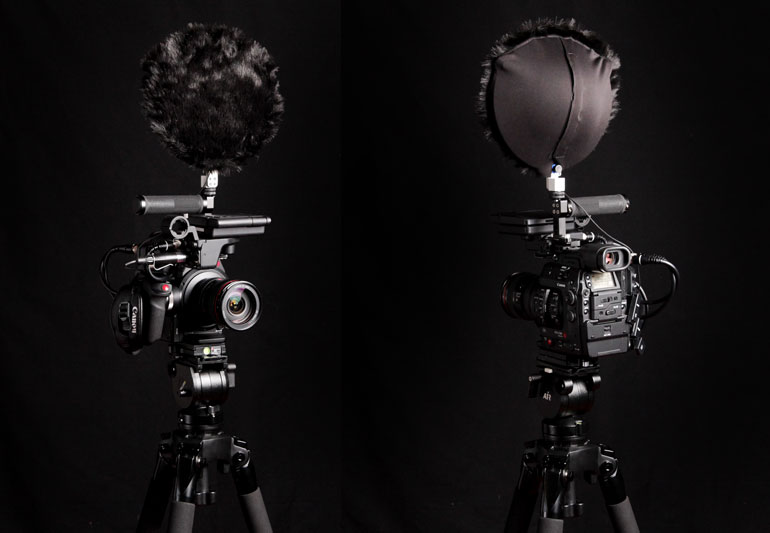
But what we like about the wind cover is it makes the parabolic microphone on top of your camera stand out a little less. Sure, it may sound petty, but there’s a reason why cameras, microphones, lenses, bags, tripods, and most other video gear all come in black. Black keeps the gear in the background, so your subjects can shine in the foreground.
The only thing we’re a little bummed about is the shoe mount on the bottom of the microphone dish. In general, anytime you have two tighteners on a shoe accessory - which is quite often with video gear - they’re never as tight as you want them to be.
The top tightener holds the microphone dish in place, and the bottom one secures it to the cold shoe. It’s simple mechanics, enabling you to tighten the microphone in any direction you choose. But your fingers can never tighten the rings that much, so unless you use a pair of pliers, the microphone is going to come loose as you carry your camera around.
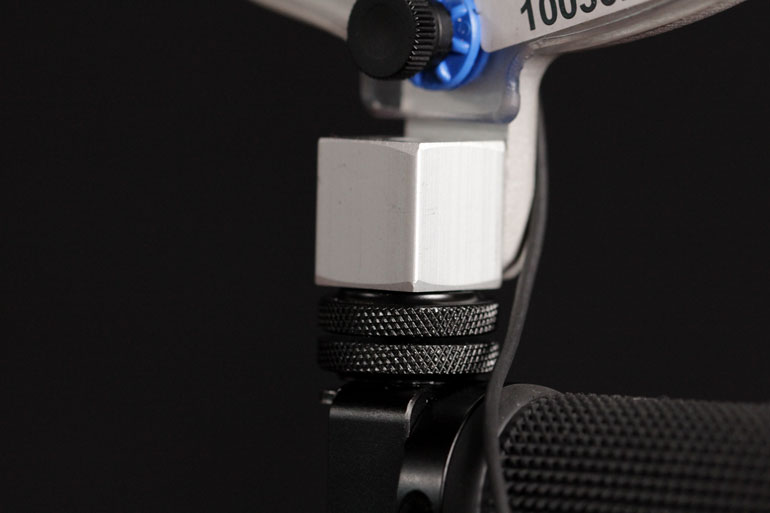
Again, this isn’t an isolated complaint, since this kind of shoe accessory tightener exists in a lot of gear out there, but it’s not an ideal solution. Thankfully, both the Klover and Sound Shark allow you to remove the shoe mount, revealing a ¼-20” thread under the dish. Now you can use any accessory arm - such as our favorite Cinevate Universal Accessory Mount - to get a really secure connection to your camera.
That is, if your camera has a ¼-20” thread somewhere. This is why cheese plates and camera grip cages are a big seller in the camera industry. Anyway, once you get the mic attached via an accessory arm, it also enables you to point the microphone in any direction, independent of the exact angle the camera is pointed toward.
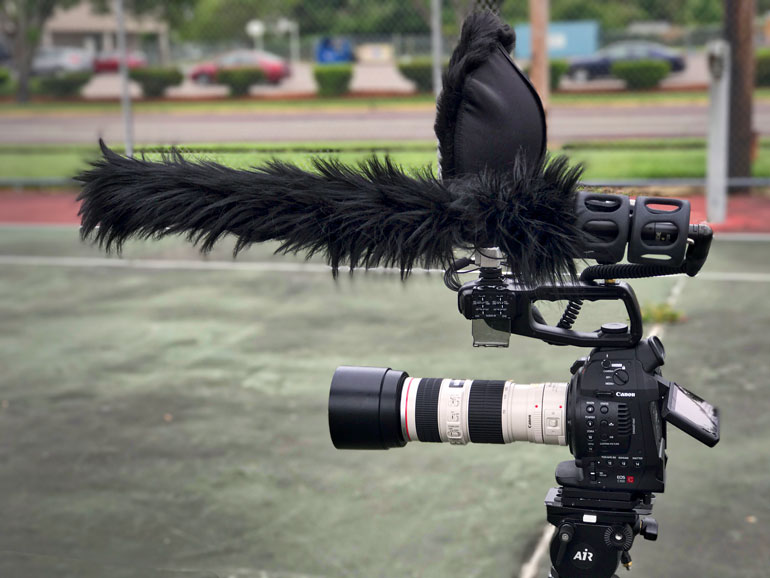
That one time we had both a Rode NTG8 long shotgun and a Klover Parabolic Mic on a C100
We should also mention, you don’t have to mount the parabolic microphone on top of your camera. In fact, setting it up on a portable light stand - like our favorite the Manfrotto 5001B Nanostand - means you can get it closer to your subject, while your camera can move farther back.
With the parabolic microphone on a light stand, you can connect it to your camera via a long XLR cable (we use 25 feet Canare cables in bright colors), or you can connect the microphone lavaliere to a wireless transmitter like the Sennheiser G3.
In fact, both the Sound Shark and Klover MiK 09 offer kits with a variety of industry standard lavaliers built in, one of which is the Sennheiser G3 Evolution series, which has a locking 3.5mm terminal on the mic, rather than a standard wired XLR terminal. We highly recommend going this route, since it gives you the option of going wireless with your microphone, or converting it into a wired connection via the Sennheiser MZA 900P.
(As an aside, we recommend this setup for any use, not just this parabolic microphone. We use a few Sennheiser MKE2 mics with the 3.5mm connections, although you can choose any other industry standard mic with this same terminal. And then you’re free to use any compatible wireless system, including the G3, or the small Sennheiser AVX, the affordable Rode RodeLINK, and so on. Then when you want to shoot a wired interview, the MZA 900P converts your 3.5mm connection into an XLR terminal, ready for phantom power.)
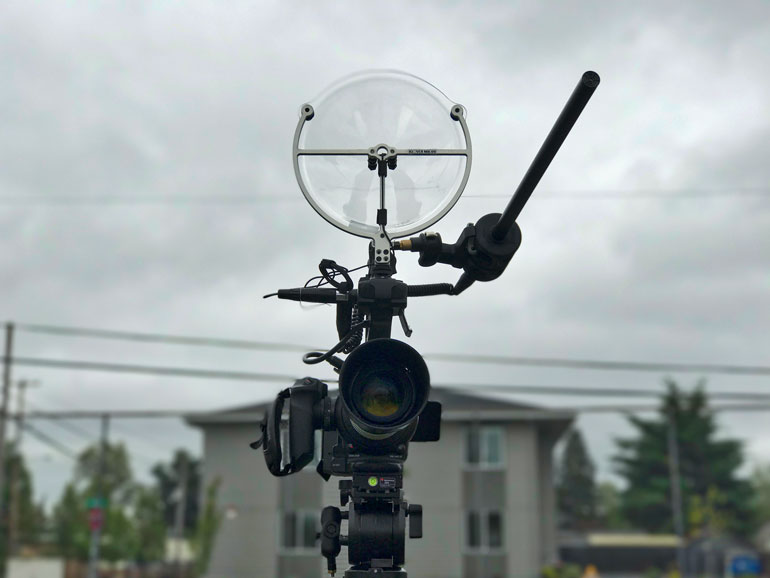
The Klover people also tell us that some users like to put their small parabolic microphone onto a boom pole, instead of on a light stand. In this way, you can better point the microphone away from competing surround noise (like airplanes in the sky), or if you have a helper around, they can pick up the boom pole and hold it over a moving subject, just like with a traditional boom setup.
How does this setup differ from using a regular shotgun mic on a boom pole, or on a light stand? Theoretically, you can place a parabolic microphone much farther away from a subject, which allows you to shoot a wider field of view without worrying about getting the boom mic in your shot. That’s hard to do when shotgun mics are intended to be used within 3-4 feet of a subject.
But does it work? We did a quick test to see if we could hear the difference.
Sound Shark / Klover MiK 09 Parabolic Microphone vs. Shotgun Microphone Test
First, a word of caution: In general, we don’t like doing gear comparison tests because we can never remove enough variables to do a good, side by side comparison. There will always be something that makes the whole test unscientific and not a good basis for buying decisions.
alternative version with eq adjustments
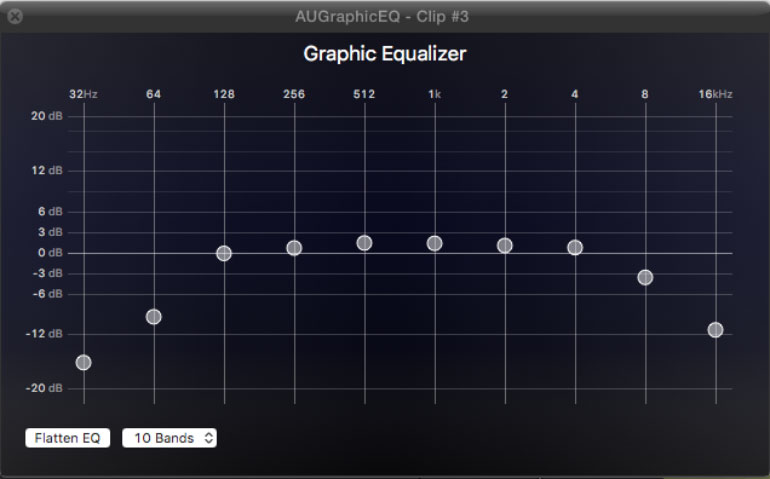
In the writeup below, we mention a few times that the sound of the mics - especially the parabolic microphone - would be quite different with just a simple EQ adjustment in post production.
We only made a few simple EQ adjustments to decrease bass and some high frequencies, using a 12 bar equalizer, so this isn't audio magic. It is, however, subjective to taste, so we leave the video above with the original untouched recordings.
For this test, we went to a public park on an average afternoon, with wind, cars, bikes, and people making a normal amount of noise in the background. We also wanted to hear how the parabolic microphone performs at rejecting off-axis noise, so we placed a small bluetooth speaker about 10-12 feet to the side, playing some Neil Young at a decent volume.
We used a Canon C100 mkI with the Canon 18-135mm Nano lens. The C100 has a couple microphones built into the tip of the camera’s top handle. They’re not good, but in a pinch, they do the job at capturing general B-roll, or dialogue when subjects are close to the camera.
For the shotgun microphone, we used an Audio-Technica 875R, which is one of the best performing shotgun mics out there for the size and price. It’s much shorter than most short shotguns, and even though we all know we’re not supposed to keep shotgun mics on top of our camera (because they never get close enough to subjects), the AT 875R is widely used as on-camera mic. It even says “on camera mic” in the name. It’s about as industry standard as it gets for on camera mics.
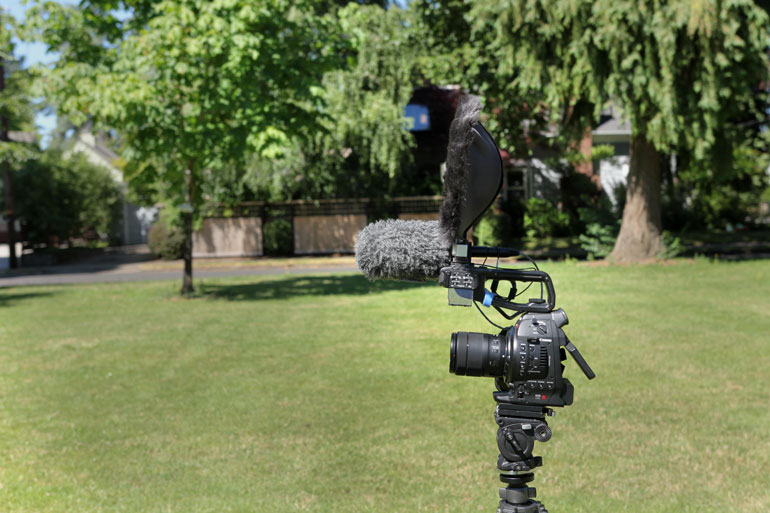
We shot at three different distances, at 30 feet, 5-6 feet, and 2-3 feet. The Sound Shark and Klover MiK 09 are rated to work 30-50 feet away from subjects. The AT875R, like most shotgun mics, aren’t meant for distant use, so their pickup is ideal at 2-3 feet. So somewhere between 3-30 feet, we were curious to hear how the parabolic microphone performs next to the shotgun, as well as the camera’s internal microphone.
Parabolic vs Shotgun Microphone at 2-3 Feet
At a distance of 2-3 feet, all three mics worked well. The trickiest part of shooting this close to a subject is if you want the camera’s lens to be aimed squarely at your subject’s face, the on-camera microphone will be aimed a little too high. In this case, we had the camera placed a little below, so that both mics were aimed closer to the audio sweet spot.
It’s something to think about, though, because if you shoot this close to your subject, their eyeline may waver between you, the camera and lens, or the big parabolic dish sitting on top.
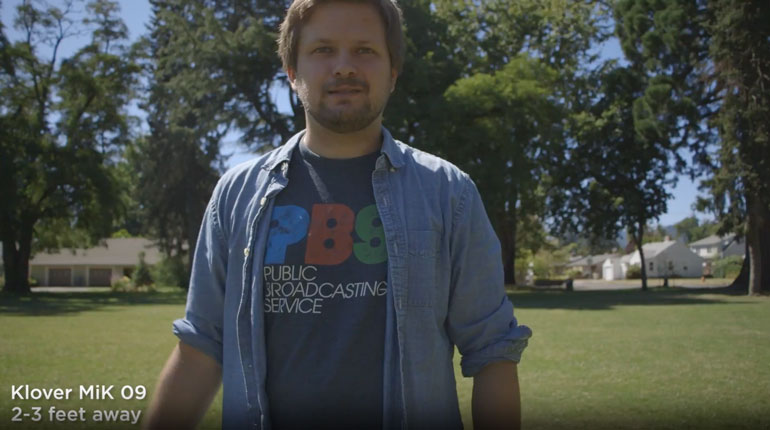
Not sure where to look: the lens, the microphone above, or the camera operator.
If anything, the parabolic microphone sounds a little bassier than the shotgun mic, capturing more of the environment’s low frequency sounds. However, we think this may because our mic came with the custom lavaliere that has its EQ preadjusted, which we assume was adjusted to increase the bass response.
Parabolic microphones in general are weaker at picking up low frequency bass sounds - that’s why their sound is sometimes described as “tinny.” This is a direct result of the size of the dish, and without going into the mathematics of it, the dish would have to be huge to capture a more natural bass response from a distant recording.
So anyway, with most parabolic mics using standard lavs, you can simply increase the bass EQ in your editor, and you’ll be happy with the results. In our case with this custom lav, simply reducing the bass a little bit puts the parabolic sound more on-par with the shotgun microphone.
And when we listen to them side by side, we think the shotgun sounds more like a digital recording of a human voice, whereas the parabolic microphone sounds more natural, or analog. We also think the off-axis noise rejection is better on the parabolic microphone at this distance. But that’s our subjective interpretation, and both sound good at this close distance.
One of the biggest sales pitches for the Sound Shark or Klover MiK 09 is that you can get the sound quality of a body-mounted lavaliere without removing your microphone from the top of your camera. This can be a huge advantage if you physically can’t attach a lav mic to your subjects, or don’t have time to do so, or other reasons. We’ll talk more about this in the conclusion.
Parabolic vs Shotgun Microphone at 5-6 Feet
At 5-6 feet, the C100’s built-in microphones take a big drop in performance, but again, in a pinch, it’s not bad. It’s always good to have a backup audio source if your on-camera microphone fails. What we’ve been doing for many years is recording the on-camera shotgun to channel 1, with manual gain adjustment, and setting channel 2 to the internal microphone at auto-level.
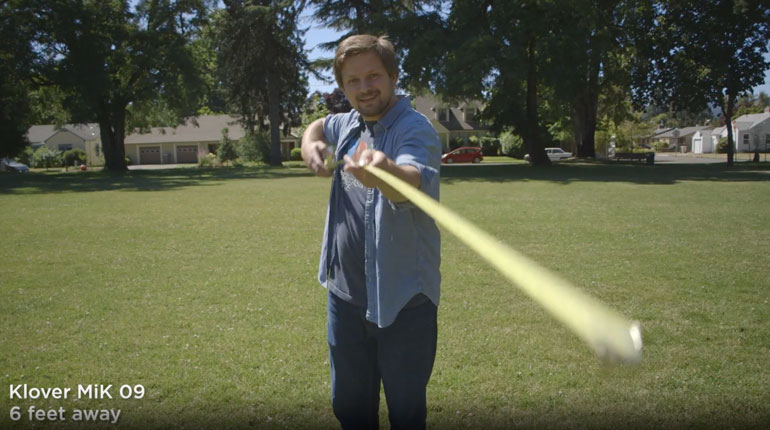
When we go to edit a project, we select all B-roll clips and turn off everything except Channel 1. But we know we always have Channel 2 to fall back on, usually within good levels, if for some reason we left our shotgun mic level too low or too high during a scene.
Anyway, at 5-6 feet, both the parabolic microphone and shotgun perform decently. There happened to be a loud van that drove by at the beginning of the parabolic mic clip, so you can hear how much more bassy this particular lav is over the shotgun. But again, with slight EQ adjustment, both mics sound good.
When we listen to both the clean recordings and the ones with off-axis Neil Young, it sounds to us like the parabolic microphone has more clarity on the subject, while the off-axis noise sounds muddier and less distracting. On the shotgun, both the subject and background music have a similar clarity, which makes them compete with each other.
Again, we think both mics sound pretty decent considering they’re not very close to the subject, and there’s a good amount of wind and background noise. It’s good to keep in mind, however, that different microphones will perform differently when they’re in less than ideal conditions. At 2-3 feet, just about any mic will sound good. But as you get farther out, with competing noise, that’s when you start to hear differences.
In our case, our Audio Technica AT875R shotgun is not the best shotgun mic out there, but it’s known for packing a lot of punch for the price and size. And inside the parabolic dish is a custom lav that is professional grade. In the combination kit with the parabolic dish, the custom lav is priced about the same as a Countryman B3, which is a well-known and respected lavaliere. So, keep in mind, you may get different performance from other shotguns and lavs out there.
Parabolic vs Shotgun Microphone at 30 Feet
This is where the test gets interesting. (By the way, we’re writing the commentary backwards from the order of tests in the video, sorry). The built in mics don’t work at all here, not even close. But surprisingly, the shotgun mic doesn’t do a bad job, given how far away it is.
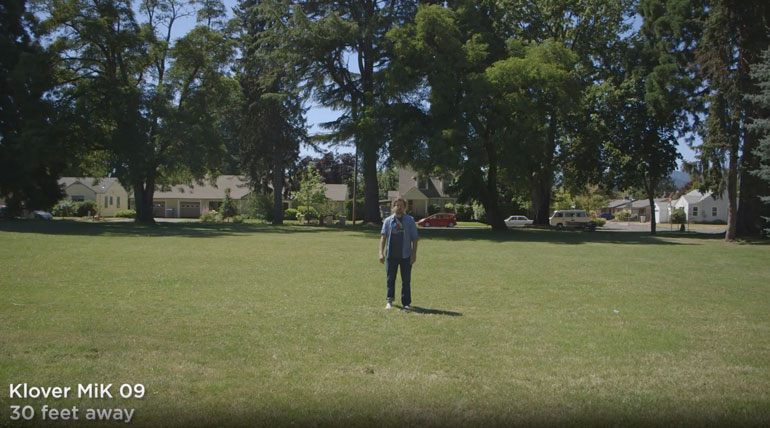
The parabolic microphone picks up the wind and car noise in the bass frequencies, due to the lav’s built-in EQ, but a quick adjustment in our editor makes the vocals stand out better. That’s one thing the parabolic mic does a good job of, the highs and lows are quite distinct, which allows the vocal range to stand out clearer with a little EQ adjustment.
It’s especially noticeable with the off-axis Neil Young test. With the parabolic mic, we can EQ out much of the music, while preserving the natural sound of the voice. With the shotgun mic, however, the lows, mids, and highs are recorded a lot closer together, so if we try to remove the music, we end up making the voice sound garbled.
It’s pretty impressive how much clarity this little parabolic microphone picks up at 30 feet away, with vocals speaking at a normal, talking level, far quieter than the loud music coming from nearby. The fact that it separates the human frequency from the background noises make it ideal for capturing conversations.
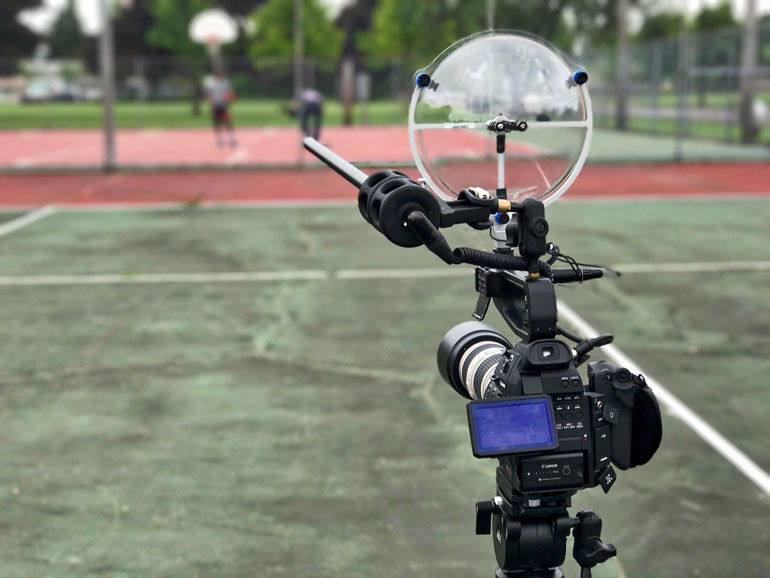
Shooting B-roll with long range audio capture
But imagine shooting a B-roll sequence from 30 feet away, with sounds louder than a regular speaking voice. Situations where you couldn’t attach or hide a wireless lavaliere, even if you wanted to. A gate creaking across the road, a horse barreling across the field, foot steps appearing out of nowhere.
So what do we think of the Sound Shark or Klover MiK 09? Where do we imagine it fits in the pro videographer’s workflow? Does it belong in your documentary filmmaking kit?
Final Thoughts
There are a few scenarios where someone might choose owning a small on-camera parabolic microphone over a shotgun. Namely, for someone just getting started with video, you could purchase one good lavaliere kit, along with the parabolic dish, and you’d be set for both body-mounted interviews as well as on-camera audio capture, from a wide range of distances.
That’s one of the marketing arguments for the Sound Shark, aimed at potential users who don’t already own other mics and want something that’s versatile for a variety of shoots.
But for most of our readers, you probably already have a shotgun mic or two, as well as a couple lav kits. So is there a reason to own a small, on camera parabolic microphone like the Sound Shark or Klover MiK 09?
Yes, you can certainly attach a wireless lav kit to a subject and shoot them from a long distance away. In fact, we started this article talking about parabolic mic usage along NFL sidelines. But a few years ago, NFL Films actually started mounting small wireless lavs to the inside of players helmets. That’s the beauty of wireless technology getting smaller and better.
But there are many times when you can’t attach a mic to a subject, whether it’s outside their clothes or hidden somewhere. It could be a cultural thing, or practical limitation, or maybe it’s simply awkward trying to hide a lav inside a bride’s wedding dress. Or maybe you’re shooting a series of man on the street interviews, or kids at a school, and you just don’t have time to hide a lav on people.
In any of these scenarios, it could come quite handy to have a parabolic microphone on your camera, getting great interview audio from subjects at varying distances, without having to worry about attaching a mic to anybody.
Similarly, as we discussed in our Rode NTG8 article, one of the advantages of using a long-distance directional microphone is you can place the mic on a light stand or boom pole near your subject, but not as near as most short shotguns would require for ideal capture. That way you can have a friend or another inexperienced person hold the a boom pole, or place a stand well out of the way of the camera, without worrying about the mic getting in the shot.
It may seem counter intuitive, to use a more directional microphone when there are less experienced (or less accurate) hands controlling it, but you have to consider the distance and angle of the subject. In a pro’s hands, they will hold any microphone, including a highly directional long shotgun, within a couple feet of the subject. Whenever the subject moves slightly outside of the microphone’s focus, they move farther off-axis quicker.
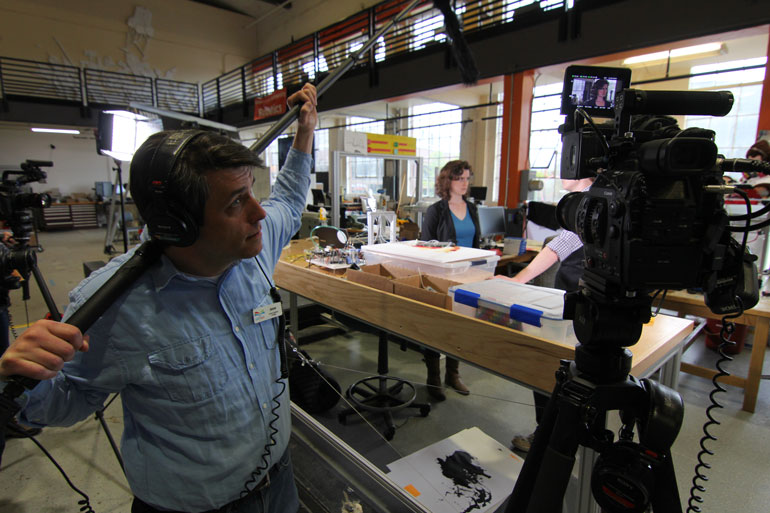
Got a volunteer to hold the boom pole and Rode NTG8 on a recent shoot
However, at a distance of 5-6 feet, for example, the subject doesn’t have to be dead center along the mic’s axis, since there’s some wiggle room for movement. Yes, the preamp or gain will have to be increased to make up for the mic’s distance, which means the overall noise floor as well as background noise will increase. Things that a sound guy would never allow.
But in this scenario, what you lose in slight loss of audio quality and isolation on the subject, you gain in keeping the mic out of the shot. And remember, when a pro sound guy holds a boom mic 2 feet from a subject, the pro camera operator has to communicate any framing and lens changes to the sound guy in order to keep the mic out of the frame. A two-way stream of communication that works well on a controlled Hollywood set, but not so much on a fast-paced run and gun documentary shoot.
Last but not least, as demonstrated in the test video (with EQ adjustments), a parabolic microphone can bring more clarity to the human voice at 6 feet and beyond, with better off axis rejection, than an on-camera shotgun. It’s easier to isolate the voice when EQ-ing. But of course, it does require a little bit of EQ-ing to bring out the best in the parabolic audio capture, and not everyone is comfortable with that or has the time or software to mess with audio finessing. For example, the Sound Shark hobbyist crowd.
Part of the reason why the parabolic microphone is clearer at longer distances is because a shotgun microphone can only reduce unwanted noise outside of the center of the pickup pattern. Whereas with a parabolic microphone, the dish actually amplifies the audio signal of whatever it’s directly pointed at, via the physics of the parabolic dish, and ignoring the noise outside of the center.
In other words, a shotgun microphone can only reduce unwanted sounds, while a parabolic microphone can actually amplify the desired source of sound. (That changes completely with something like the Schoeps SuperCMIT shotgun, which digitally cancels out background noise… but presently we don’t have $4500 to spend on a shotgun microphone).
So yes, we do see a place for the Sound Shark or Klover MiK 09 in documentary kits, and possibly even corporate video production kits, when they’re not as controlled. If you already have a spare lavaliere, it’s even more worth considering, since it won’t set your wallet back that much.
The most important piece of the puzzle is that furry wind screen. It really does normalize this strange satellite dish sitting on top of your camera. If you like to talk to passerby about gear, then by all means, fly the parabolic mic naked. But if you like to remain in the background, without calling attention to your gear, then get the dead kitty.
Finally, after spending some time with this little parabolic mic, we’re curious now, is there room for a Klover 16-inch parabolic microphone on a documentary production? Maybe one day we’ll find out. In the meantime, send us your questions, comments, or ideas for gear reviews over at our contact page.
Happy shooting!
