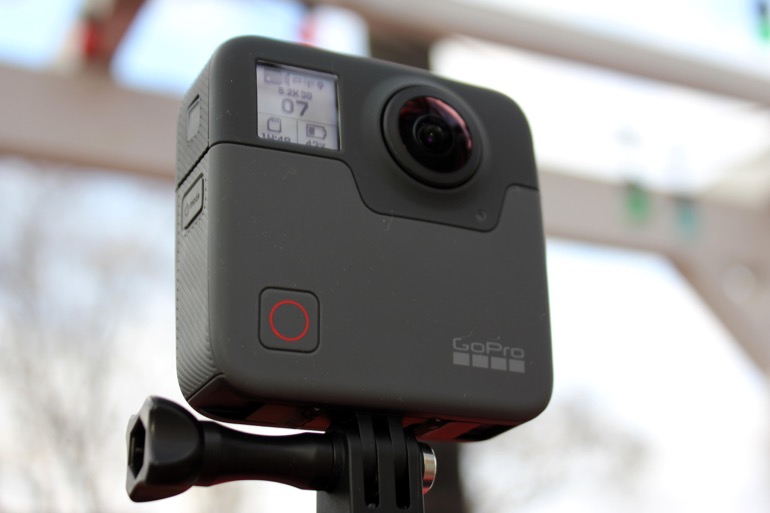
GoPro 360 and Fusion Studio
Guest post by Brady Betzel
Just like 3D televisions and Google Glass, 360 video and virtual reality video seem to be a forced trend that might click with the general public, but needs a lot of compelling content to kickstart it.
One company that could bring 360 action videos to the mainstream - and is known for creating compelling (and mind blowing) content - is GoPro. GoPro really began resonating with the public when they released the Hero 3 action cam, a 4K capable action camera that could withstand water and minor drops while continuing to capture broadcast quality video.
If you watch any reality TV, you’ve seen GoPro cameras in action. The GoPro Hero is the pinnacle action camera line and is so good that it seems like they are having trouble getting customers to upgrade and buy the newer Hero cams, like the Hero 5 or Hero 6, because of how complete their previous cams were.
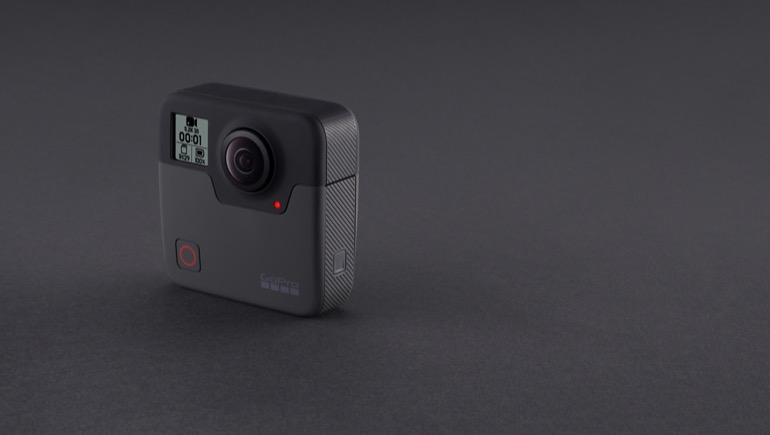
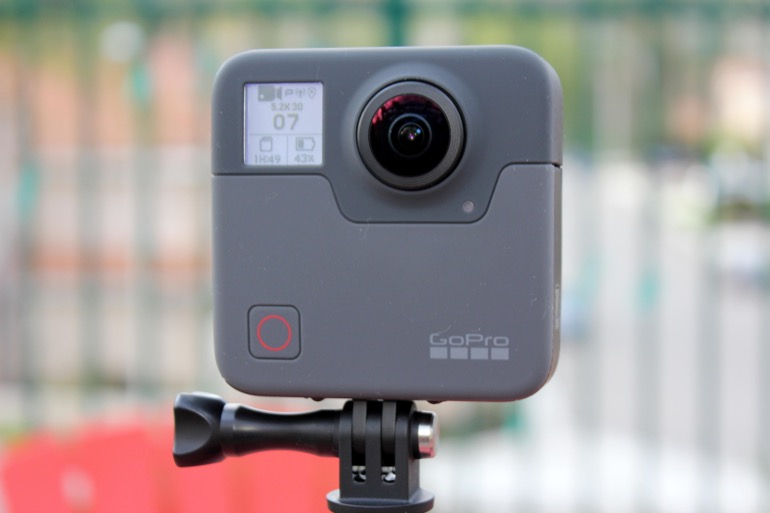
One way GoPro is trying to stay competitive while holding on to their extreme sports roots is with the GoPro Fusion camera. The GoPro Fusion is a 360 degree video camera that can record ambisonic audio (a sphere like surround sound recording and playback technique) using Ambix.
To set the Fusion apart from other 360 cameras like the Samsung Gear 360, Ricoh Theta V, Nikon KeyMission 360, and Yi 360 VR, GoPro is seemingly banking on both damage resistance, as well as the ability to take a 16:9, 1920x1080 section of the 360 video captured on the Fusion and export it is a standalone video, which GoPro labels this Overcapture.
While it’s not the only 360 camera to use this idea, it falls under the GoPro name which holds a lot of value on its own. To go even further, GoPro touts that its overcapture can be done on a mobile phone app (at the moment iOS only) as well as desktop software.
So for nerds like me who can’t stop reading about tech and cameras in AND out of work, what are the perks that separate the GoPro Fusion from other cameras?
GoPro protune flat color profile
GoPro’s Protune flat color profile is an obvious perk - it allows for a little extra crunch in the shadows or brightening of the highlights, without losing all the detail when you bring the footage through a non-linear editor like Adobe Premiere Pro or Blackmagic’s DaVinci Resolve.
The colorist in me wants to always use the flat ProTune setting because, of course, we can make it look better than a standard GoPro color profile...right? Maybe or maybe not, but in reality GoPro’s Protune Color setting looks great.
GoPro’s Standard Color mode seems to oversaturate colors like blue and green as well as set the contrast of the video or image to a good S-curve, and the overall image typically looks great. However, if you want to turn the blues teal, the grass brown, and the sky purple - the flat ProTune color profile is where you will want to live. You have a little more flexibility when swinging hues around and bumping the contrast.
Multi-Cam Shoots with One Camera
One of the most glaring examples of how useful the Fusion could be for professional users is the ability to capture multiple angles, in sync, from one camera. For example, if you work in any sort of documentary or reality television, conversations inside of cars can require lots of small cameras when filming, and lots of work in post production to sync and group.
If you use a Fusion you can have at the least the passenger, driver, and view out the windshield from one camera. That's pretty incredible considering that is at least 3 standard GoPro’s worth of footage, albeit only 1920x1080 at the moment.
What’s more is that the Fusion is water resistant down to 16 ft and generally built to handle rough circumstances - search "GoPro fails" on YouTube and you’ll see what I mean. Over the past 5-7 years of my GoPro use I’ve really grown to like how the cameras operate and generally have no technical problems, so I am pretty loyal to the brand. I’ve dropped and fumbled a lot of GoPros from the Hero 3, 4, 5 and even the Session 5 without any technical problems.
Price and competition
What could be the potential drawbacks of the GoPro Fusion? Price. The Fusion starts at $699 which includes the camera, the very well built tripod/selfie stick, USB-C cable, two very sturdy mounts, a kind of strange case, and a battery.
The Fusion is priced similarly to its direct competitor, the Garmin VIRB, except the VIRB is actually $100 more. What doesn’t the Fusion include with purchase? Well the two mandatory memory cards, which if you have a few GoPro Heros lying around, I guess you could steal those memory cards and pop those into the Fusion. But if not, you will need to budget at least $120 for some memory cards, bringing you to at least $820 + tax and shipping - not cheap in my book.
On GoPro’s website they show a link to purchase two SanDisk Extreme microSDXC cards for $119. Keep in mind that there are certain cards that GoPro deems “Works with GoPro” which you can check out here. If you read through the GoPro Reddit you can find some people’s experiences. This Reddit is generally a great place to see honest feedback and examples of shooting you can do with not only the Fusion but other action cams.
GoPro Fusion Specs
Alright so enough pontificating and back to the tech specs and some real world testing.
Here are the GoPro Fusion camera specs:
Video Resolution: 5.2k (4992x2496) @ 30fps allows for 1080/30p Overcaptures- GoPro offers a more in depth description of how they arrived at this resolution here: https://gopro.com/news/beyond-counting-pixels--defining-resolution-in-spherical.
Video Resolution: 3k (3000x1504) @ 60fps allows for 720p/60p Overcaptures
Field of View: Spherical
Photo Resolution: 5760x2880 in JPG or RAW (.GPR)
Shooting Modes: Video, Photo (Single, Burst, or Night), Timelapse (Timelapse Video, Timelapse Photo, or Night Lapse)
ISO (Photo): 100-800
ISO (Video): 100-6400
Shutterspeed: up to 30 seconds
Voice Command Compatible
Connections: WiFi,Bluetooth
Find My Camera function
First Impressions
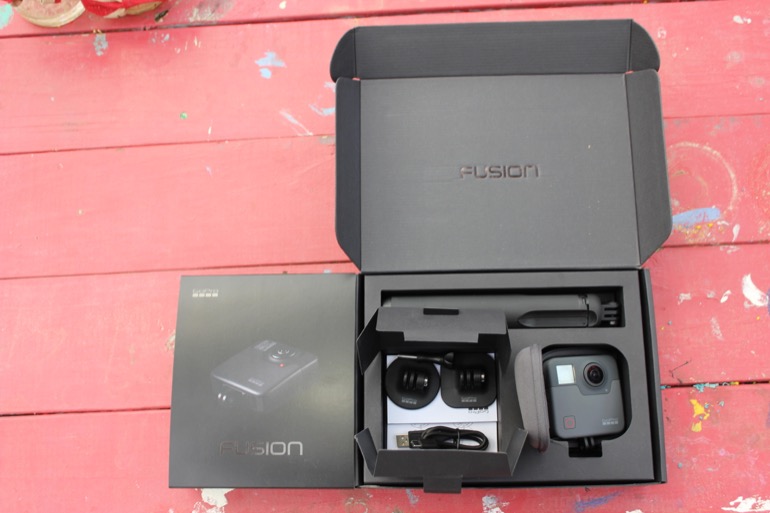
Once I opened the Fusion retail packaging I immediately charged the Fusion on my Samsung Super Speed USB charger. You could do the same on a Super Speed USB charging port on a desktop or laptop. While it was already charged 80% out of the box, it took about an hour to fully charge the Fusion battery from being flat.
However, from zero battery life you are definitely going to need to let it go overnight. I can’t really tell you how long it took from zero to charge but it seems like 6 hours. It will last a little over an hour when filming 5.2k @ 30fps.
Right when I picked up the Fusion I could feel the build quality. In fact, I felt like the doors that swing open to access the USB-C port, battery, and memory cards are easier to use than the Hero 5’s doors and a little more sturdy.
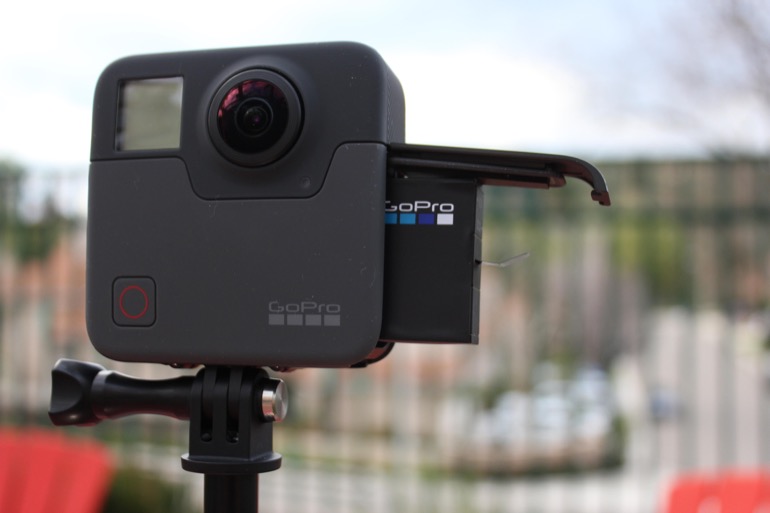
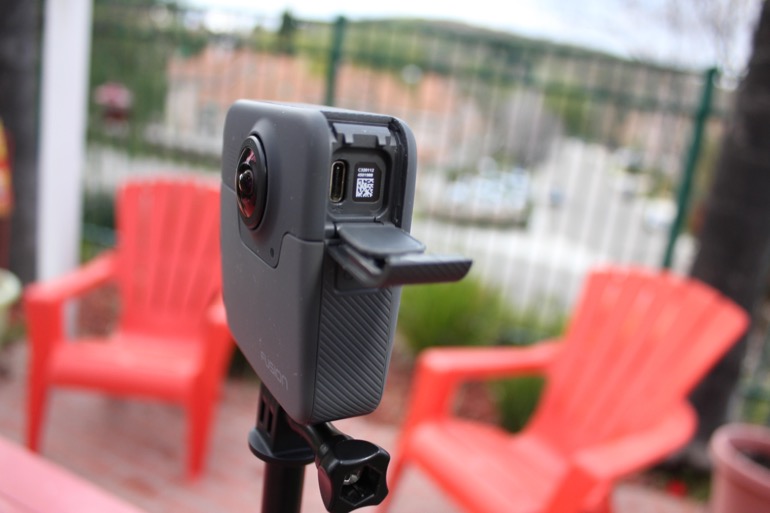
Overall the Fusion itself is on the large side. It is about the size of two Hero 5 or 6s stacked on top of each other (which makes sense since this is essentially two cameras in one body). The Fusion’s shape is a sort of irregular polygon with the bottom being a little narrower than that top. To be honest it’s a little odd, it probably should be a little more ergonomic.
The camera itself feels like a matte-finished rubber, similar to the Hero 5 or 6. Unlike the Hero line of GoPros, the lenses do not have interchangeable covers on the top of them, leaving the lenses very, VERY exposed. This might be the time to pitch the GoPro Plus program.
For $4.99 a month you can exchange a camera up to 2 times per year if anything happens to it, as well as upload unlimited photos and 35 hours of videos for any camera from the Hero 2 and up, except for the Fusion (bummer). You also get 20% off accessories, as well as VIP Support. They say VIP support means front of the line access but I wasn’t able to test it so I’m not sure how that works, nor could I exchange a camera, but in theory this sounds like a good idea on a $700 camera with exposed lenses. Check out GoPro Plus here.
This is also the point where I plead with GoPro: can we protect those lenses somehow? GoPro has made a living off cameras surviving almost anything, and while the Fusion is water-proof up to 16ft without housing, the lenses are what I worry about most. If you scratch one of those, your media is pretty much toast.
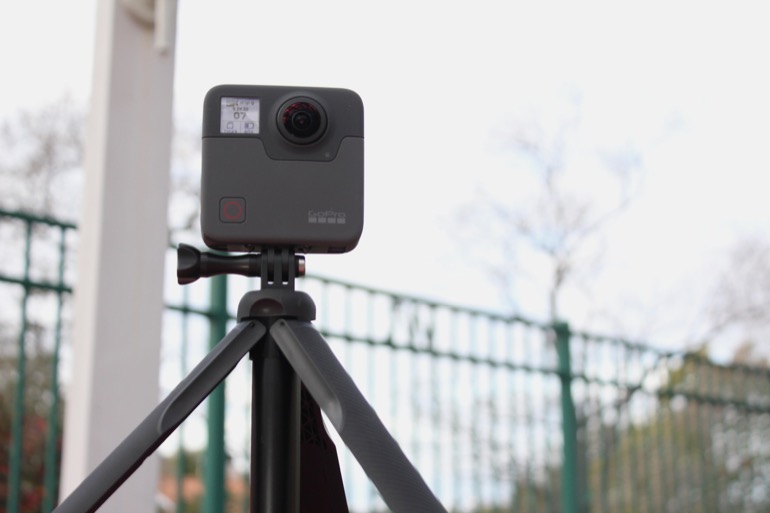
After all those thoughts, I had the Fusion fully charged and I quickly got familiar with the menu, which is similar to some old GoPro menus without a touchscreen - clunky. The voice control is a nice touch but sometimes I don’t want to be talking to myself and a camera. That being said, the voice commands do work pretty well. However, I would love a joy-stick like button to get around the menus, because pushing the mode and record buttons confuses my little brain.
Using the Menus
To really set up the Fusion efficiently you need to use an iOS or Android based phone. At the moment I have a Samsung Galaxy S8+ which controls the Fusion well, except that they haven’t released the Overcapture function like in iOS. I really love how you can move your phone around in 360 degree space to see what your Fusion is seeing.
Going through the menus on the phone, you first choose your shooting mode: Video, Timelapse, or Photo. In the video menu you can choose between 5.2k @ 30fps or 3k @ 60fps and whether you want to use ProTune or not.
In Photo Mode you can choose either ProTune or RAW - Burst Mode or Night Photo Mode. In Timelapse Mode you can choose between Timelapse Photo, Timelapse Video, or Timelapse Night Mode.
Shooting a Timelapse
With all these options, my advice is to shoot video to as close to the finished project as possible, so if you are doing a timelapse use the Timelapse Video Mode, where the Fusion will do all of the hard work putting the video together.
As I went through using the Fusion I quickly learned that the post production is the roadblock in 360 video. It is not efficient even if you have a 40 core monster system. And it’s not GoPro’s fault, all 360 video is cumbersome and bandwidth hogging. But shooting as close to the final clip length as possible will give you a leg up on editing.
In my mind there are a few specific cases for using the Fusion over a standard GoPro action cam like the Hero 5 or 6: obviously 360 video/photos, the infamous Overcapture, and 360 timelapses.
What I wasn’t sure about before I started reviewing the Fusion was: would I actually pick it up and use it easily like the Hero, or would I need to actively think of times and scenarios to use it in?
What I always loved about the Hero line of action cams was that I could just pick it up and go without thinking about it. With the Fusion I find myself thinking about what I will use it for. That’s not necessarily a bad thing, but at first glance the Fusion should be a camera that lets you film and pick what you want later, and/or just upload it as a 360 video to YouTube to watch on your Samsung Gear VR headset.
If you are lifelong GoPro-er like me, the Fusion takes a change of mindset. That being said, I still needed to test it out so I took the Fusion out to the park and let it run a video timelapse while I was playing around with my kids. It was a partly cloudy day, so it was perfect to get some nice cloud-lapse action.
As I quickly found out, while there are in-camera settings like exposure values and ISO values, the bulk of the processing happens in post production using GoPro’s Fusion Studio, GoPro’s Adobe After Effects and Premiere Pro plugins, and even some 3rd party voodoo with Boris FX’s Boris Continuum Complete VR Unit in an app like Blackmagic Design’s DaVinci Resolve 14.
I set the Fusion to Timelapse Video mode on a 2 second interval, at 5.2k, and GoPro Protune turned on, which allows for some fine tuning like setting the ISO Max to 1600 and EV compensation (exposure compensation), which I left at 0 for this, since the clouds weren’t too blown out and shadows were holding details.
Using the Fusion menu system on the camera brings me back to the days of trying to navigate the older Hero line of GoPros like I mentioned earlier. It feels like you have both arms tied behind your back. I understand it might be a little weird to figure out the touchscreen on the Fusion but hey that’s why I’m paying GoPro $700.
Overall, though, setting up the timelapse wasn’t too painful. And using the Timelapse Video Mode is the most efficient way to get a 360 timelapse onto YouTube, unless you have many hours to post process your files. Even when you use Timelapse Video Mode, make sure you leave a few hours for post processing in Fusion Studio.
Shooting a 360 Video
To test the heart of the Fusion, I wanted to record a short video driving to work through Hollywood, specifically Hollywood Blvd at the Hollywood and Highland complex where the Dolby Theater and El Capitan Theater are located.
I used an older GoPro suction cup mount that I had at home with the Fusion to mount it to my windshield while I drove. I was a little hesitant since it is a heavier camera and I wasn’t keen on running over the Fusion on Hollywood Blvd, but luckily for me I will be able to return the Fusion to GoPro once I’m done with the review because it didn’t fall off!
One thing that is really handy with the video setup of the Fusion is that you only have two options: 5.2k/30fps or 3k/60fps - and since I wanted to get the highest quality as well as potentially use the Overcapture to isolate some of the video, I chose the 5.2k to squeeze every pixel I could out of the image.
I mounted the camera on the windshield and hit record to immediately go into video record mode, not too much thinking involved especially since a lot of settings occur in the post production of the Fusion camera using the Fusion Studio software.
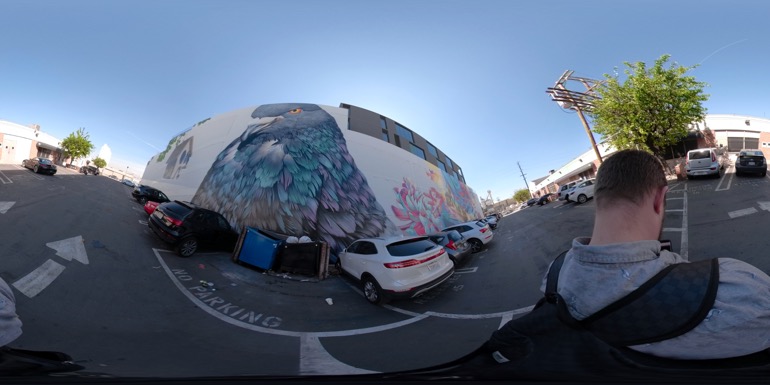
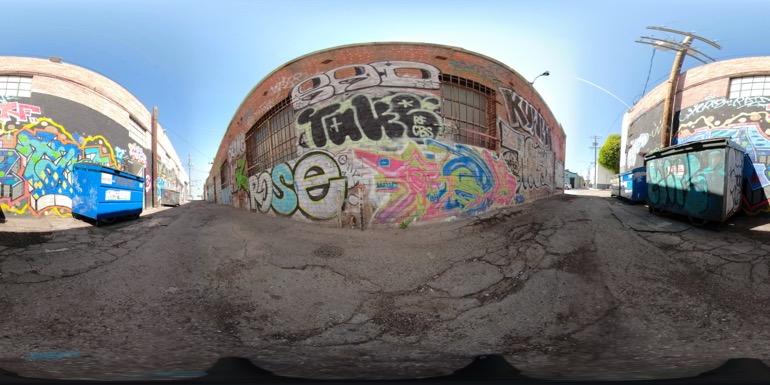
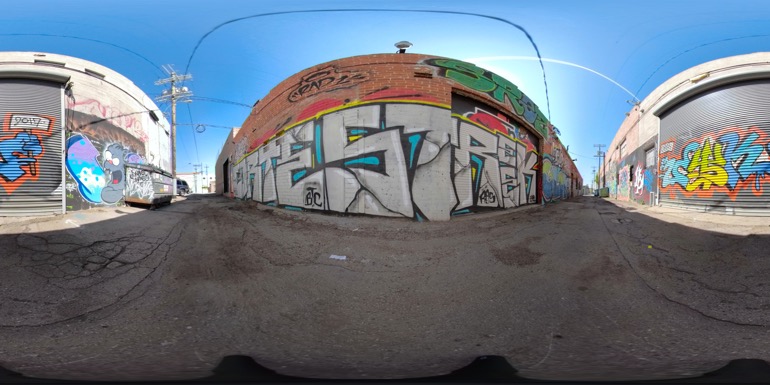
You can also check out some 360 photos I took that are about 6K resolution that I posted to the free hosting site www.Memento360.com. Click on the image to go to its 360 degree view.
GoPro Fusion Studio
All-in-all the camera itself is above average. The hard sell, however, is the post processing of the footage. In this review I am focusing on GoPro Fusion Studio, the Adobe Premiere along with the GoPro VR plugins, as well as how to manipulate the footage in Blackmagic Resolve using the Boris FX Continuum Complete 11 OFX plugins.
Previously, I hadn’t really thought too much about 360/VR video and didn’t really put it together how much storage and bandwidth it requires. You will learn that lesson quickly once you begin to transfer your footage to your computer.
Once you install the Fusion Studio Software (which also installs the Adobe Premiere Pro and After Effects VR plugins), you have two options: do the work off the camera or manually transfer the media to your computer and point Fusion Studio to its location. Either way takes a tremendous amount of time and processing power.
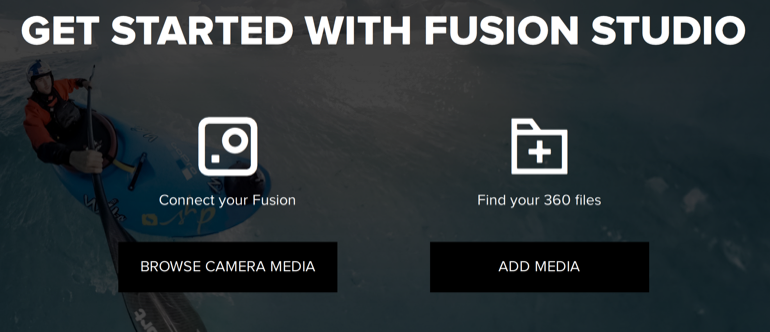
Personally, I think that transferring your media to a folder on your computer and pointing Fusion Studio to that folder is faster since you aren’t relying on the USB-C connection and Fusion camera to process your media.

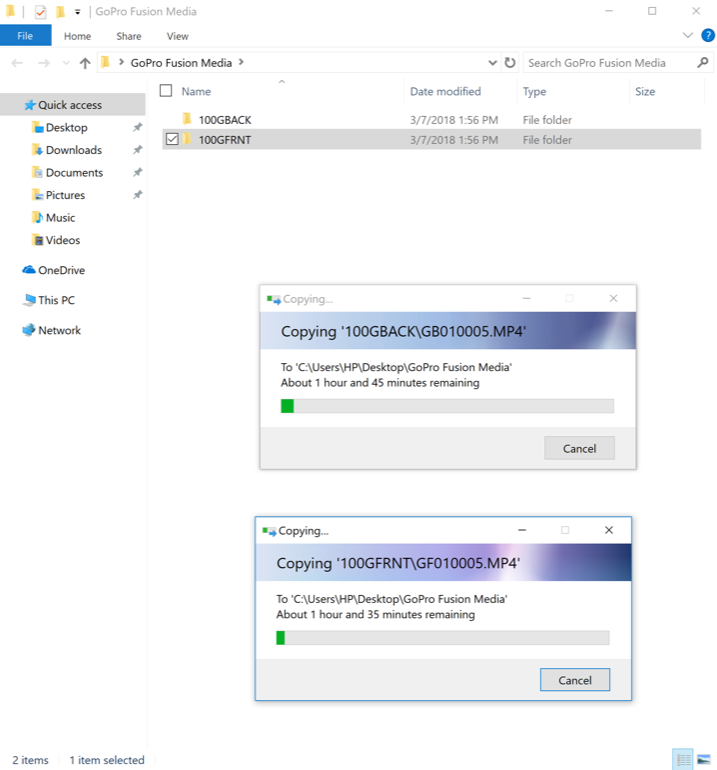
All that being said, I transferred the 25 minutes of footage I had filmed (separated into a Front and Back Camera folder) in about 30-40 minutes. Keep in mind you need to transfer the entire folder of contents for each camera to your system. This is where you should be very organized and keep your events categorized, possibly with a date in the name like “20180307 Fusion Test” for the main folder, with subfolders “100GBACK” and “100GFRNT” completely in tact.
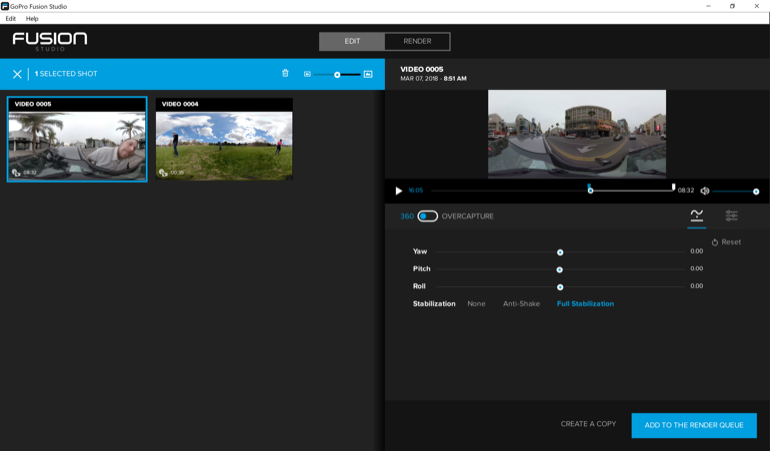
Each time you boot up Fusion Studio, previews have to be made whether you are working from the camera or your local drive, and those usually only take about 5 minutes or so. From there you can choose the video you want to work from, and decide whether you want to make a 360 video or isolate a section using Overcapture.
If you are exporting a 360 still image you will adjust your capture, select an export setting which is oddly the same as the video options, and then change the image settings in the render que - an odd oversight.
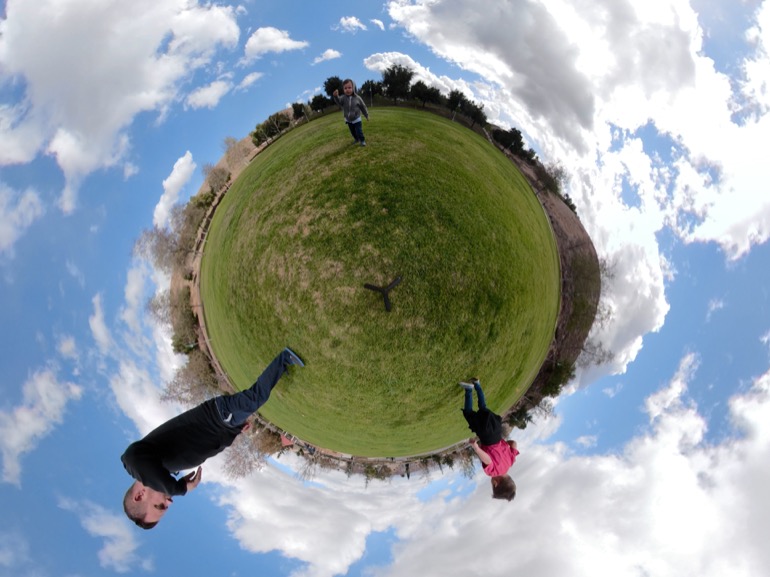
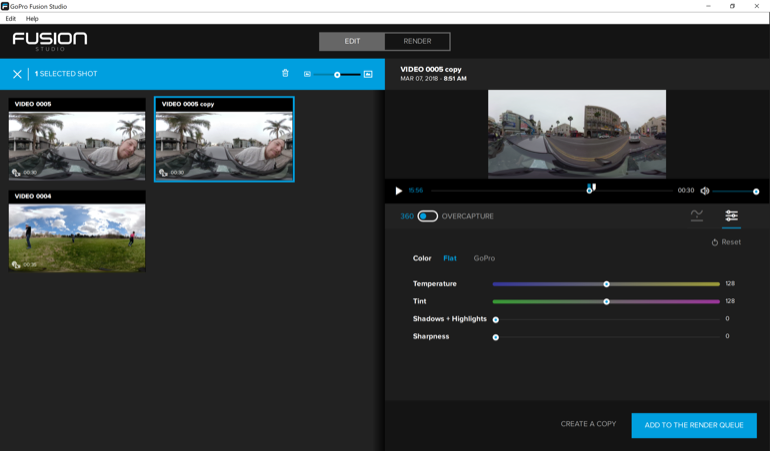
In Overcapture mode you can create a TinyPlanet look (where all the video is stuffed into the capture window and it looks like you are standing on top of the world, a 16x9 isolation of any direction you move the viewer to, or a 4x3 isolation. In both modes you can fix things like the horizon and also adjust color settings like the GoPro Flat or GoPro Color settings.
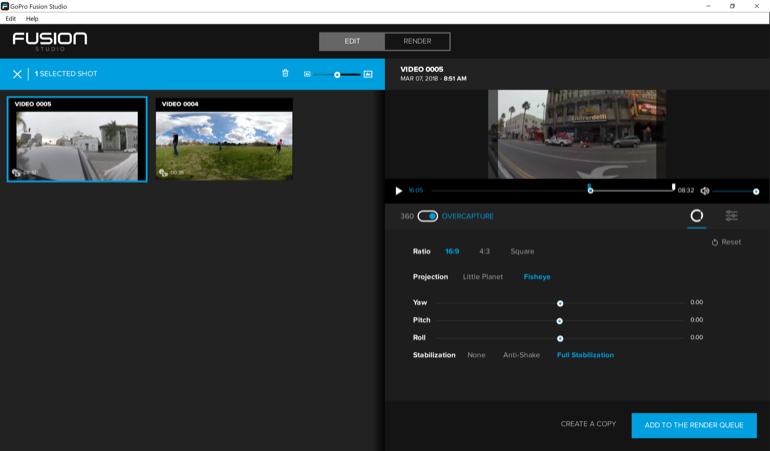
In addition you can adjust Temperature, Tint, Shadow + Highlights, and/or Sharpness. I love that you can change the color profile from Flat to Color in post production instead of before you film. I'm not sure if that takes away any dynamic range or not, but it seems like GoPro is always filming in a flat color profile and adding their own LUT if you want it. A great improvement in workflow.
Rendering and Exporting
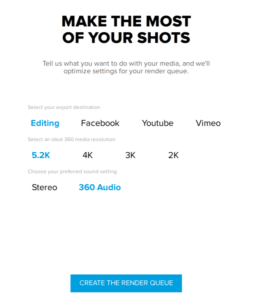
Once you fix any white balance issues or horizon problems you are ready to export. Fusion Studio gives you a few options: Editing, Facebook, YouTube, and Vimeo. You can identify and select options like resolution and audio layouts (either Stereo or 360 if the destination supports it).
Once you select the Editing preset you add it to the Render Queue, from there you can click on the queued video and choose whether you want to use H.264, Cineform, or ProRes.
Fun fact: ProRes export works on a Windows PC! That being said, I personally like Cineform for its color reliability between operating systems, but that is just a personal opinion.
Render time is the definite downside to 360 video in general. I am using a high end HP ZBook x2 tablet with an Intel i7 Quad Core CPU, 32GB of RAM, and an NVIDIA QUADRO M620 (2GB) GPU - so while it’s not a 44 core monster, it has some juice behind it.
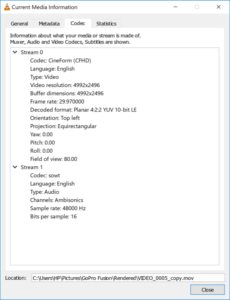
The 30 second test clip I exported with the Editing preset in Flat color with Image Stabilization applied took an hour to export, and the resulting file was a 1.5GB - 4992x2496 4:2:2 Cineform 10-bit YUV Quicktime with Ambisonic audio. That’s a big and long render in my opinion.
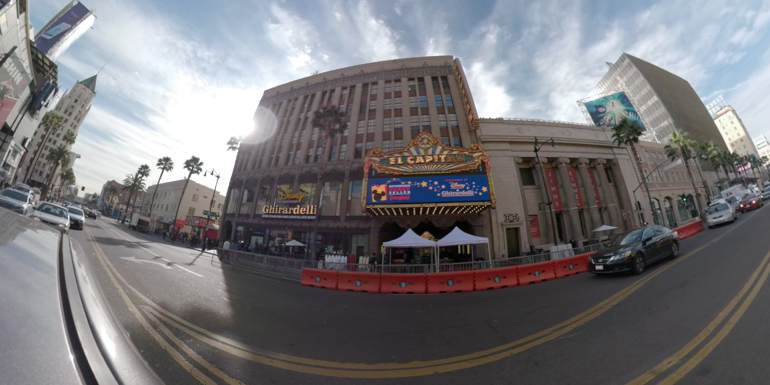
Once you are done in Fusion Studio you can either upload your video to the server of your choice like YouTube or go even further and load it into Adobe Premiere. I wanted to work inside of Adobe Premiere since that is probably what most people will be working inside of. Keep in mind you will need to run the clips or timelapses through Fusion Studio first to get an editable Quicktime that is stitched together, and then you can send it over to Premiere for further editing or color correction.
Editing In Adobe Premiere
One roadblock with Premiere is setting up your sequences properly before you begin so that your exports work correctly. Usually export problems occur because of incorrect audio tracks being assigned in the original sequence preset, mixing up mono or discrete instead of 5.1 or stereo.
When setting up a Premiere sequence to use with the Fusion files (or 360 video with 360 audio in general) you need to set it up properly before you edit. Specifically the preset under VR > Monoscopic 29.97 > 4096 x 2048 Ambisonics, if you are exporting a full 360 video with 360 audio. If you are using stereo audio, select that preset. And if you are planning on doing some Overcapture style editing, select the 1920 x 960 version and change your vertical aspect ratio to 1080. In addition, check that your timeline has 4 channels of audio, Audio Master is Multichannel, and Track Type is Adaptive. If you don’t you might have some undesirable outcomes like no 360 audio to go with your 360 video.
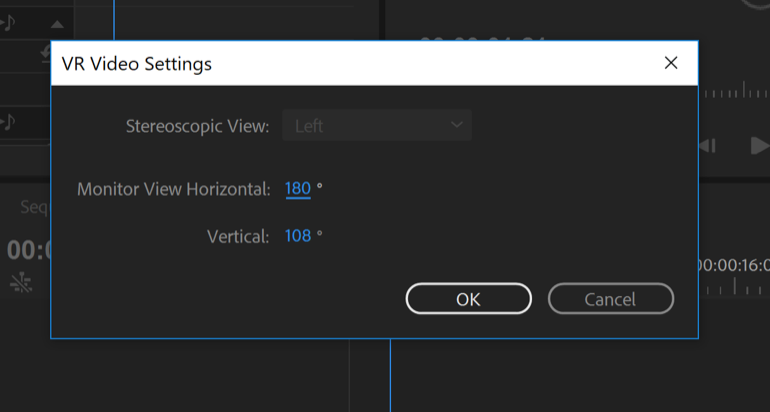
From there if you are using the 4096 x 2048 setting you will want to set your Premiere viewer to VR mode. To set it to VR mode you are going to right click on your Record viewer, scroll down to VR Video, click Enable, right click again, scroll down to VR Video, click settings, and change the Monitor Horizontal View to 180 (leave Vertical at 108). This way you have a 16x9 view when you click and scroll around the VR video on your new timeline.
In terms of editing you can edit and color correct like normal. If you want to add text you will use the GoPro VR Layers, and if you want to straighten the horizon you will use the corresponding GoPro VR Horizon plugin. Under each plugin there are options like correcting the Yaw, Pitch, Roll, and even Field of View.
If you keyframe these you will want to experiment with the Smooth transition settings to not edit a jerky video. The Smooth Transition setting really comes into play when you are doing an Overcapture edit. Again, when editing an Overcapture video you want to use a 1920x1080 timeline. To edit a flat 1920x1080 video using multiple parts of your 360 video you are going to want to apply the GoPro VR Reframe plugin on to your footage. You will also not want to view your sequence in the VR display that I described earlier, since technically you are creating a flat 1920 x 1080 video.
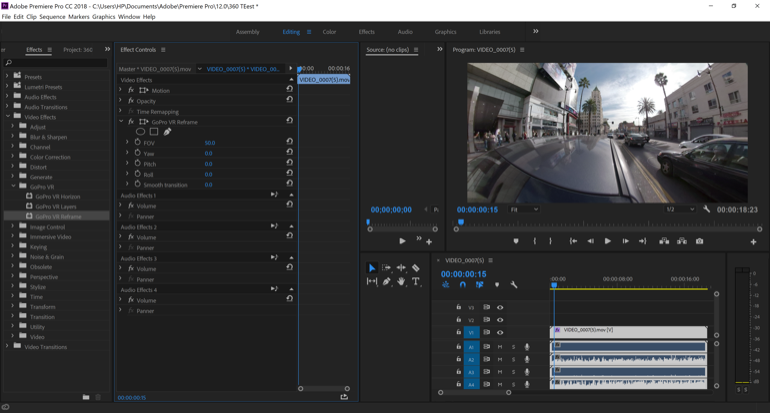
Inside of the Reframe plugin you can keyframe movements using Field of View, Yaw, Pitch, Roll, and don’t forget Smooth Transition. This takes some practice but can make for some very interesting videos. Here is the same 360 video clip from above but edited in Adobe Premiere Pro using the GoPro VR Reframe to do an “Overcapture” edit. With just a few keyframes you can get some surprisingly great results and dynamic camera moves:
When you are ready to export your final VR video from Adobe Premiere, I would suggest that you send your sequence to Adobe Media Encoder. Not only does it allow you to still use Premiere but the VR export templates are a little different.
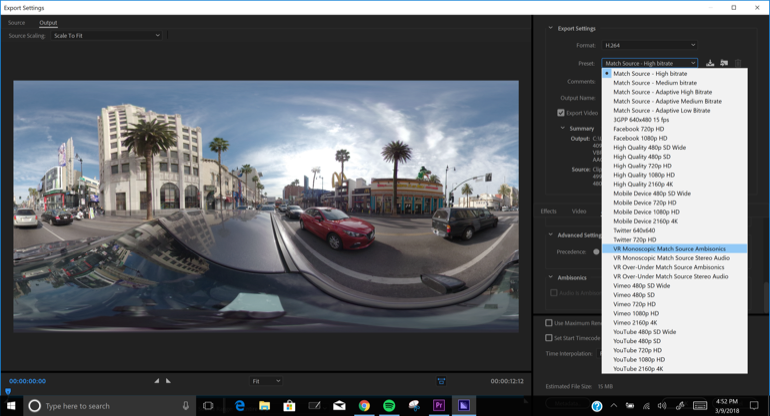
In Adobe Media Encoder you probably will want to export a YouTube compatible H.264 with VR metadata built in. Under Format select H.264, under Preset choose “VR Monoscopic Match Source Ambisonics” or “...Stereo” depending on your audio layout. This preset is handy because it will include any metadata settings that the streaming services needs to properly playback your 360 video, including 4 channels of audio with the VR flag, as well the the video with the VR flag.
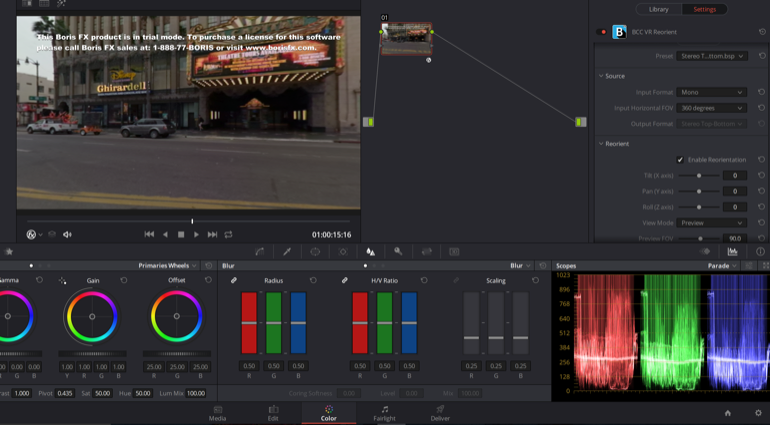
To test out the footage inside a professional color correction app, I exported a Flat Color Quicktime from Fusion Studio. However, as of this review Resolve 14.3 does not natively support 360 video, so I reached out to BorisFX and found that BCC 11 via OpenFX has a VR suite that will allow you to use 360 video inside of Resolve.
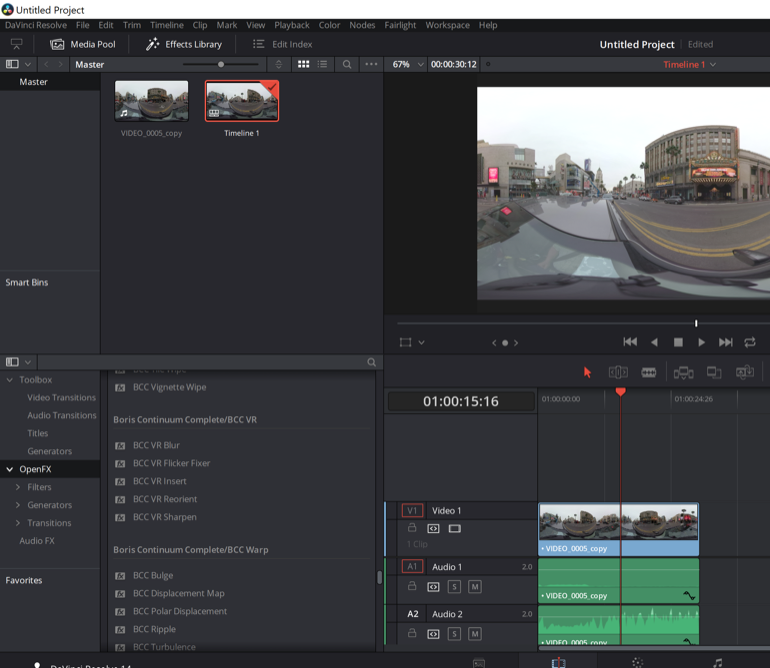
I downloaded the trial of the BCC 11 OpenFX package and quickly was able to apply the BCC VR Reorient, specify Stereo Top/Bottom, Input format Mono, and bam I was in business. I wish I could pan around inside the viewer, but since it’s OpenFX it might be a limitation of Resolve that allows me to pan around in the inspector. To run BCC VR inside of Resolve you would definitely want a high power machine with a beefy GPU like a NVIDIA 1080ti.
Conclusion
In the end the GoPro Fusion 360 camera with 360 audio recording capability is not a cheap solution for the standard GoPro enthusiast. However, if your interest is piqued or you are already using 360 video, it may be the high quality solution for you.
I have written and somewhat complained about the post processing of 360 video. Well, bad news everyone: this is for any 360 video. So notwithstanding the post production power you need to process these files, the GoPro Fusion is the high quality action camera we have come to expect from GoPro.
My advice is to shoot what you want to upload, no more. If you want to create a lot of 360 content fast, you want to avoid a lot of editing other than some simple in/out point trims to trim the fat of your videos (or in my case, my face looking in the camera before I run away).
The Fusion is a solid version 1 of a product but could really use a version 2. Maybe a better menu/touchscreen function, a better looking form factor, and lens covers like the Hero 5/6 camera line. If you scratch the lenses on the Fusion you are out of luck and better have paid for the GoPro Plus service.
Is $699 plus the cost of the memory cards a fair price? I think it is at the point where we are at, in the evolution of 360 video. As a workflow pipeline for pro-sumers and enthusiasts, 360 video is a heavy lift in post production. GoPro did their best with the ability to use Overcapture on iOS devices, and hopefully Android devices soon. And for what its worth GoPro’s Fusion Studio is actually a pretty handy tool to get your 360 video from camera into an editable format.
So at the point we are at now, the Fusion generally succeeds but has a fair amount of room to grow (as long as the Fusion doesn’t go the way of the Karma drone). If you do what I did and made a simple in camera timelapse with a few frames needing to be trimmed off the top and bottom with no Resolve color correction or editing in an NLE, then 360 video isn’t horrible (time consuming yes, but hair pulling no). But once you get into editing and color correcting 360 video, you may get frustrated.
In general terms, 360 video feels like it doesn’t have a warm and fuzzy home, much like 3D on home television sets felt like. Maybe I’m just jaded by the overall 360 video process and workflow and am being unnecessarily critical of the Fusion when I shouldn’t be. For what it’s worth I love GoPro as a brand, and while there are things that can improve, their products can shoot a phenomenal image, timelapse, and video. And with GoPro’s Protune Color settings you are almost always guaranteed an image Instagram will love.
Brady Betzel is an Emmy nominated Online Editor working at Margarita Mix Hollywood in Hollywood, California where he works on shows like Life Below Zero for National Geographic, Cutthroat Kitchen for Food Network, and many more including documentaries and commercials.
He has worked his way up from working as a Post Production Coordinator to Post Supervisor on talk shows like The Showbiz Show with David Spade, Offline edited on shows such as Bad Girls Club and The Real World, and is trying to not be constantly tackled by his 3 sons.
You can find Brady on Twitter: @allbetzroff and you can check out other shows he has worked on in his IMDB.
Feel free to email him at bradybetzel@gmail.com
