Documentary Filmmaking Equipment List
Documentary, nonfiction, factual, reality, news shooting - there are many ways of describing it, but the art of making a documentary video requires essentially the same film making equipment tools across the board, no matter what you call it.
Below, you'll get our thoroughly tested documentary filmmaking equipment list that is the cornerstone of contemporary videography.
But first, let's talk a little bit about documentary video production, and why the tools you choose are so important to the job.
A Filmmaking Equipment List Built on Portability
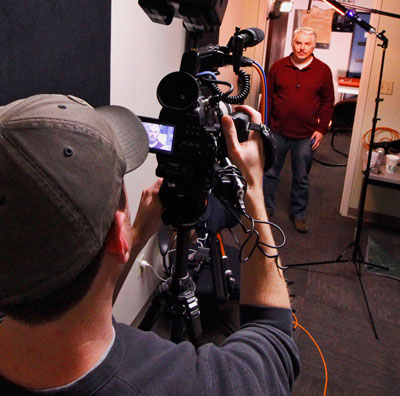
What is the core of documentary filmmaking? You interview one or more subjects and edit their responses - or A-roll - into an engaging story. You may want to add your own voice narration, or place helpful text on the screen, to guide the story forward.
And then you shoot a series of non-interview footage - or B-roll - of the subject performing an action, along with simple cutaways of objects and nature to use as inserts.
Finally, you lay these B-roll clips over the A-roll, ideally into sequences that help the viewer understand the who, what, where, when and why. And after you’ve finessed the edit with some background music, along with a title and credit sequence… congratulations: you’ve made a documentary.
Most simply, you’re video recording someone telling a true story, and then through the process of filmmaking and editing, you’re creating a shorter, more interesting version of that story.
This is somewhat different than promotional video, which we go into more detail in our corporate video production article. With promotional video, even when it’s “documentary style” as opposed to creative advertising, you’re likely to write a script, plan your shots, and start with the end goal in mind, before beginning to shoot. You’re imagining the story, visuals, and emotional response of the audience, long before you pick up a camera.
On the other hand, with documentary, you’re capturing as much footage as you can up front, the vast majority of which will not end up in the final video. So essentially, you’re looking to put together a documentary filmmaking kit that will enable you to shoot as quickly and effectively as possible.
But the style and quality of footage you’re aiming to capture - that can mean the difference between shooting with an iPhone, making a documentary with a DSLR, upgrading to a more expensive cinema camera, or shooting with a large crew on cameras that cost more than your house.
Want to read more about the different types of video projects out there, and what makes each one different? Check out our video production services infographic.
So where do we fit in? And why do we recommend specific filmmaking equipment for the various types of documentary video productions?
In this article, almost every piece of gear we discuss is chosen and optimized for portability and efficiency, in order to capture the greatest amount of footage in the least amount of time, while also pushing for cinematic visuals and high quality audio.
Filmmaking Equipment is the core of videography
Do you get hired for your creative talent, or for the gear you own?
Some professionals who have been in the video production business a long time will advise you to get video production jobs based on your experience, rather than hope you get hired based on the camera you own. After all, camera technology is evolving so rapidly right now, that buying a camera today doesn’t guarantee it’s still relevant in 2 years.
And so the professional veteran who has been at this for 25 years will tell you to rent your gear, rather than save up to buy video equipment.
The problem is, many of us have not been at it since the dawn of time. Yeah, of course it would be great if clients would hire us based on our creative experience and reputation for good work, but how do you get there in the first place?
The truth is, we make a living from our filmmaking equipment. Our families have a better quality of life when we choose better video gear. Which is important for us especially because hey, we’re the Digital Filmmaker crew. Honestly, we wouldn’t be doing this if it didn’t pay the bills. No matter how amazing this work is.
So if we make a living with our filmmaking equipment, do we buy the gear that the industry favors, so we can rent out our stuff to other producers? Or do we buy the equipment that our clients ask for?
The answer is neither.
We choose the video production gear that will allow us to make the best possible videos, with the least amount of headaches.
Video Production Equipment has Diminishing Returns
Imagine a continuum of equipment from left to right. On the far left is Cheap and Simple, and with Inferior Results. On the far right is Expensive and Complex, but with Superior Results.

Yes, you absolutely can shoot a documentary on an iPhone, but it will be a pain to achieve the kind of results that a real video camera can do natively. You can also get a consumer camcorder, but even if you buy the best camcorder money can buy, the results will still look like a camcorder.
Moving down the continuum, you can get a DSLR for that silky filmic look at 24 frames per second, and with the camera being so small and affordable, you'll be able to capture a lot of footage quickly. But without a lot of accessories, attachments, hacks and rigging, you may not be able to consistently capture good audio and usable video.
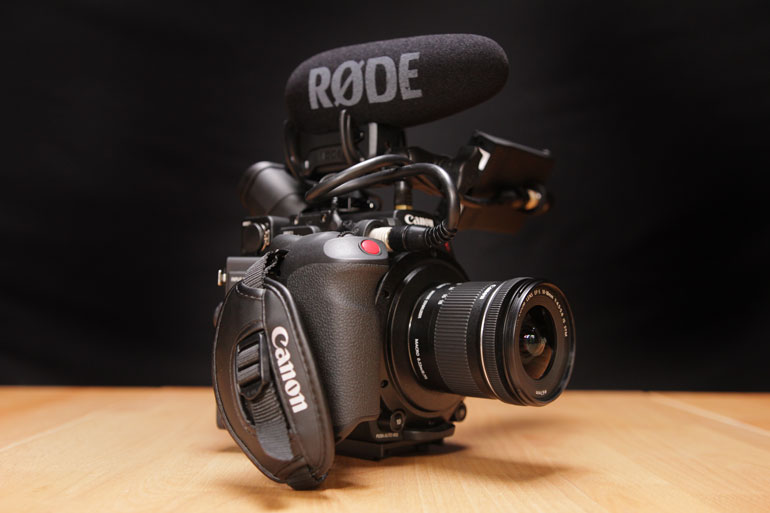
So we come to the digital cinema camera, specifically the Canon Cinema Cameras, notably the Canon C100 and Canon C200.
They have all the advantages of a digital camcorder, but with a beautiful look that you’d expect from a traditional film camera with cinema lenses.
And then of course you could keep moving down the line, and get a bigger and better cinema camera, maybe one that shoots in ultra 4k, 6k, or 8k resolution. Of course then you’ll need a bigger tripod and fluid head, very expensive media to capture at those data rates, most likely a new computer with lots more specs, and if you want to shoot handheld or with a gimbal, you’ll probably need to start working out.
At some point along the line, the complexity and expense of the filmmaking equipment continues to shoot further and further up, while the results don't improve all that much. That's the Law of Diminishing Returns. Realistically, at the far right on the graph, you're spending so much money and adding so much complexity to your production, that your productivity and profit start to diminish.
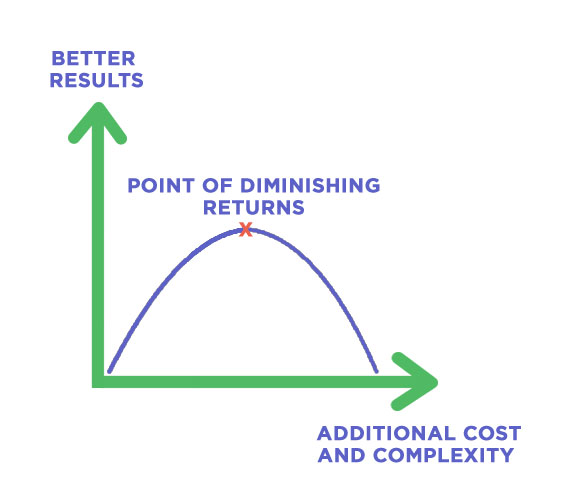
The solution that we’ve come up with is to find a happy medium along the continuum. Affordable prosumer cinema gear allows us to shoot beautiful documentaries quickly and efficiently, which enables us to shoot more docs, edit them faster, get hired more often, and maybe even make a living at this craft.
In the end, maybe our next client hasn’t heard of our reputation before hiring us, but they’ve seen our last video, and the quality impressed them enough to pick up the phone and give us a call.
How To Make A Documentary Shoot Go Smoothly
Choosing the right gear is more than just choosing a camera. It’s everything else, too, that enables you to create better videos than perhaps someone who bought the wrong gear. The right gear allows you to focus on shooting fantastic images, conducting great interviews, and packing and traveling in a way that doesn’t blow your budget.
We’ve all been there, cursing the little piece of gear that is just. not. working. The quick release plate that continues to come loose, so every few minutes you have to stop what you’re doing and tighten the screw again.
Or that microphone that continues to give you trouble, so between every question during the interview, you have to stop the flow of the conversation and go fiddle with the mic. Meanwhile your light runs out of batteries.
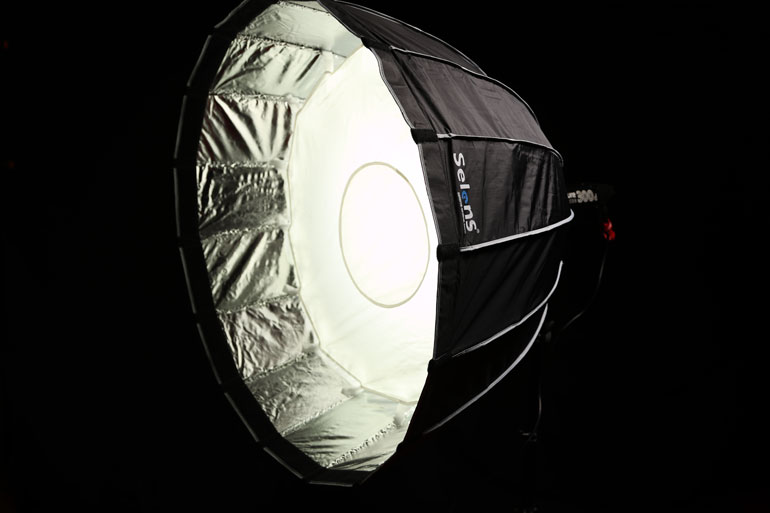
An Octagon softbox is great but can be a huge pain to put together
Your documentary shoot can be ruined by the wrong gear. It’s not just bad gear, because there are some amazing tools out there that are perfect in a controlled environment, like in a studio set or on a corporate video shoot. But on a documentary production, a $15,000 brushless gimbal can create so much extra work for you that you spend half the day staring at your gear rather than capturing the story in front of your camera.
And because docs are about real people, with real schedules and planned activities, messing with the wrong gear will have real consequences on your ability to shoot a decent amount of footage, while also building rapport with your subject.
A lack of both footage and rapport can seriously impact your ability to make a good video, which then affects your chances of getting hired for the next gig. (For more tips on improving a documentary shoot, here's an article we put together for ProductionHub.)
The Best Camera for Documentary Filmmaking
This is perhaps the first question asked by every aspiring documentary filmmaker, and the decision will dictate what kind of other gear you purchase, including camera support, lenses, media, and which computer to edit your video.
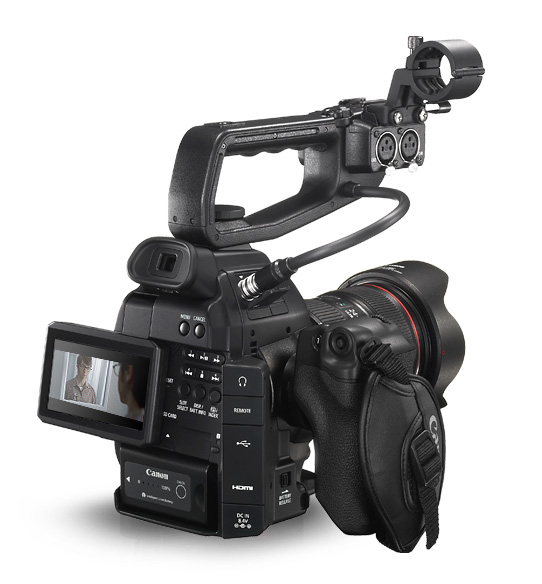
To jump right to the point, we highly recommend the Canon C100 for all types of documentary video producers.
The C100 is the clear successor to the DSLR cameras that have ushered in the DSLR revolution. We have these DSLRs to thank for the leap in image quality that video production has taken in the past few years, especially documentary production. But despite their image capture abilities, the early DSLRs were a pain to use in fast paced, run and gun video production.
The C100, on the other hand, has the XLR inputs you need, the sensor outputs a beautiful image in very low light, the camera has a very innovative autofocus feature that is a godsend for documentary shooting, and it can accept all of Canon’s photo lenses, some of which are very affordable.
We have used three Canon C100 for a few years now, on shoots all over the country, creating stunning looking docs for web series, universities and nonprofit organizations, and big name clients. We’ve shot over 100 documentaries for PBS national and regional stations, including the original web series "Indie Alaska." We’ve been nominated for over 10 Emmy awards and have won two Emmys for work that we shot on the C100.
And honestly, we could shoot with the C100 for another 5 years and it will still be just as fun to use, not to mention profitable.
Why get the C100 mark II over the mark I? Because the C100 mark II has a few important improvements that justify the price increase, including a much better EVF - or Electric View Finder, an internal microphone, better color handling and codecs, slow motion shooting, and a better LCD flip-out screen.
But for the price, the C100 Mark I is a remarkable value, especially with the Dual Pixel Auto Focus (DPAF) installed.
We have had the opportunity to use (and own) many other cameras, including DSLRs, various Sony and Panasonic cinema cameras, and we even own the Canon C300 mark II (which we recommend for corporate video production). But we still stand by the C100 as the very best camera for filming a documentary.
Canon XC10 vs C100
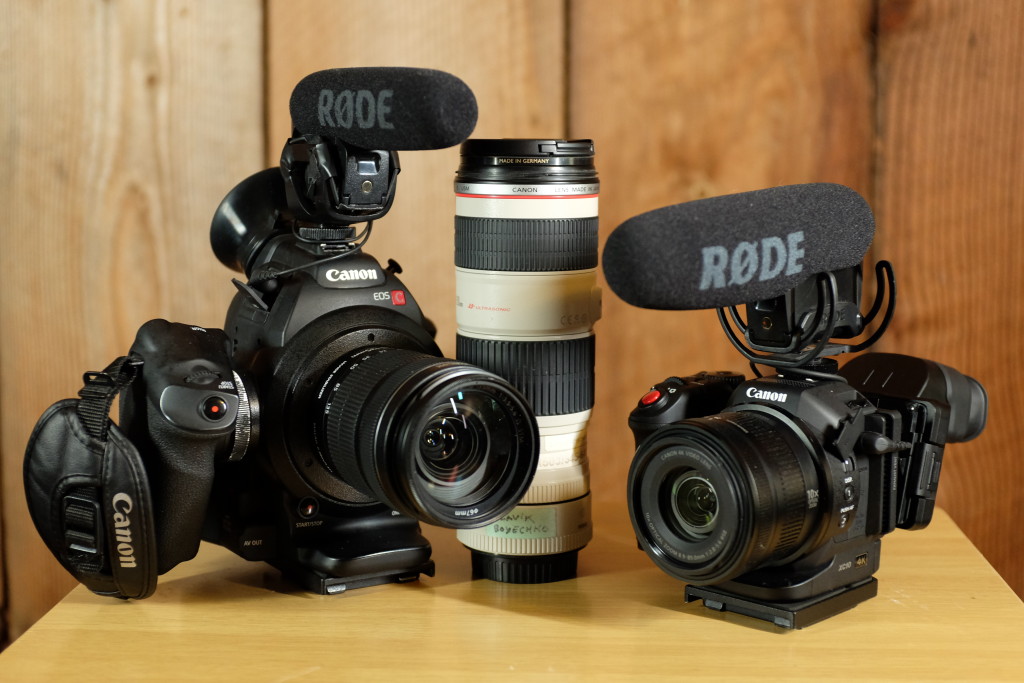
For some shooting scenarios, where you may be moving around quite a lot and want to capture everything quickly without changing lenses, the Canon XC10 or Canon XC15 is a great alternative to the C100.
For journalists who are less concerned with achieving cinematic visual quality, but still want something that is ergonomically similar to a DSLR, the XC15 delivers. It has an XLR input (which the XC10 doesn’t), it’s strikingly easy to use, and you can hide in the crowd while shooting purely handheld.
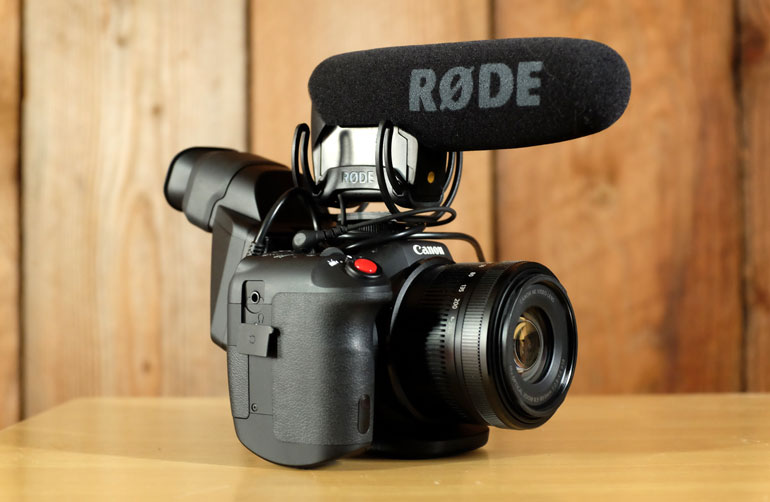
The biggest attraction to the XC10/XC15 is the built-in lens and its astounding image stabilization feature. You can zoom from 24mm to 240mm, enable the 2x tele conversion option, and effectively be shooting at 480mm while holding the camera in your hand. We’ve done this on several shoots, and it’s always fun to imagine what it would take to shoot at a similar focal length.
Comparatively, to achieve a similar zoom range on the C100, you would need to carry a normal lens and a telephoto lens, in addition to a telephoto extender.
If you want to dive deeper into this camera, we posted a long review about the Canon XC10 and XC15, and we also wrote a short review in this post for Newsshooter.
Canon C300 vs C100
For reality TV and feature length documentary work, the original Canon C300 has been the most popular camera in recent history. Ask any rental house in LA. The main reason for picking up a C300 over a C100 is that the codec meets certain broadcast standards. It’s also just a more robust and feature packed camera.
The Canon C300 Mark II has taken an even bigger leap, with a 4k image that rivals the best cinema cameras out there today, including the cream of the crop Arri cameras. So, imagine being able to shoot videos that look as good as big budget Hollywood blockbusters, without the cost and crew required to shoot a major blockbuster.
It’s why we recommend the C300 Mark II over in our promo video guide. It does take more time and effort, more accessories, and a lot more investment to be able to shoot with it, but the C300 Mark II is worth it for slower paced corporate shoots.
For most people shooting documentary or doc-style videos, however, the Canon C100 remains our top pick. What about the C200? Where does it fit in? To be honest, it's not an easy answer. Check out our Canon C200 review for an in-depth analysis.
lenses for canon cinema cameras
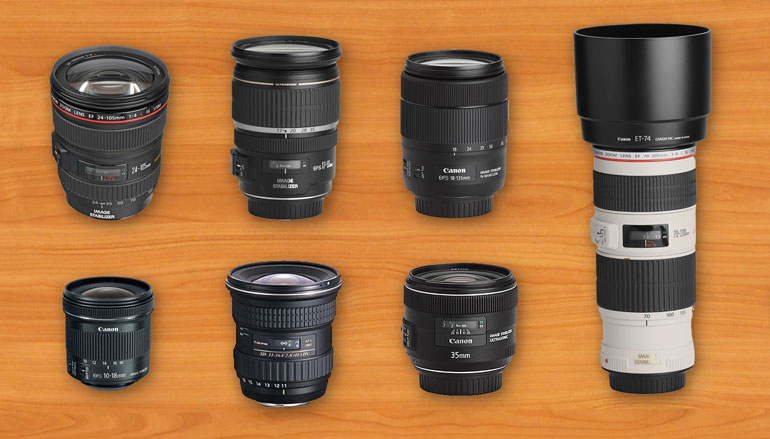
In our bag, and in most doc shooter’s filmmaking equipment kits, you’ll find 3 types of lenses. The normal, everyday lens for 75% of your needs, the telephoto lens primarily for interviews (but also for B-roll), and the specialty shot lens. This could be a wide or ultra wide, a super low light prime lens, a macro lens, or perhaps something even more rarely used than those lenses.
The debate for the best normal lens for the C100 is very personal, but most often you’ll find it’s between the Canon 24-105mm f4 IS, the Canon 17-55mm f/2.8 IS, or the Canon 18-135mm f/3.5-5.6 IS.
We use all three of them interchangeably, based on the type of shoot we anticipate.
Normal Zoom Lenses
The Canon 24-105mm feels the best in your hands, so if you like to focus manually, this is your everyday lens. It has a great reach at the long end, but it’s often not wide enough in small spaces, so you’ll need to change to your wide lens more often.
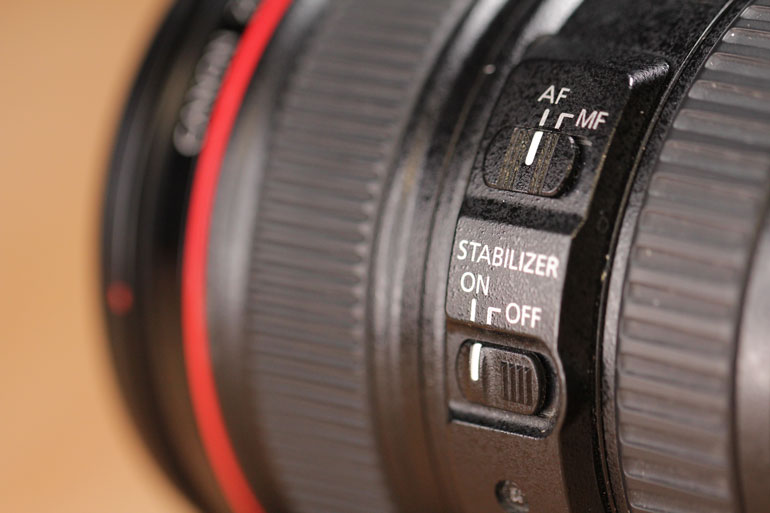
Even though this very widely used lens is fairly old by now, the image stabilization on the original 24-105mm is actually quite good. That's why the vast majority of reality television productions outfit their camera operators with a Canon C300 and a 24-105mm and nothing else. Just handheld run and gun and get the shots, fellas.
The Canon 17-55mm feels more plasticky (it’s not an L lens - or “Luxury Lens” like the 24-105mm), and the focus ring is hard to get used to, since it turns in the opposite direction of all other Canon lenses. But it’s a stop brighter at f/2.8, and it’s wider at 17mm, which makes a big difference on the C100 with its 1.5x sensor crop.
This is a great lens if you shoot handheld a lot, but we miss the reach. We actually keep the 17-55mm in our corporate video kit bag, because it’s sharpness and quality (and f/2.8) is perfect for more planned shots where you don’t need to quickly zoom to 100mm or above to capture a moment, like you do in documentary.
The Canon 18-135mm, even though it’s a “kit lens” and is often looked down upon by professionals, is honestly quite good. The manual focus control is terrible, and the plastic feel is not very comforting, and it’s also variable aperture from wide to tight. But here’s the thing: on a C100, all of those downsides go away.
On a C100 with the Dual Pixel Auto Focus, you can ride the AF by toggling it on/off on your hand grip, so you never have to manually focus again. As for the lens being variable aperture (and certainly not parfocal), the C100 enables a feature with the 18-135mm that actually maintains the exposure and quickly refocuses as you zoom from wide to tight and back. The average viewer does not notice the effect.
And finally, the zoom range and the price make the 18-135mm even more attractive. Shh, don’t tell anyone, but we actually use the 18-135mm frequently on our high end corporate shoots with our C300 mark II. (The newest “Nano” version even has the typical silver lens ring painted black, so phew, nobody can tell you’re shooting with a kit lens.)
Telephoto and Wide Lenses
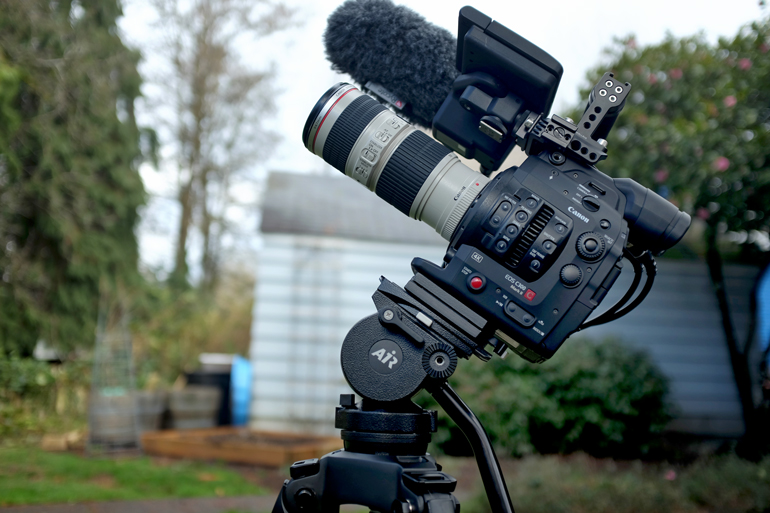
For our telephoto lens, we swear by the Canon 70-200mm f4 IS. It’s half the weight and price of the f/2.8 version, and you won’t miss that extra stop. As a bonus, it works perfectly with the Canon 1.4x extender when we need super telephoto or closeups.
For portable documentary shooting, the 70-200mm f/4 is extremely good. Super sharp and very lightweight. The IS is very noisy, however, so don't expect to use it in very quiet scenes - it's loud enough to dominate the on-camera microphone recording.
On the wide end, we’ve used the popular Tokina 11-16mm f/2.8 pretty regularly on our shoots, until the Canon 10-18mm IS came out. It’s incredibly cheap, light weight, and the extra 1mm actually does make a difference. Plus the AF and IS make it a perfect companion to the C100. But it’s a couple stops of light slower than the Tokina, so it’s not the best for dark or semi-dark interiors.
Prime Lenses
As for specialty lenses, we occasionally carry a Canon 35mm f2 IS with us, for very low light scenarios. It’s the smallest, lightest, and most low light sensitive lens that still has IS - we highly recommend it. But it doesn’t have a permanent place in our documentary filmmaking equipment kit, so often it sits on the shelf until a special need arises.
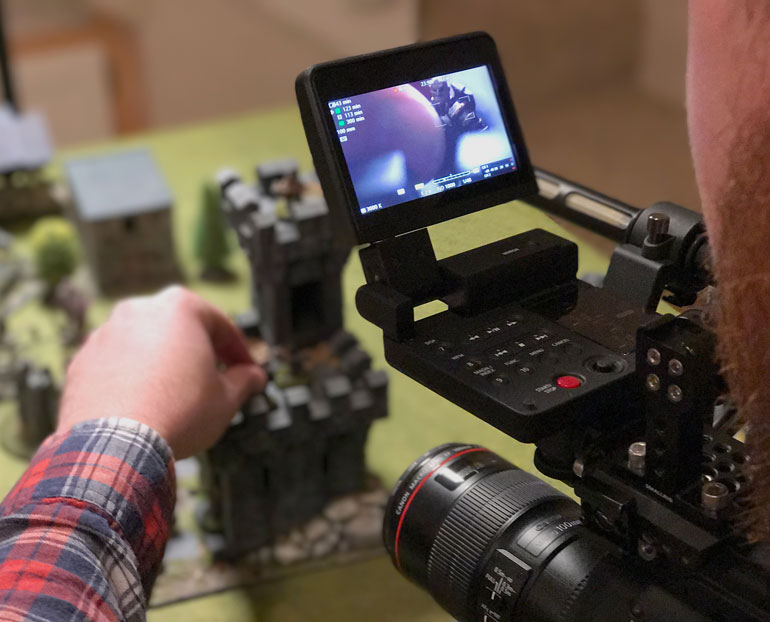
Finally, we very recently added the Canon 100mm f/2.8 Macro IS to our everyday documentary kit. Sure, it's great for specialty macro shots of tiny objects or closeups on anything in general, but we've found it's actually a workhorse lens for all-around interviews and all-around B-roll shooting, even handheld.
The 35mm f/2 IS and 100mm f/2.8 IS are the only two prime lenses we use in our documentary kit right now. In fact, we're so smitten by them, we recently shot a whole short doc with just those two lenses, and wrote a long piece on prime lenses for video.
Lighting is essential in a filmmaking equipment list
Even though a documentary filmmaker will typically only use lights during an interview, rather than during B-roll acquisition, bringing along the right or wrong lighting kit can have an immense effect on the quality of your video.
In a 3-4 minute web documentary, the average clip length is about 3-6 seconds. On average, you’ll see a talking head shot - or the A-roll - only occasionally between sequences of B-roll clips.
So in the end, the viewer will only see your interview lighting setup for maybe 15-20 seconds of the whole video.
But if you’ve ever seen a badly lit interview, you only need 1 second to ruin the credibility of the entire documentary.
In one second the audience forgets about the subject and topic, or what is being said or the emotions that are at play, and our attention goes immediately to the lackluster video production as we’re looking for other signs of poor craftmanship.
In essence, we lose the “suspension of disbelief” and we remember that we’re watching a video that someone made, rather than sitting back and letting a story naturally unfold before our eyes.
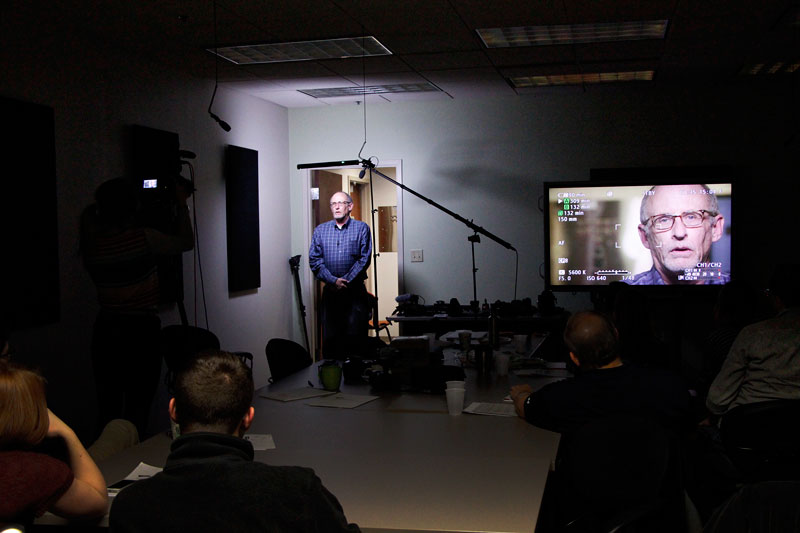
So, getting good lighting for your interview is important, and documentary filmmakers can spend their entire career in search of the perfect light kit to make those 15-20 seconds of talking head shots look like a million bucks.
When you shop for your first video lights, you probably assume that the more light output you can afford to purchase, the better off you’ll be. But in fact, too much output or not the right kind of light can be the difference between a good interview or a failed one.
So here’s how we break down our two recommended setups: are you shooting your interviews primarily indoors or outdoors?
Lighting for Indoor Interviews
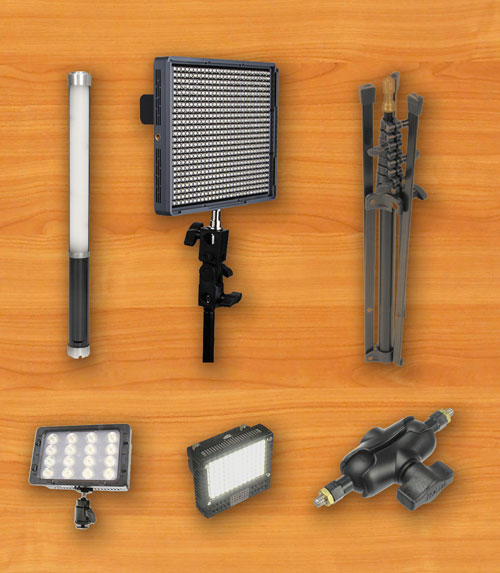
For indoor interviews, we use the Westcott Ice Light 2 as the key light. It’s extremely portable and has a tube shape remeniscent of a light saber. Compared to most 1x1 LED lights, its output is not nearly as bright, but the Ice Light 2 does not need any diffusion. You place the Ice Light 2 within a few feet of your subject, and the light gently wraps around your subject’s face, without blinding them.
The benefit to portable light is huge for documentary interviews. If you’re working as a solo shooter, one man band style, you won’t have a crew person to sit in while you fiddle with lights, audio, and camera framing. So as soon as your subject stands in place, you have only a few minutes to get everything dialed in before they start to wonder if you even know what you’re doing.
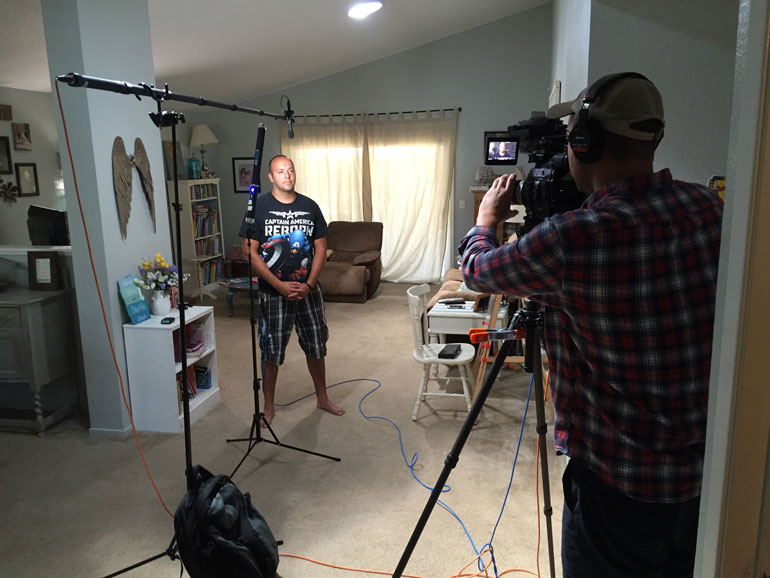
The Westcott Ice Light 2 is light enough to be hung from rafters, or placed on a countertop, or if your subject wears eyeglasses, you can rotate the Ice Light to sit horizontally above their face and avoid those annoying glare reflections. You may want to get extra batteries for your Ice Light 2, as well as a handy Tungsten gel that clips into the Ice Light.
We’ve ended up using the Ice Light more than any other light, on more than 200 interviews across the country, and we still stand by it for our documentary kit. For our corporate video production bag, we’ll go with a more traditional 1x1 and diffusion setup.
Fill Lights, Rim or Edge Lights, and Lighting a Background
Once you have your key light setup, you’ll need another light to either fill the other side of your subject’s face if necessary, or to separate their head from the background with a rim or edge light. Most often, though, we’re using a second light to brighten the background, to create texture and to make sure the subject doesn’t look like they’re standing in a dark pit.
The most portable and most versatile light for these purposes is the Aputure Amaran 672W. There are 3 versions of the Amaran - the Spot version for a narrow but super bright beam, the less bright Wide version (with an attachable tungsten filter), and the dimmest Bi-color version.
We recommend the 672 Wide because a Spot will need some sort of diffusion for any of the above purposes. And because the Ice Light is also daylight rated with a tungsten filter, you don’t need a bicolor secondary light for all those in between kelvin values.
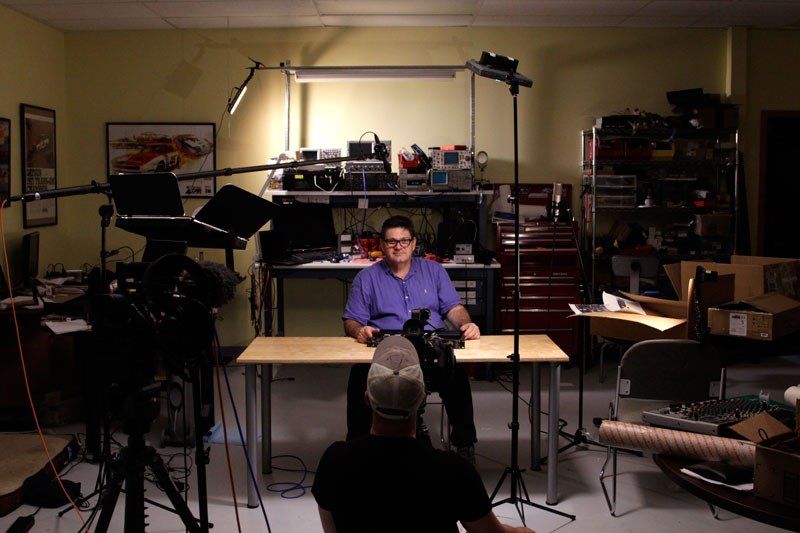
The best part about the Amaran 672W, other than it’s very cheap and extremely portable, is that in a pinch, it can also serve as your key light both indoors or in cloudy daylight, without diffusion. (Check out our in-depth article on Aputure Amaran and Light Storm lights).
We also carry around a few other small lights that hardly take up any room, but can come in handy more often than not. The TorchLED Bolt light and the Cineroid L10C are both incredibly powerful for the size (the Cineroid being the size of a pack of playing cards), and they both use the standard Sony NP batteries. We also carry around the credit card size Aputure M9 light, which isn’t that bright, but it’s so small and has an internal USB-powered battery that it’s worth carrying around.
Lighting for Outdoor Interviews
If your documentary will primarily be interviewed outside, first of all, is there any way you can change that? Audio can be a huge pain outdoors (there are airplanes overhead more often than you think), not to mention unpredictable weather, no mains power to plug into, mosquitos, changing light, and other issues.
But if you have to shoot an interview outside, you’ll need much brighter lights than you think. In our corporate video guide, we recommend the Aputure Light Storm LS1S for your outdoor key light, but it is very heavy, bulky, and can be spendy with the added battery cost.
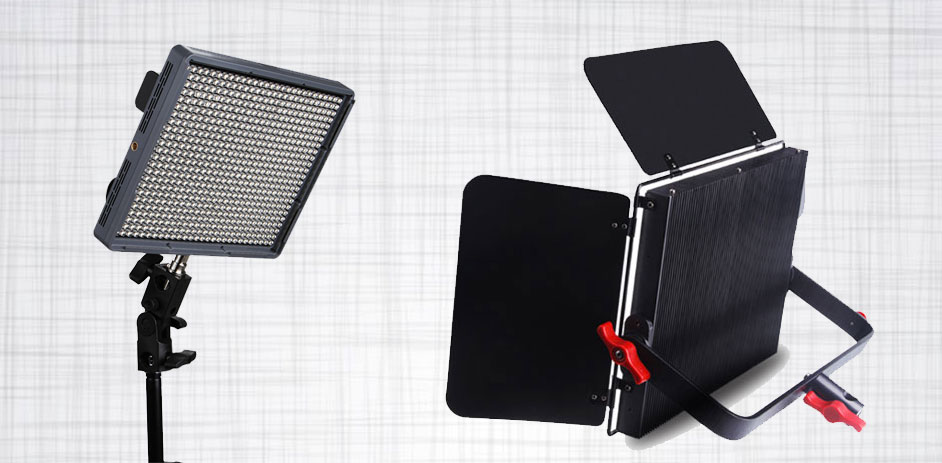
For shooting a documentary interview outdoors, you would be better off with one or two Aputure Amaran 672S spot lights. Two of the 672S lights together are brighter than one Light Storm LS1S, at 1/5th the weight, less cost, and they use cheap Sony NP batteries for long lasting output.
One caveat with the Aputure Amaran lights is that they are not rugged. Cheap, lightweight, and bright, yes, but their plastic housing is not durable and probably won't survive a bad fall. Plus, the battery plates and 1/4-20" threads will wear out with heavy use. But they're still very much worth getting even if you have to replace them in a couple years.
Lighting Updates
The lights we use and recommend in our filmmaking equipment list have been road tested and we really like them for our documentary kit. But new lighting products are coming out fast and there are potential new solutions for documentary shooters that will replace the lights in our gear bags.
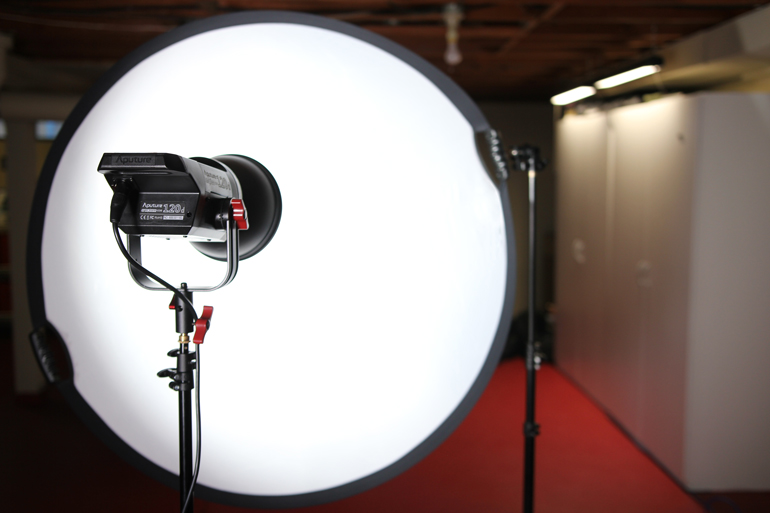
We're testing out the new COB LED Fresnels for high output through diffusion scrims, and right now our favorite is the Aputure COB 120D for indoor lighting. The Aputure 300D is a game changer for outdoor interviews and we recently used it for over a year and wrote review of the Aputure 300D.
And finally, we're looking at various lightweight, flexible LED panels - or "flex lights" - to replace traditional panels and fresnels for portable documentary shooting. We recently attempted a DIY Flex Light, failed miserably, and then got a couple super cheap manufactured versions instead. Check out our article on Flexible LED Lights.
Best Microphone for Interviews
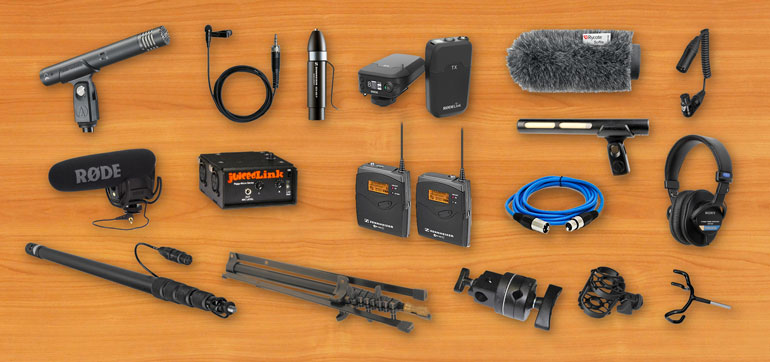
At some point you may decide whether you’re a lavalier kind of person, or a boom mic on a stand kind of person. In our kit we use both a LAV mic and an overhead boom mic for 90% of our interviews - to give us options in editing and to also serve as backup in case one mic has rubbing noise or fails altogether for whatever reason.
For our boom kit, we use the Audio-Technica AT4053B hypercardioid condenser microphone for all our indoor interviews. Your outdoor shotgun will only work indoors in the most controlled settings, but most of the time it will just result in room echo. So be smart and use a hypercardioid small diaphragm condenser for your indoor interviews.
Alternatively, we also use and recommend the similarly priced Audix SCX1-HC. But you won’t find them as frequently on doc shoots as you will the Audio-Technica AT4053B.
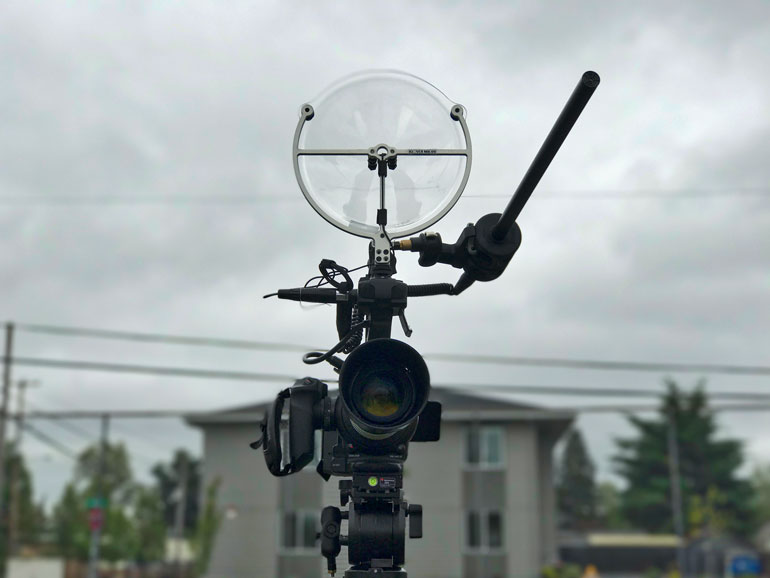
Some doc shooters keep long range shotguns and parabolic microphones in their filmmaking equipment kits
We place the mic in a popular microphone shock mount, on the shortest boom pole we could find (to fit in our carry-on luggage), the K-Tek KE-79CC with an internal coiled XLR cable, which then goes on the smallest grip head we could find, the Matthews Minigrip Head, and on this solid boom pole holder.
For our lav mic, we use the Sennheiser MKE-2, which is an upgrade from the kit ME4 mic that you’ll find in the Evolution G3 Wireless kit. It’s worth the upgrade, even if you use the mic only wirelessly with the G3 kit.
Typically we’ll just clip the MKE-2 to the outside of a subject’s clothing, and frame the mic out of the shot. The MKE-2 is a versatile mic in that it can be used with the wireless pack, but we add the Sennheiser MZA900P Phantom Power Adapter to make it a wired lav.
For outdoor B-roll scenarios where we want to hide the lav, or for any interview where we either can’t clip on the mic or want to shoot with a wide angle and avoid seeing the lav in the shot, we love the Rode Invisilav. It’s a lot simpler to use than other undercovers. You simply route the lav mic through the Invisilav, then back up through the second hole (to remove tension from the mic capsule), and then gaff tape the Invisilav under your subject’s clothing.
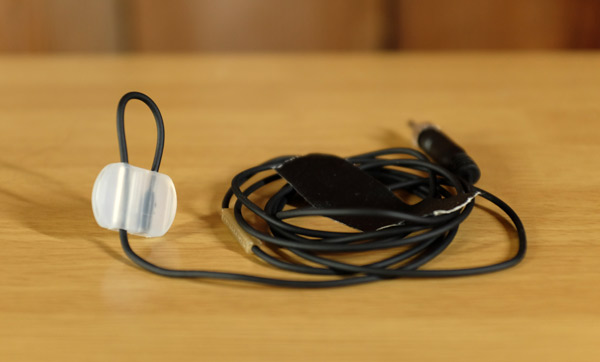
As a bonus, once you’ve hidden your mic on your subject for walk and talk or B-roll shooting, when you want to transition to a formal interview you can simply replace the wireless pack with the MZE900P Phantom Power Adapter, and the mic stays put.
Alternatively to the Sennheiser G3 wireless pack, we often use the Rode Rodelink wireless transmitter and receiver. It’s a little bulkier, but extremely simple to use, and a little cheaper than the G3. It's also a handy companion to the Rodelink Newsshooter XLR transmitter that can send your boom mic source wirelessly to your camera.
And although we don’t use it for indoor interviews, the Audio-Technica AT875R shotgun mic has a permanent place on top of our C100. It’s the shortest and best sounding on-camera shotgun you can get, and it especially goes well with this Rycote Softie for outdoor shooting, along with a super short XLR cable that stays out of your way.
If you have to shoot an outdoor interview, there are many shotgun mics you can choose from that will do a similar job. New on the market is the Deity S-Mic 2, which is an upgrade to the hugely successful Aputure Deity mic. Alternatively, we really like the Rode NTG8 long shotgun for outdoor interviews.
Best Tripods and Monopods for Video
Choosing a tripod is a topic that can (and should) be a long article unto itself. It goes back to the portability/quality continuum from earlier in this article.
You can get a very cheap and super light tripod that might be a pain to use, or you could get the biggest and best tripod that is solid but a hassle to carry around, or you could get something in the middle.
We travel so much for our shoots that even the smallest, lightest bowl-mount professional video tripod out there can still be too big for our luggage. So we use and highly recommend the Gitzo GT2531LVL.
Unfortunately, it's recently been discontinued. Stay tuned for a replacement recommendation.
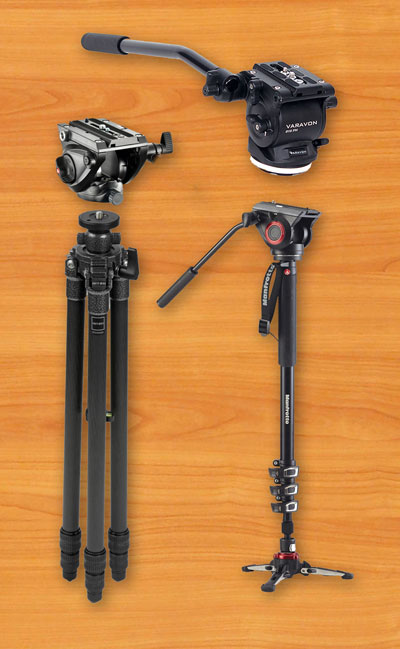
The Gitzo GT2531LVL is primarily a photo tripod, except that it’s the only Gitzo that has a leveling head, making it entirely fit for video use. And to us, having a center column that can be raised up, to re-frame your interview, for example, makes it even more versatile than a dedicated video tripod.
It’s the perfect companion to the C100, but strong enough to handle a jib, slider, or even a rigged out camera with all the bells and whistles. In fact, the GT2531LVL works just fine even with our heavy C300 mark II on a big slider.
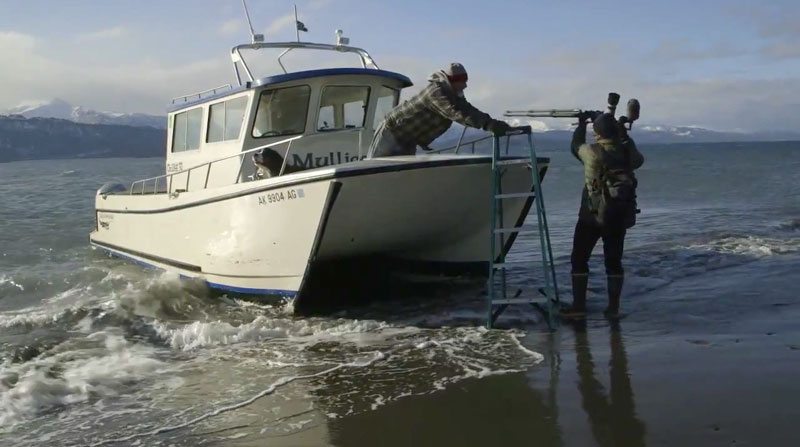
The Gitzo GT2531LVL tripod and C100 make a great combo for documentary shoots
Of course the bigger question for this setup is what fluid head to buy? Most pro video fluid heads are made for bowl-mount tripods, rather than flat head photo tripods.
We’ve tried lots of flathead fluid heads out there, and none of them are perfect until you get to super expensive and heavy heads. But for a good enough fluid head, we use the Manfrotto MVH500AH. Alternatively, the Benro S4 does a good job paired with the C100 (but without much else on it).
Or if you’re lucky enough to find one on Amazon, the Varavon 815, in our opinion, is the smoothest fluid head for under $200. We bought 3 during a short window then they were available. There’s some oil in there, maybe just glue, but for whatever reason it works like magic.
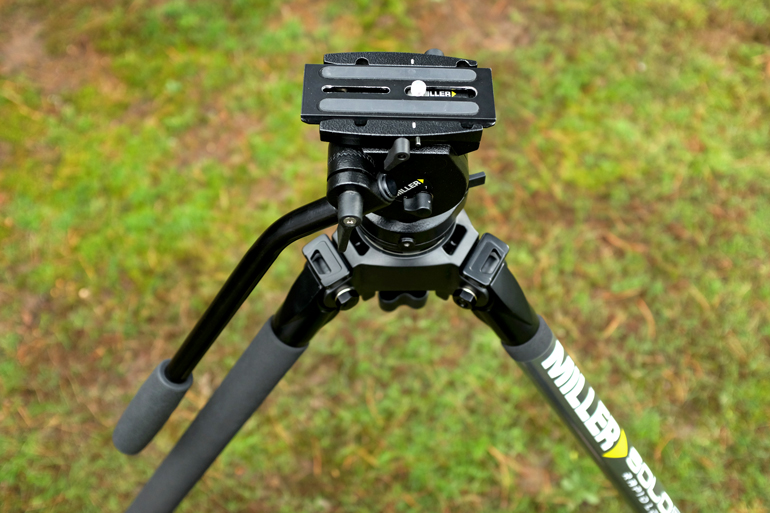
If you want to go with a traditional video tripod with a bowl mount, we really love the Miller Air Carbon Tripod system (see our article on the Miller Air Tripod). Yes, it's bigger and heavier than our Gitzo system, and if we're only shooting interviews with our tripod, maybe that's overkill. But if you shoot any kind of B-roll with your tripod, the Miller Air is perfect for documentary shooters. And it's much more affordable than you think.
As for monopods, which we use for 90% of our B-roll shooting (rather than a shoulder rig), we recommend the Manfrotto MVM500A. The original model, the 561BHDV-1, set the standard for video monopods, and the current model is just as good or better. There is also the newly released MVMXPRO500, which is a slight upgrade to the regular model. Any of them will do the job well - just make sure it’s a video monopod with little feet and a fluid head, rather than a standard photo monopod.
Video Production equipment Accessories
As you know when you’re shopping for video production equipment, for documentary filmmaking or any kind of production, the accessories are the secret behind all of this stuff working together.
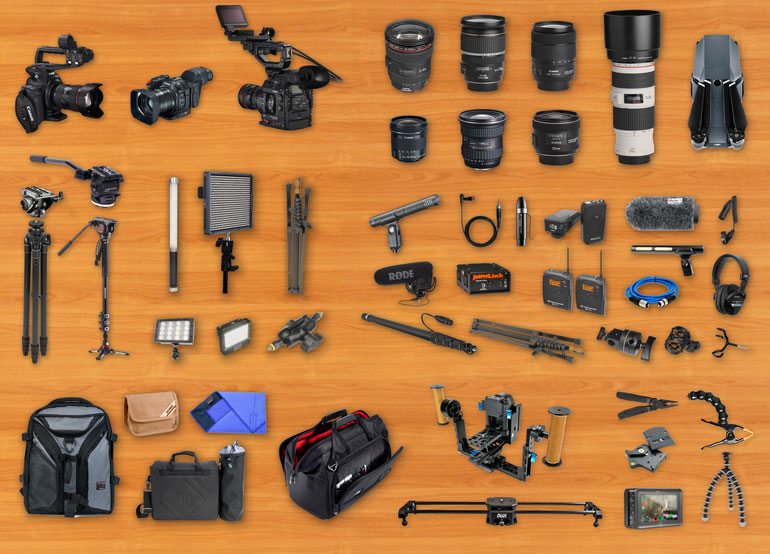
Here’s a quick list of everything else that we use in our everyday documentary filmmaking kit.
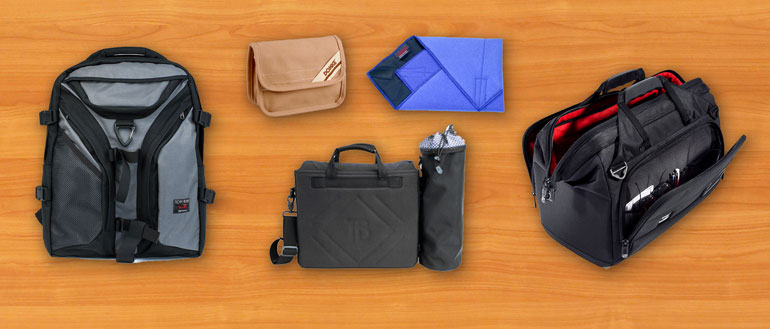
Main Backpack
We prefer to keep our camera and lenses in a durable bag that doesn't scream "camera gear."
The Tom Bihn Brain Bag is a perfect fit, and hasn't failed us yet.
The Brain Bag is divided into a front and back section. In the front is a fully assembled C100 with lens and top handle and hand grip.
In the back section is a Tom Bihn Lens IO - a neoprene lens bag that can also be carried on its own. We have all our lenses in here.
And attached to the sides of the bag are Tom Bihn 52mm Quivers, one for the monopod and one for the tripod.
For air travel, we usually disassemble and pack the C100 into the back compartment with the lenses, and our editing laptop goes in the front section, inside a Tom Bihn Brain Cell sized for a 15" Macbook Pro.
Secondary Bag
With your camera and lenses safe in our backpack, we carry a secondary bag for the variety of other gear and accessories.
The Sachtler Dr. Bag 3 works really well. It's spacious without unnecessary dividers, the orange interior makes everything easy to see, and when unzipped, the bag becomes like a "Doctor Bag" with a rigid top section.
So while on a shoot, you can quickly throw stuff into the Dr. Bag and stack your stuff way past the normal height, leaving it unzipped yet rigid enough to hold your gear as you carry the bag.
We also use the Portabrace DV4 bag for this same use. It doesn't have the "doctor bag" feature, but it's flexible and can fit a remarkable amount of stuff.
Both bags fit into standard carry-on compartments.
Packing Wraps
Instead of relying on photo and video bags that have rigid dividers, we like to organize everything into small pouches and neoprene wraps, which allows us to be flexible when we pack and carry our gear.
The Domke F-945 pouches come in a variety of colors and are perfectly suited for organizing your gear.
Portabrace also makes padded pouches that are quite nice for carrying accessories.
Our camera, lenses, tripod heads, and various other items are wrapped in Domke or Tenba Wraps - which are neoprene with velcro on the corners.
We prefer to use the largest size available - 19" or larger - in various colors. Get more than you need - trust us, you'll use these on everything.
Finally, mark all your pouches with some white gaff tape and marker. It's a huge time savor!
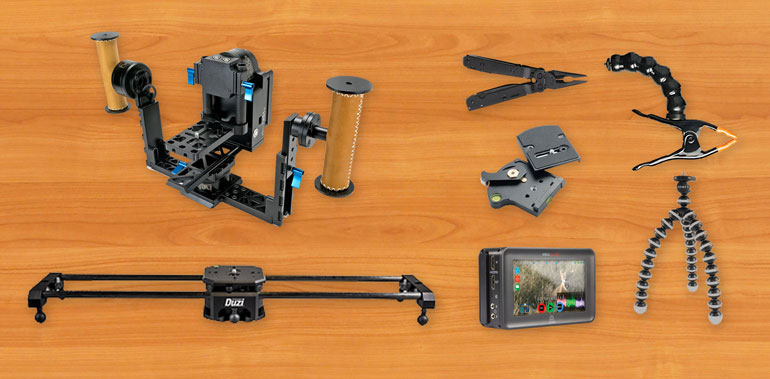
Optional (But Helpful) Video Equipment
We always bring a Rode Videomic Pro with us, because you never know when you may need to break down your C100 for ultralight shooting. It's also a nice backup for the interview boom mic, in case it fails.
If you're planning to shoot with a Canon XC10, you'll definitely need the VideoMic Pro for B-roll. The newer Canon XC15, however, comes standard with an XLR preamp that goes on the cold shoe.
Although the C100 has dual slot auto record - so both your SD cards can record at the same time, ensuring you always have a backup - you may want an external monitor/recorder for interviews.
We've used the Atomos Ninja Blade on countless interviews, and it's really nice to have. Partly because you instantly get a ProRes file to start editing with, but partly because having a bigger and better monitor allows you to ensure your interview shot is focused and exposed perfectly.
And of course, never leave home without a multitool. We use a SOG knife with all the bells and whistles, and we make sure to check it in our luggage when we fly.
Batteries, clamps, and quick releases
You'll want to carry extra batteries for your C100, as well as for your lights, external monitor, shotgun mic, wireless lav systems, and anything else you might have. If you can, opt for chargers and batteries that have metered displays on them - knowing whether your batteries are charged or not is a huge time saver.
You may also want to carry a small car power converter, which allows you to plug in a standard charger into your car, rather than having to bring along a car charger accessory for every type of battery you use.
Having a few Dinkum ActionPods, or even a Gorillapod with you is a smart idea. You can use them to attach your lights to just about any surface, without having to bring another light stand along.
Along with a few clamps, you may also want an accessory mount that has 1/4"-20 male or female threads on each side, allowing you to attach monitors, lights, and microphones to various stands or cheese plates. We stand by the Cinevate Universal Accessory Mount as one of the most durable pieces of kit out there. Pair it with a 1/4"-20 coupler and you can rotate and place the Ice Light in just about any position.
And finally, the Manfrotto 394 Quick Release system is absolutely essential to shooting on the go. Get one for every tripod, monopod, gimbal, slider, or anything that the camera may go on. Clipping your camera in and out will be a breeze. There are many other quick release systems out there, but the Manfrotto 394/RC4 system is one of the best values for the money.
Advanced Filmmaking Equipment for Documentaries
If you still have room in your bags for a few more items, these two pieces of gear will take your filmmaking up a few notches.
Brushless Gimbal - The kinds of shots you can get with the C100 on a Letus Gimbal are amazing, and it’s portable enough to go along on documentary shoots. Seriously, it's probably had the most effect on the quality of our shooting, enough that we now plan many of our shoots around the Helix Jr. Here's a post on how we modified our Letus Helix Jr. to work even better with the C100.
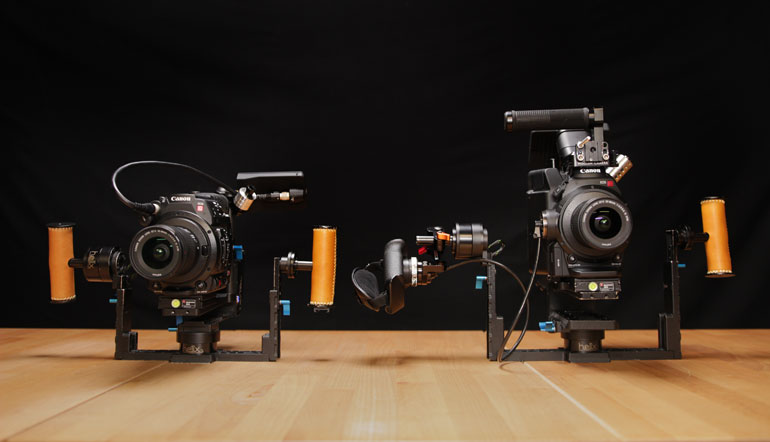
Canon C200 on a Letus Helix Jr. Canon C300 mkII on a Letus Helix Standard
If you shoot with a smaller camera like the Canon XC10/XC15, or a DSLR or mirrorless camera, the Pilotfly H2 is a very easy to use gimbal with a long battery life. But like all of the smaller gimbals, it's limited to smaller and lighter camera setups.
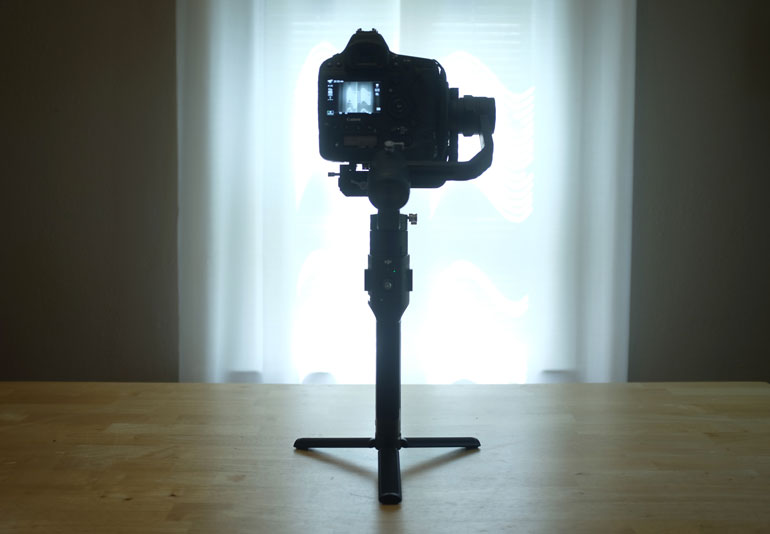
Most recently, the DJI Ronin-S has become the new favorite gimbal for both lightweight cameras as well as DSLRs and the Canon C100. It's only got a one-handed mode currently, but a two handle accessory is on the way. Our full review: DJI Ronin S.
We review more gimbals in our DSLR Gimbal article.
Slider - Of course, the staple of all cinematic filmmaking is the slider dolly. We’ve had a number of them over the years, but the most recent version of the Cinevate Duzi (with the Fly Wheel) is hands down the best slider we’ve ever used. Here’s a link to a longer review of the Duzi V4.
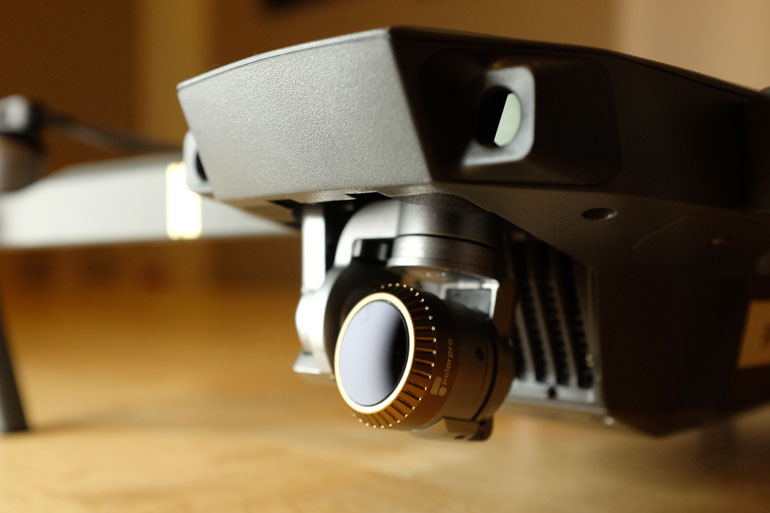
Drone - Although we almost always bring a drone to commercial shoots, we would have never considered adding one to our everyday documentary kit. But then came along the DJI Mavic Pro, which is the size of an average lens. Now it goes everywhere with us.
Conclusion
That about does it! That’s our main filmmaking equipment list for our documentary video productions. We usually travel and shoot as a 2-man crew, so we can bring everything with us on local shoots, as well as with air travel. But if you’re a one man band, you may have to pare down the kit to just the essentials for the shoot you’re on.
For example, on a solo shoot, you may only bring an Ice Light and one light stand, a lav mic rather than a boom kit (with another light stand), and maybe you’d skip the slider. You can still fit everything you need in a backpack and a carry bag for your tripod, monopod, and other accessories. We know, we’ve done it many times!
Now that you have the gear, how do you get the work? We go into a long discussion about the first client/videographer interaction in our infographic/article on Video Production Services.
