FCPX Proxy Media
Apple's Final Cut Pro X has come a long way from its release in 2011, but there are still a few major missing pieces that make it difficult to use for many professional video producers. The limitation of FCPX proxy media is one of the biggest issues.
More specifically, it's the inability to use external proxies, either generated by a camera or through a third party transcoding workflow, that makes FCPX a hard sell for some pro editors.
Simply put, you should be able to shoot in high resolution media, edit with low resolution proxy files that many cameras spit out, and then when you're ready to export you relink to the full resolution master clips and call it a day.
FCPX does provide a simple method of transcoding your media to proxies from within the interface, and it's very simple to do.
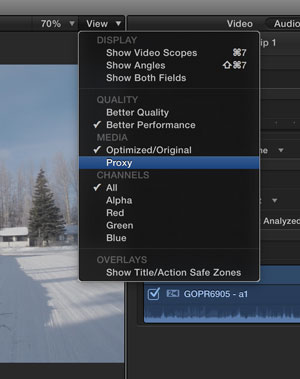
But the devil is in the details, and for many videographers and working editors, the internal proxy function doesn't replace the traditional external proxy editing workflow.
Thankfully we've come up with a workaround to let you edit with FCPX proxy media and temporary media, and then later force FCPX to relink your edited clips to other media, bypassing the official relink tool.
It's not as easy as switching proxies on and off, but until Apple officially implements this feature, our workaround might save your next job. It's already been a lifesaver for us on several projects.
Final Cut Pro X Native Proxy Media
We dived head first into FCPX from the day it came out, and we can't imagine using anything else in our day to day workflow. But we also have the benefit of producing, shooting, and editing completely independently, without having to interface with clients, producers, or other editors.
So when it comes to media management, for example, we can keep it simple and edit a project all from within one library. And when a project is finished, we backup that library to another hard drive and call it done.
But lately we've had to push the boundaries of FCPX, and it began with our shift to shooting with the Canon C300 mkII.
Previously, our workflow with DSLRs or our C100s was to backup our raw footage to a drive, then transcode with EditReady (formerly ClipWrap), and then import into FCPX, telling it to reference the external media rather than copy the files into the library.
For the most part, this workflow was a thing of beauty. At the end of each day, we could backup the library file - typically less than a gigabyte - while the external media remained untouched.
Copying media to library versus leave files in place
When we started to use our C300 mkII, Final Cut Pro X didn't really like working with the XF-AVC native media, or even externally rewrapped media. So we now import the camera clips directly into FCPX, it re-wraps the media to .MOV files and maybe does some other magic, and voila, our footage edits like butter, all in beautiful 12bit color (thank you C300mkII).
But that's with HD or 2k footage. With 4k media - which we use primarily for interviews but also for specific clients who request it - even our amazing iMac 5K Retina computers can't keep up. And so we must generate proxy media within Final Cut.
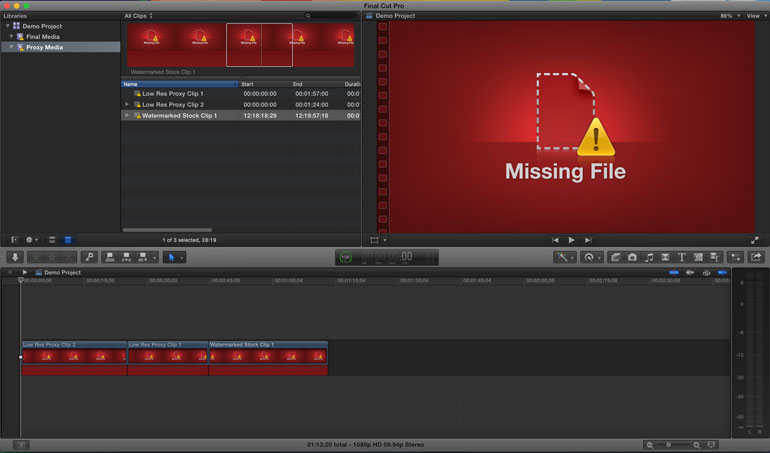
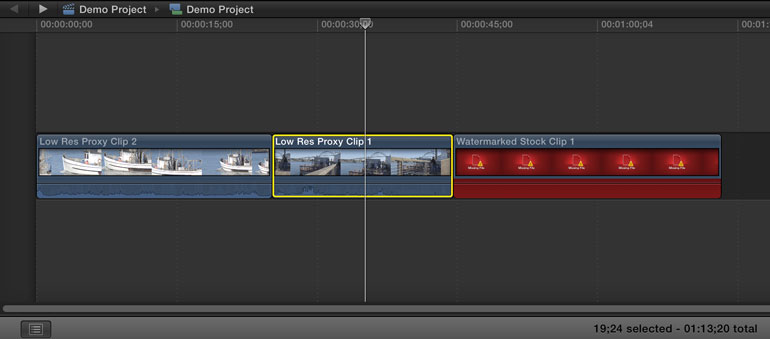
Sometimes switching to FCPX proxy media can be a little annoying, like when you start seeing a ton of missing media exclamation marks for all your miscellaneous clips. You have to remember to generate proxies for every clip in your browser, including footage from your drone, stock video, sound effects, music, you name it.
And don't forget that when you're ready to export your final project, you have to switch back to Optimized or Original Media, or else you'll mistakenly send your client a low resolution version of your video. We've done it before, it happens.
So for the most part the internal proxy editing workflow works fine, and we're glad for it. But it does make backing up quite difficult. Our libraries for a short 2-5 minute video often end up reaching 1TB or more, since they include all the original media. So each night, when we want to backup our library, we must drag the entire 1TB file over to another hard drive, which takes 3-4 hours.
And then of course there's the fear of losing your original media. Anytime you format your camera media and depend purely on the clips FCPX stores within a library, it's a little scary. We still remember a few years back, before FCPX libraries were implemented, we accidentally dragged an Events folder onto another Events folder within FCPX, and the original media vanished instantly. Everything gone, nothing in the trash can.

What a simple FCPX clip layout should look like, in the ideal world.
So we're constantly worried about holding onto our original media in its pure form, in as many backups as we can afford. That's the point of the C100's Dual Slot Record function, as well as the C300 mkII's proxy recording to the SD card.
When recording media is your livilhood, you want to make every effort to retain those recordings during the volatile process of editing. And yet, FCPX insists that you trust its internal import and transcoding process. The question is, to what extent can you trust it?
Video Editing with Temporary Media and Stock Clips
The other aspect of a traditional proxy editing workflow doesn't use external proxies at all. It's when you use stock media with watermarks during initial edits - for client review before you purchase the final media.
After a grueling edit using low quality or watermarked media, there's nothing more frustrating than having to go into your project and recreate your edit using the final purchased clips. That goes for music, stock video, sound effects, animations, photos, you name it.
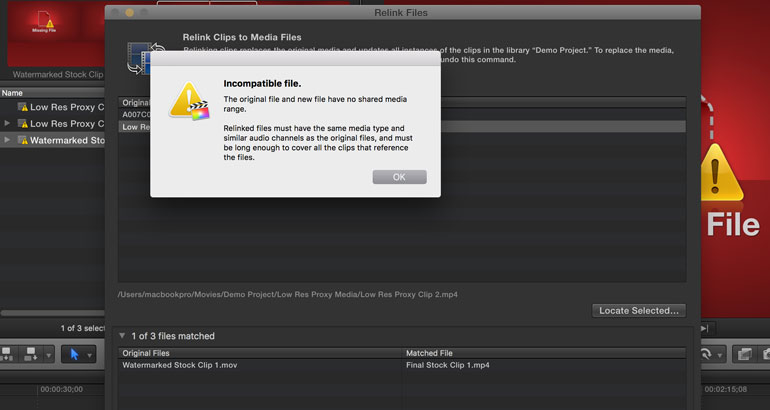
But of course, if you try to use FCPX's internal relink function to overwrite watermarked media, you most likely get the dreaded "Incompatible File" error. For whatever reason, the purchased clips don't match the temporary watermarked media, whether the clip duration is different, or video resolution, or audio metadata, or photo format, etc.
Final Cut Pro X Open Clip In Timeline
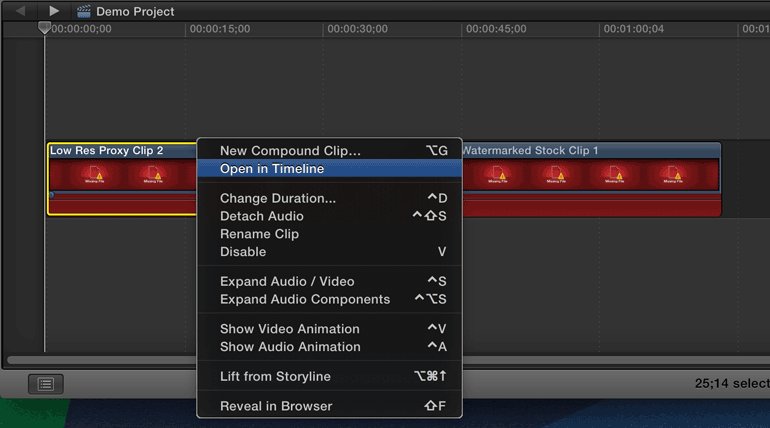
The basis of our workaround is FCPX's "Open in Timeline" feature. You can open up any clip and view the source video and audio data in a timeline view. (In FCP X 10.3 this feature is now called "Open Clip.")
This is actually our recommended method of manually syncing dual source audio for interview clips - before you begin to edit.
You simply choose an interview clip in the browser (rather than from inside a project timeline) and "Open in Timeline," drag your external audio source below the camera's scratch audio, manually sync it up, and voila. From now on, whatever you do with the interview clips in your projects, the sync'd audio will tag along.
Here's a video demonstration of FCP X audio syncing that we put together for Envato Tuts+.
But in the proxy and watermarked media workflow, you can't use this feature in the browser. After you've already edited a project with proxy media, if you go back and try to edit the original media in the browser, the project clips won't be affected.
And similarly, if you have several sections of an interview spread out in a project, if you replace the internal guts of one clip, the other clips remain unaffected. So there's the rub. In order to use this workaround, you have to go into every clip in your project individually, to replace it's guts with the full resolution version of that media.
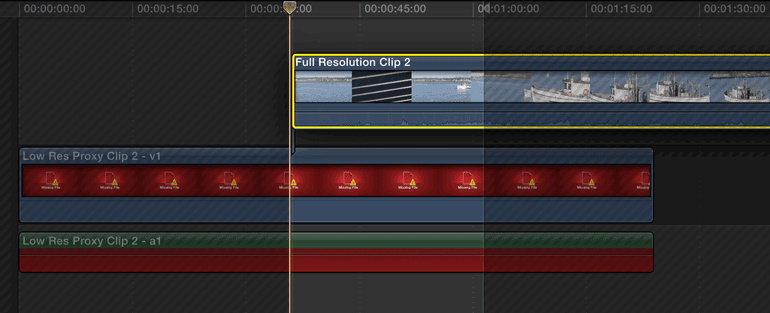
FCPX doesn't allow you to drag the replacement media back to the beginning, to place it above the proxy clip
And if you've gotten this far, you're about to run into another roadblock. Say you're in a project, you right click on a clip and "Open in Timeline," you'll notice the majority of the clip is greyed out and you can only see the used piece of the clip in that particular cut.
If you try to drag the full resolution clip on top of the timeline, FCPX prevents the clip from going way back to the beginning. It only allows you to place the clip starting where the current part of the proxy media is being used.
FCPX Proxy Media - force relink
At last, here is the step by step guide to the proxy editing workaround:
In your final project, right click on each of your clips and go into "Open in Timeline."
Then you select the original, full resolution media in the browser, and drag it over the visual portion in the clip timeline, and click "Replace."
*If for some reason the clip durations don't seem to match, it's probably because the in and out points of the clip in the browser are set to a small portion of the clip, rather than the full media.
If you're successful, the entire proxy clip has now been replaced with the full resolution version, and all the various effects, adjustments, and plugins you've applied will work on the new clip.
Ready to pour some champagne? Not so fast.
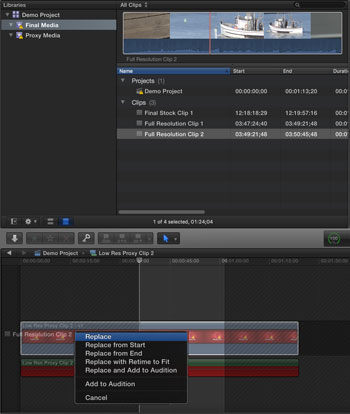
The problem is, when you drag a clip with both video and audio onto just the video part of the "Open in Timeline" meta view, you introduce another audio channel into the source media, and you leave the proxy audio channel still "missing," so to speak.
So in the project view, you still see red in the audio portion of the clip, indicating missing media, and your audio inspector now shows an additional audio channel.
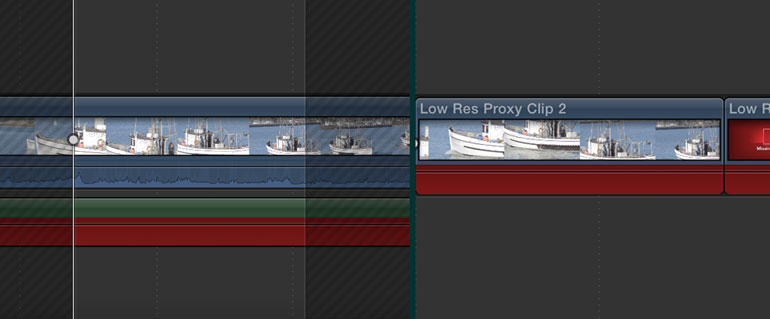
Replace Audio and Video Components Seperately
To solve the above issue, you have to drag the original, high quality media over the proxies video and audio components separately.
Next to the clip connection/append options, there's a drop down where you can select "Video Only," and then you can drag the high quality media over the video portion of your proxy clip. After that, select "Audio Only," and drag it again onto the audio portion, and select Replace.
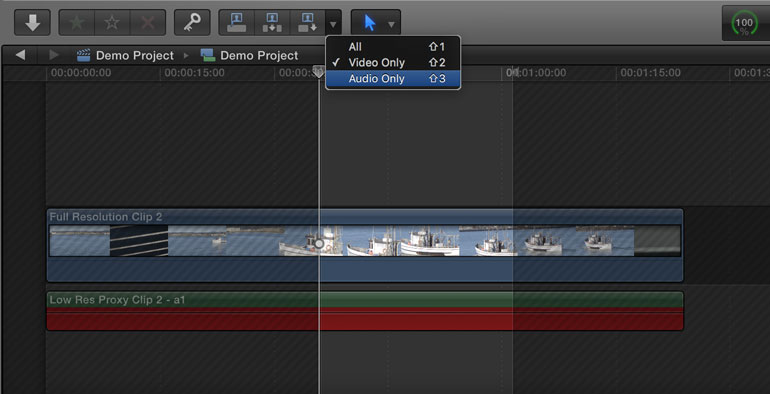
There are also shortcuts for this process, if you are quick and confident that you can execute this workflow without errors. After you've selected your clip in the browser, you can press Shift-2 to choose Video Only, or Shift-3 to choose Audio Only. After that, you simply select either the video or audio portion of the proxy clip, and then press Shift-R to replace it.
It's much faster than dragging clips, and if you have a long project, the shortcuts could speed up your workflow quite a bit.
Conclusion
So there you have it, a working solution to editing in Final Cut Pro X with external proxies and temporary media. It's not as simple as a light switch right before your master export, but it's a usable way to force FCPX to relink to external media after you've finished your intensive edit.
There are downsides to this workaround, of course. If you have to make additional edits after you've gone through and replaced all the proxies and temporary media, you're now committed to editing with full resolution media, which may be slow going depending on your computer.
But even with this limitation, there are creative workarounds that you may come up with for your workflow. For example, you could create a duplicate or snapshot of your final proxy edit, go in and replace all the clips with the full resolution masters, and then continue editing with proxies. Then when you need to export a new final output, you could copy and paste clips from the duplicate project, or use a series of compound clips, or other alternative solutions.
Hopefully Apple will integrate external proxies into a future update, as they've been very aggressive with their updates since the original release. But until then, the FCPX community is continuing to work together to find creative solutions for making FCPX work better in professional workflows.
If you have a suggestion for how to make this proxy workaround better, we'd love to know! Please email us and we'll be happy to add your notes to this working article.
Thanks for reading, and happy shooting!
