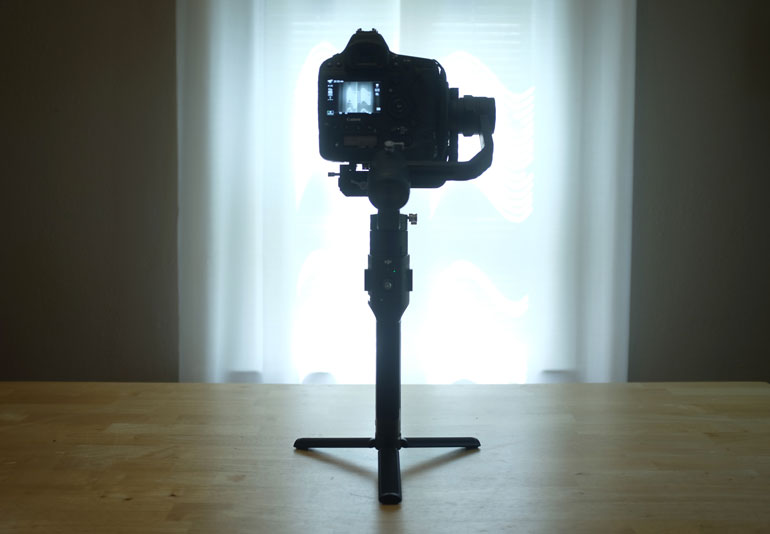
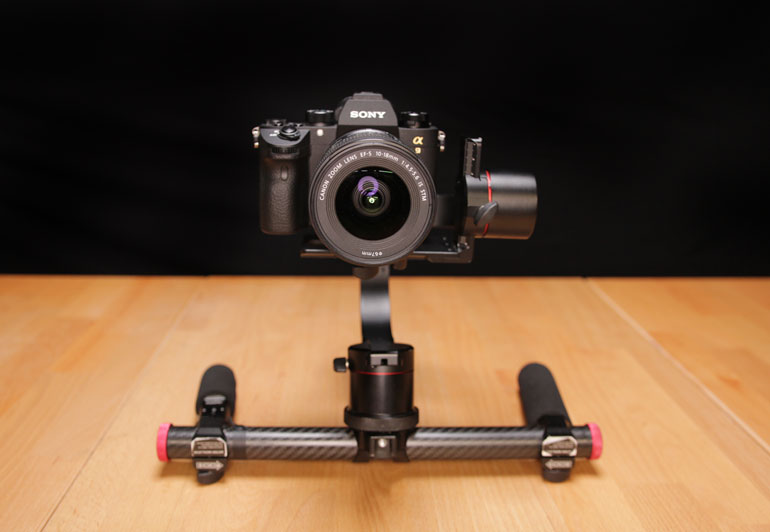
DJI Ronin-S Review
With the amount of gimbals being released these days, you wouldn’t think there would be any more excitement for yet another gimbal. But the DJI Ronin S has got everyone worked up. And surprisingly, the DJI Ronin-S price is low enough that just about everyone can afford it.
This is really the one many of us have been waiting for. Of course, there’s still some negative sides, but at the moment, it just works. And not just for lighter cameras - it works for heavier DSLRs, mirrorless cameras with larger lenses, and even cinema cameras.
And yet, it is a one handed gimbal. Are we really expected to put a 10 pound camera on it? At the moment, yes, this is our best option. But very soon on the horizon, DJI will release a two handed accesory for the Ronin S, and that might make it the last gimbal you’ll ever own.
TL:DR: The DJI Ronin S is the gimbal that filmmakers have been waiting for. It doesn’t take any expertise to tune, to balance, or to use. And it works with medium sized mirrorless rigs, DSLRs and cinema cameras that until now have required large, sophisticated gimbals. Plus, it’s actually priced reasonably.
The road to the DJI Ronin S
We've been using gimbals on documentary and corporate productions for years: first the Defy G5 and then the Letus Helix Jr as soon as it was released. We immediately threw our Canon C100 on it, got it balanced and tuned semi decently, and began taking it on every gig, no matter what it was or how remote or how fast we had to shoot.
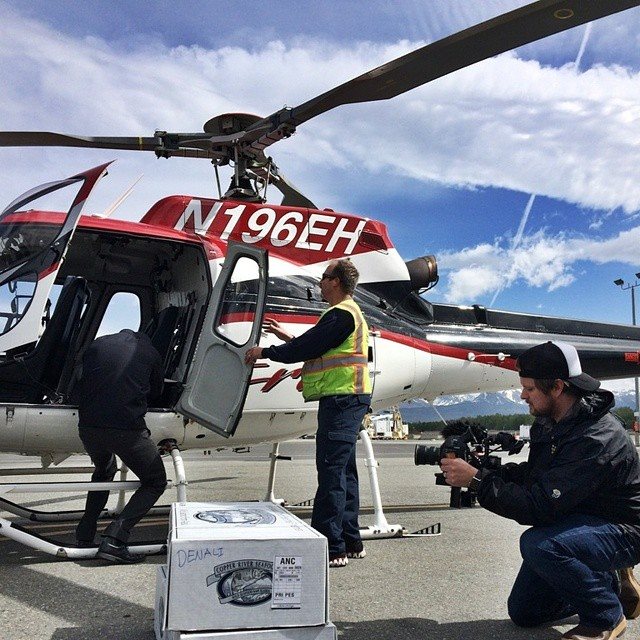
It wasn't perfect, but it worked well enough. As time goes by, however, we all like to upgrade our equipment and try out new products - not just for reviews but to improve our video production capabilities and reduce the frustrations of using subpar gear.
So we've tried many gimbals throughout the years - from the cheapos to the industry standards. DJI's original Ronin and Ronin M work, but they are heavy and not very portable. The Movi gimbals have some the best engineering behind them, but they can't compare to the simplicity and portability of the Helix Jr. We could rebalance a Helix Jr on the ground, in a car, on a boat, wherever - because it didn't need a stand.
The newer offerings from DJI and Movi finally have stands built into them, but they are anything but light and portable. The DJI Ronin-2 weighs 15 lbs itself and often sells with a gimbal support system. The Movi Pro is lighter but certainly can't be called small.

Then came the updated Helix Jr with more powerful encoded motors. They solved a lot of the frustrations of using the first generation brushless gimbals, where if you touched a motor or the camera, the whole thing would freak out for a couple seconds.
When corporate clients and documentary subjects see a gimbal going into a seizure, there's only so much "it's fine, it's supposed to do this" assurance you can muster before people start to doubt you.
The main problem with the new motors - which we talk about in our Letus Helix article, is that they require a lot more precise PID tuning for medium and heavy cameras. That kind of advanced setup is certainly fine and expected on high end productions, but it's most likely way too complicated for the typical videographer.
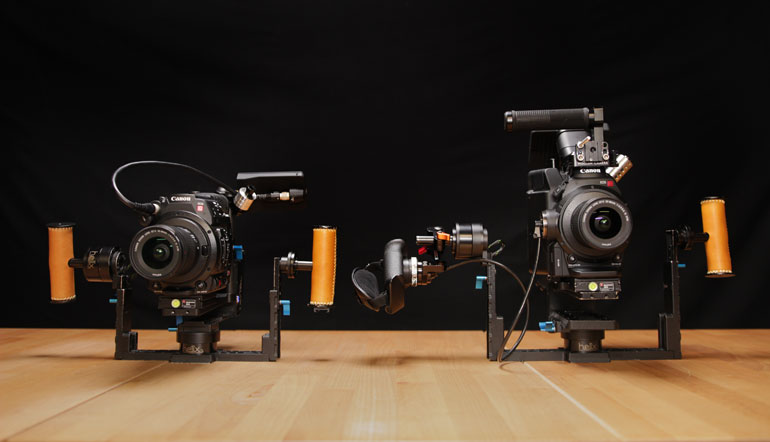
Canon C200 on a Letus Helix Jr. Canon C300 mkII on a Letus Helix Standard
If you only use a lightweight camera and lens combo on a Helix Jr, you probably won't run into too many difficulties with the tuning, because the motors don't have to work that hard. But it's medium sized cameras like a DSLR, a mirrorless with a bigger lens, or a cinema camera that requires more attention.
Then if you want to add accessories like a microphone, on-camera light, wireless transmitter, or simple enough, an external monitor, you may need to go back and tune the gimbal again.
DSLR Gimbal Alternatives
A couple years ago we started seeing single-hand gimbals arrive from a number of manufacturers. FilmPower was the first with their Nebula gimbal, and then came gimbals from Moza, Came-TV, Ikan, Zhiyun Tech, EVO Gimbals, and others.
We considered moving to a one-handed gimbal because they were so much simpler to setup and use, but they generally have low load capacities, which means you can only use a very lightweight camera and lens.
Not a problem for many shooters who adopted the Panasonic GH4 or a Sony A6000 or A6300. Even the Sony A7SII and A7RII were under the load limit if you kept it simple with a lightweight wide lens.
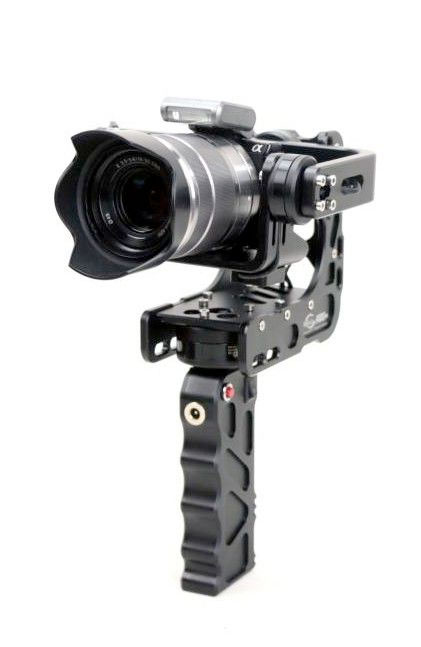
The original Nebula 4000
For us, we jumped at the Pilotfly H2 Stabilizer when it first came out, because not only did it have a higher load capacity (up to 4.9 lbs) than most other single handed gimbals, but it had the ability to transform into a two handed gimbal with the two-hand holder kit. Not just by adding additional handles to a one-handed gimbal, but by actually removing the single hand grip and replacing it with a battery-powered two handed unit.
The two-handed Pilotfly H2 has been the most compact and simple gimbal solution for the last couple years. Compared to other one-handed gimbals, the H2 two-handed is very low profile, not overly top or bottom heavy, and best of all, it simply works out of the box. No tuning necessary.
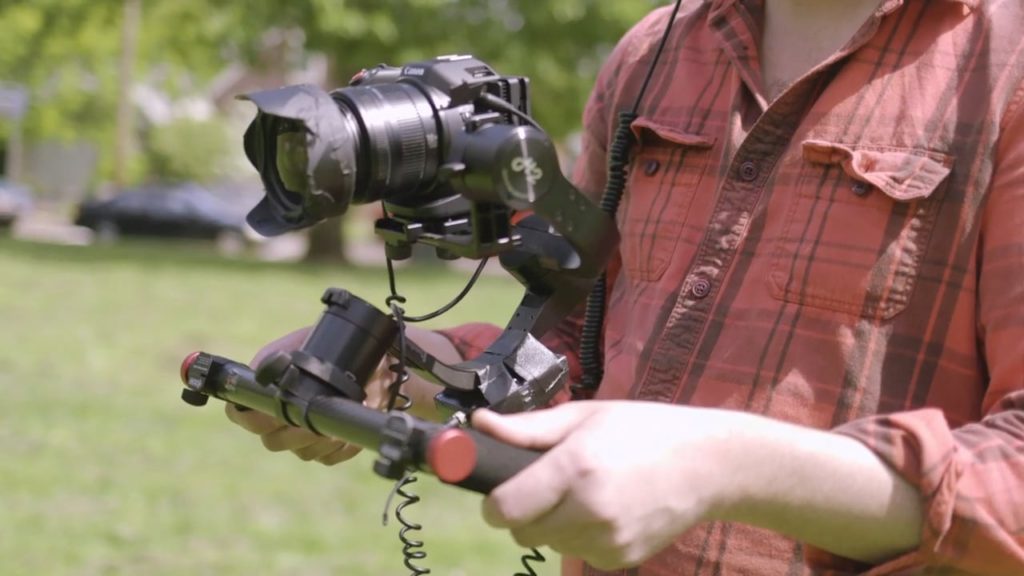
We placed the Canon XC10 on it and it was a dream to use. We taped a wireless receiver to it and were able to record hours and hours of direct-to-camera training materials while walking around, without getting tired of holding the rig. Plus, the batteries lasted for ages.
But as it happens, we weren't entirely happy with the XC10 for professional work. The Raynox wide angle adapter we used above just flared too much, and without it the built-in lens wasn't wide enough for gimbal work. We talk about our experience a lot more in-depth in our Canon XC10 review.
So we replaced the XC10 with the Canon 1DX Mark II. Finally, 4k at 60fps with a large sensor and great colors to match our Canon C300 mkII. Only one problem, it barely fit on the Pilotfly H2.
Canon 1DX Mark II on a Gimbal
The Canon 1DX Mark II is a near perfect gimbal camera. It has the best autofocus of any camera today, and you get Canon colors and compatibility with Canon lenses. You can shoot wide or semi wide with a lightweight Canon 24mm f/2.8 IS lens, for example, and the full frame sensor still gives you very satisfying depth of field.
It has great low light sensitivity, it has a built in microphone for scratch audio, and it's a simple unibody shape that seems like it would work well on gimbals.
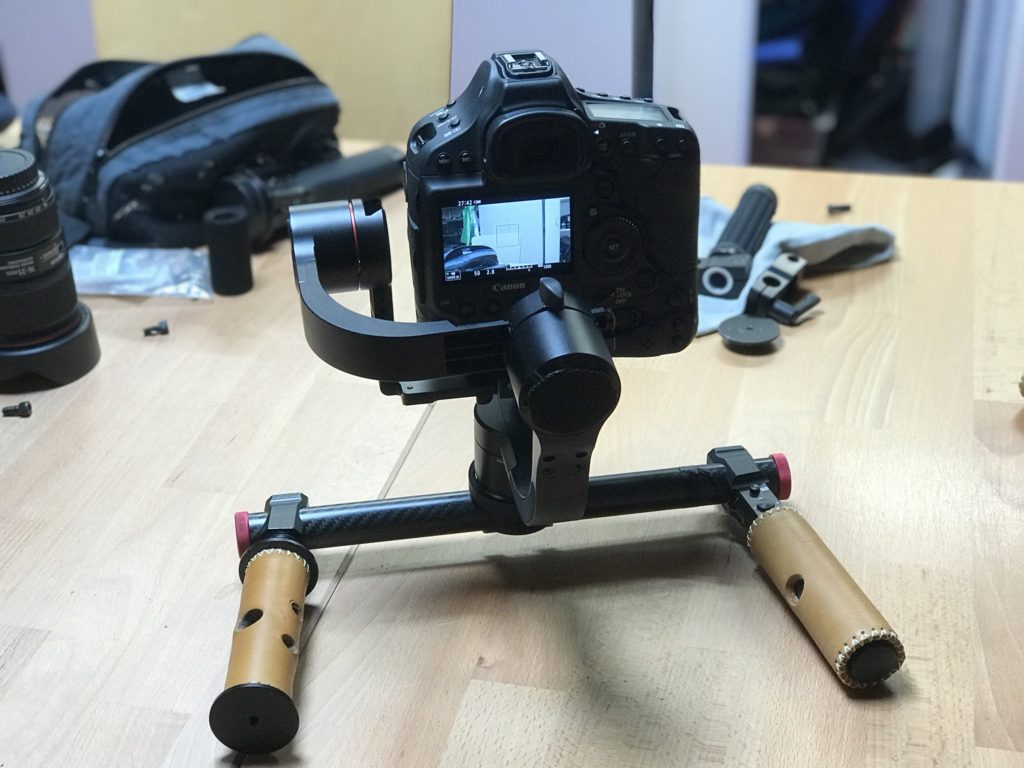
So for anyone who shoots with Canon cinema cameras, isn't the 1DX mkII the best option for a dedicated gimbal camera, to pair with your A cam?
It absolutely should be, but until quite recently, the 1DX mkII hasn't fit on any of the easy gimbals out there. And so 1DX owners have had to fly it on heavy duty gimbals instead, and if you're going to do that, why not just gimbal with your C200 or C300 rather than have to deal with color matching with a DSLR b-cam?
We actually did manage to get the 1DX mkII working on the Pilotfly H2, but barely. We had to remove safety screws from all the axis, and lower the camera to an uncomfortably loose part of the carriage, because the size and weight of the 1DX does not work on the H2 by default.
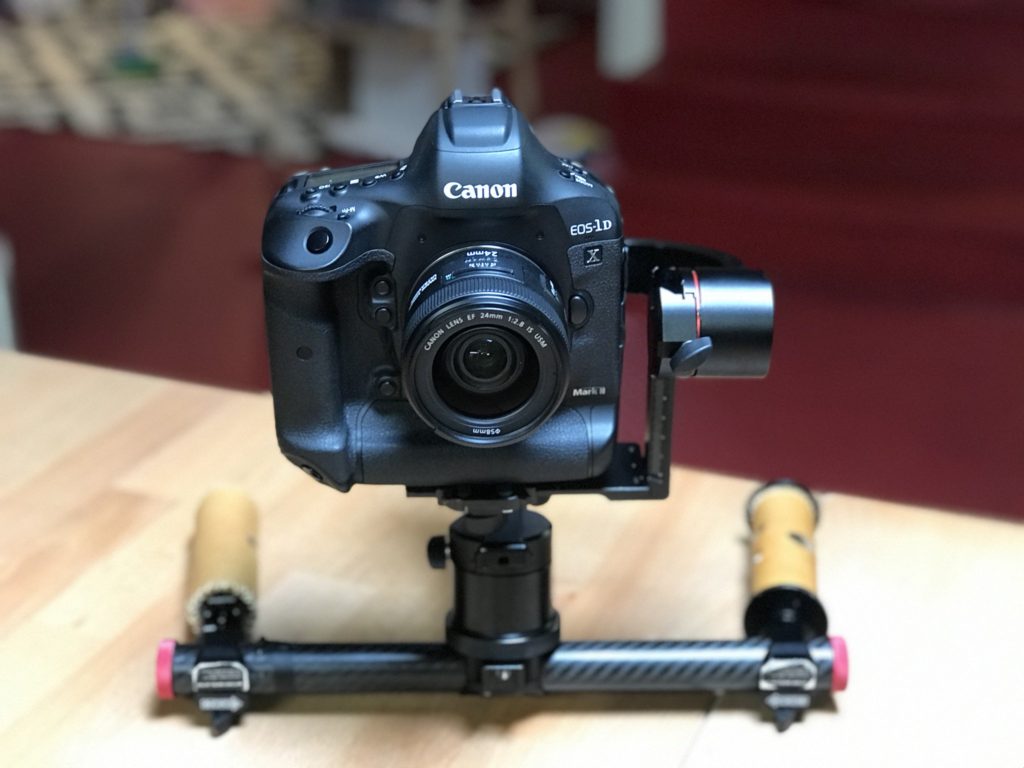
Most gimbals can't handle tall cameras, which is why a 1DX or a Canon C100 never balances as easily as a boxy camera like the Sony FS5. On a Letus Helix, you can make a camera more bottom heavy by adding weights to the bottom of the gimbal, but on other gimbals that's not an option.
Anyway, we got the 1DX balanced semi decently on the Pilotfly, but it's still too much for the H2 to handle. Because the encoded motors enable you to adjust the horizon by holding the camera in a position for a couple seconds, it means the horizon is ever adjustable. Which means as we're using the 1DX, the weight of it makes the Pilotfly H2 reset the horizon continually. It means we have to manually check the horizon every few seconds.
So, it works, and it definitely feels good to use with two hands (we replaced the default handles with the leather ones from a Letus Helix), but unfortunately it doesn't stand up to use.
Zhiyun Crane 2
Recently Zhiyun has introduced a gimbal that filled the much needed space for a simple, portable gimbal with higher than average load capacity. The Zhiyun Crane-2 can carry cameras up to 7 pounds, and based on the success of their previous one handed gimbals, it appears to be an easy tuning experience.
(The naming convention is a bit confusing. The Crane-2 is a different gimbal entirely than the Crane V2.)
Early reviewers even got the Crane 2 working with a Canon C200, which has been a breakthrough for anyone looking to mount a cinema camera on a small gimbal.
After it was released, some users found that the base Crane 2 setup didn't allow for 1DX mkII to be balanced properly. As is the case with many gimbals, they just aren't setup for cameras that are tall. But Zhiyun responded and came out with this Gravity Adjustment Plate that replaces the default camera holder.
All told, the Crane 2 seemed like the best current solution for medium sized DSLR cameras, mirrorless rigs, and even cinema cameras.
But while we've been waiting for a two handed accessory to replace the one handed Crane assembly, DJI announced that they were getting into the one handed gimbal business.
And DJI's Ronin-S initial retail price estimate was even lower than the Zhiyun Crane 2, which sealed the deal for many people who were on the fence about whether to get the Crane 2 or wait for something else.
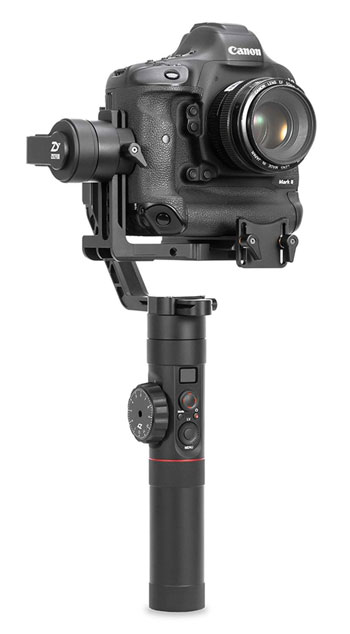
The DJI Ronin-S
When DJI teased the Ronin-S at CES 2018, at first it seemed like yet another gimbal in a sea of gimbals, but DJI is a giant company that has a lot more resources for R&D than any other competitor. And at CES, when they said they still needed more months to really fine tune the Ronin S, we could see this was an important product that they wanted to get right.
We were lucky to receive one of the first production models from B&H Photo Video, and have been using the Ronin S with our 1DX mkII for a few weeks now. So far, we're very impressed and are breathing a sigh of relief that DSLRs and heavier mirrorless cameras now have something that just works.
Balancing heavy cameras on the Ronin S
The Ronin S can take cameras up to 22lbs, which is amazing that the motors can handle that much capacity. But can your arms and wrists? In his review, Kai Wong even tried the Canon C300 mkII on a Ronin S.
Most people probably won't be flying their C300 mkII on a one handed gimbal, but once there's a two handed accessory, we could actually start seeing the C300 and FS7 and even a Panasonic EVA1 sitting on a Ronin S for years to come.
Right now the camera du jour is the Canon C200, especially the gimbal-friendly C200B model. A C200B by itself weighs only 3 pounds, and a Canon 10-18mm only adds 0.5 pounds to it. Add the touchscreen monitor to the side, and the C200 / Ronin S becomes a force to be reckoned with. Even in one handed mode.
Canon 1DX Mark II on a Ronin S
Our 1DX mkII does indeed fit on the Ronin S, but just barely. Weight wise we know the Ronin S can handle a much heavier camera, but it's the maximum length that the three axis can extend to, where the 1DX runs into issues.
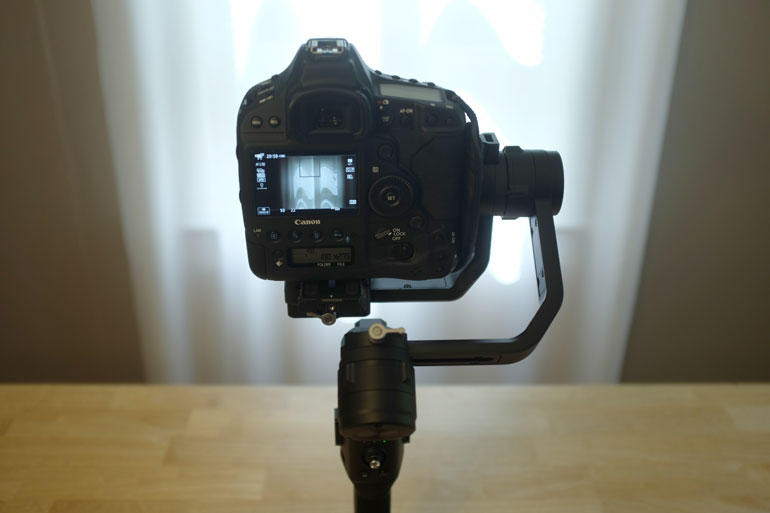
For us, we like to have a Vello hand strap on the 1DX at all times. And since it's such a pain to install and remove, we'd like to leave it on, even while it's on a gimbal. Fortunately that's possible with the Ronin-S, but really, it just barely fits.
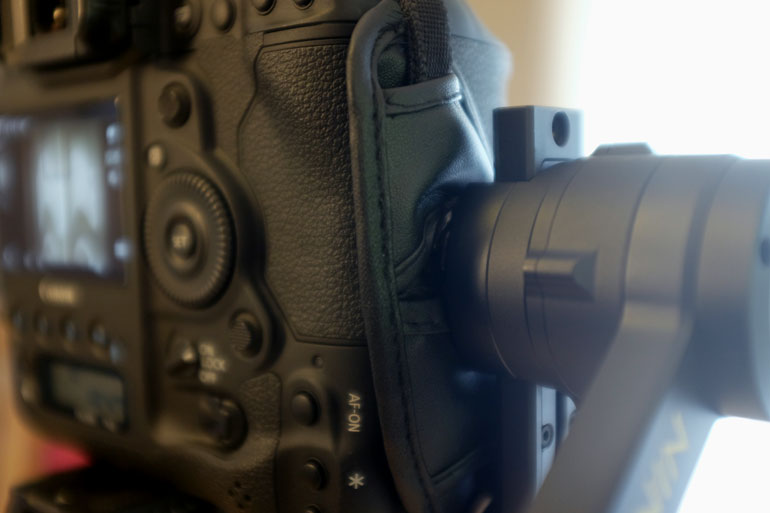
We have all the axis at their farthest points. And that's with a lightweight Canon 24mm lens. If we wanted to shoot with a Canon 16-36mm, we'd have to remove the hand strap. If you wanted to add a microphone or external monitor, it would have to go somewhere else, because there's no more room for additional top weight.
Our favorite gimbal lens is actually the super lightweight and wide Canon 10-18mm. Unfortunately for the 1DX, that lens is an EF-S mount and isn't natively supported by a full frame sensor. Fortunately for us, we have google to show us how to remove the plastic piece that makes the 10-18mm work brilliantly on the 1DX. No vignetting past about 14mm.
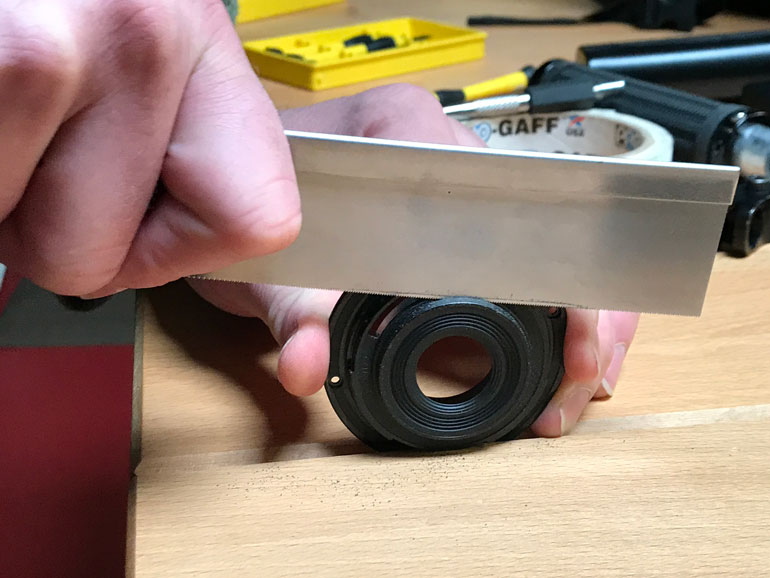
Unlike many other gimbals, the motors are actually on the right side of the camera. That's a very nice feature for a lot of cameras, which tend to have an articulating screen fold out to the left. Also the HDMI port is on the left side of the camera, so even lightweight HDMI cables have always tended to hit gimbal motors.
If given the option, it would good if DJI enabled a reversable carriage, so that users could balance their camera to sit to the right of the motor. Nit picky, perhaps, but options are good.
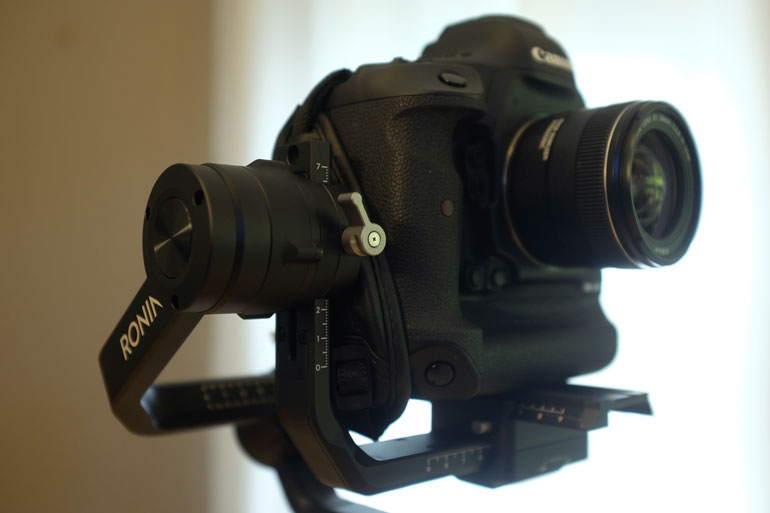
The main bummer with such a tight fit is that we can't add a quick release plate, like our favorite Manfrotto 394, on top of DJI's plate. It makes our 1DX too top heavy and unable to balance.
That means if you want to use a 1DX as both a gimbal cam and your primary A cam, you'll either have to figure out how to use the DJI plate on your tripod, monopod, or shoulder rig, or you have to continually add and remove your daily quick release before and after gimbal use.
DJI Ronin S Build Quality
Before even turning on the Ronin S, its most noticeable feature is the build quality. Compared to a lot of competing gimbals we've seen lately, DJI has got manufacturing and design down. It's really, really good.
On most gimbals, the main point of failure is actually the tightening knobs. They can be plasticky, hard to tighten or loosen, in weird positions, and unreliable. We've had cameras fall off several gimbals in the past, due to poor tightening knobs. True story.
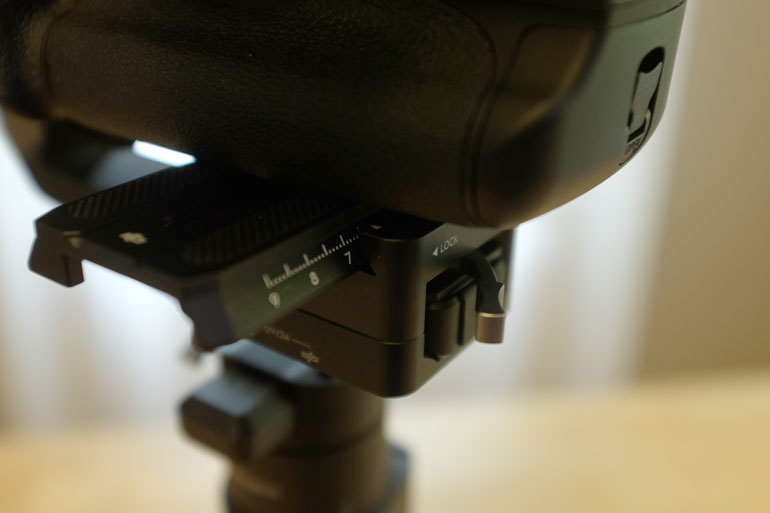
The knobs on the Ronin S are actually quick release levers, which makes them unique among other gimbals. All the axis have built in stops, so should one of the levers accidentally get loose, your camera won't fly off. But in our experience the levers do a good job of preventing slippage.
All the machining and the overall feel of the Ronin S is extremely solid. We would trust it with a C300 mkII and the not cheap Canon 18-80mm cinema lens on it.
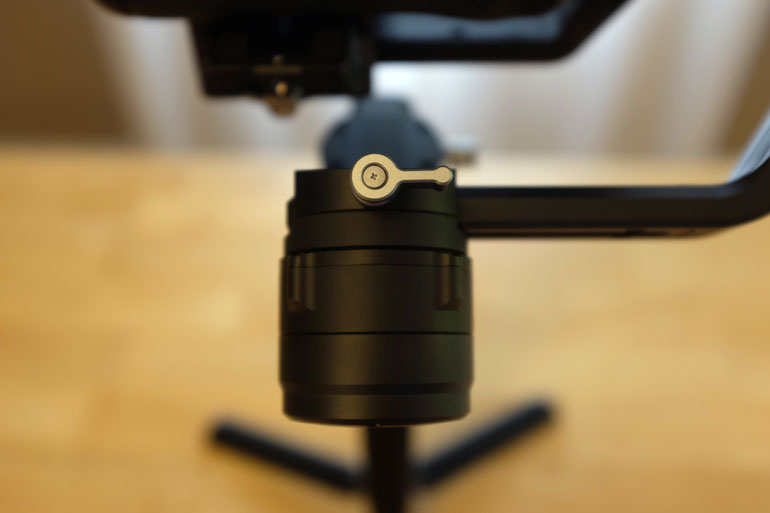
Having a quick release system means you don't ever have to rebalance your gimbal, apart from slight adjustments. The good news is with the Ronin S, you only really have to balance the tilt when you slide the camera into the quick release. The other axis can stay in their positions.
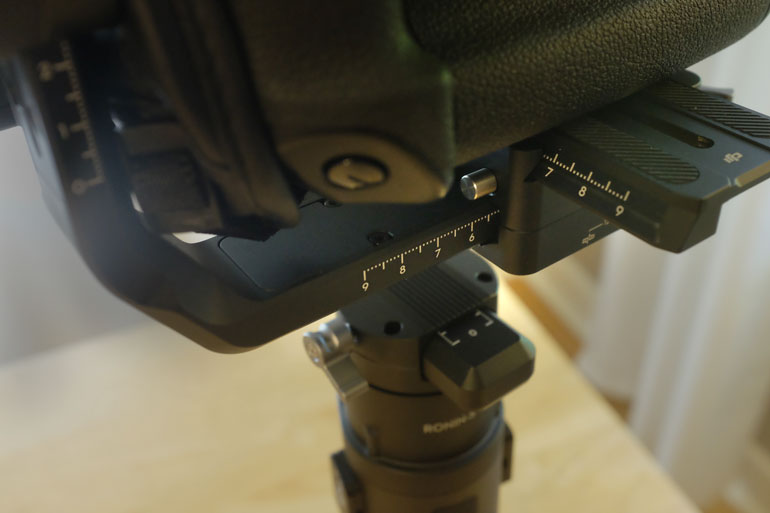
All the axis have measuring markers on them too, so it would be very easy to mark your balancing points with a piece of gaff tape or a marker, or write it down somewhere.
Powering the DJI Ronin S
Until the two handed accessory comes out, the only way to use the Ronin S right now is with the one-handed grip. It attaches easily to the bottom of the main 3 axis motor carriage, and inside the grip is a built in battery.
Although the Ronin S battery can run for 12 hours, it's not user replaceable, so you have to charge the internal battery with a USB-C cable before you can use it. If you forget to charge it before a production trip, it could mean you're out of commission for a few hours while waiting for the internal battery to charge.
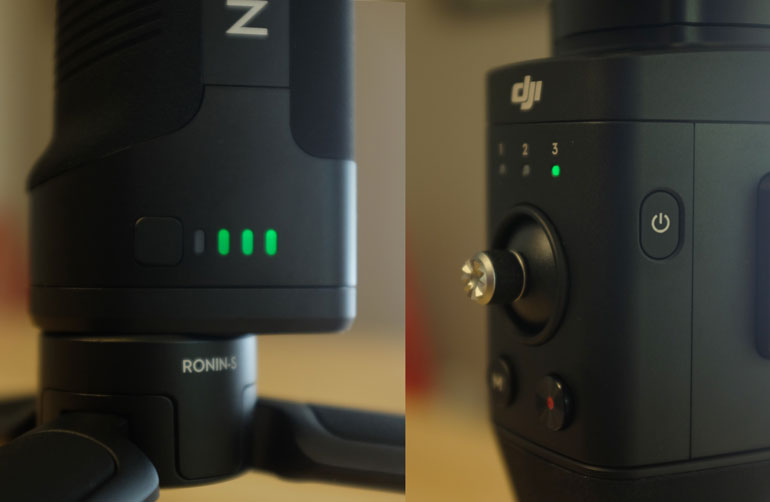
To power it on, you first have to turn on the hand grip power, with a button low on the grip itself, and then you can turn the motors on with a power button up near the camera. This way, you can power on/off the motors, without turning the system completely on or off. We're not entirely sure what the benefit of this is, but it's how a lot of gimbals operate, so we don't question that anymore.
DJI Ronin S Weight
As a result of the excellent build quality, the Ronin S weighs close to 5 lbs on its own, before you add a camera to it. That's not as much as the original Ronin at close to 10 pounds, but it's about the same as the Ronin-M weight. The difference is the Ronin-S is a one handed gimbal, and so all the weight is centered on the one handle, as opposed to being spread out over a wide base.
Now, if you add a camera and lens that weighs about 4-5 pounds, which is fairly typical of a medium sized DSLR and lens, you're holding up to 10 pounds with your hand. That can get tiring.
To be honest, the weight isn't as big a deal as you may think. It's a different story when the stabilizer remains solidly working even when you hug it near your body.
If you've ever used a Glidecam, you know how agonizing it is to hold not only a 4-5 pound camera, but an additional 4-5 pound counterweight at the bottom of the steadicam, with ALL of the pressure going into your wrist.
There's no bracing a glidecam. Relief comes with much more complicated accessory systems that transfer the wrist pressure to your arms, shoulders, chest, and hips.
With the Ronin S, however, you can hold the rig with two hands and brace it against your body.
The little tripod feet can actually be placed against your body for even further support. With the incoming two handed accessory, holding it up for longer periods of time will be even easier.
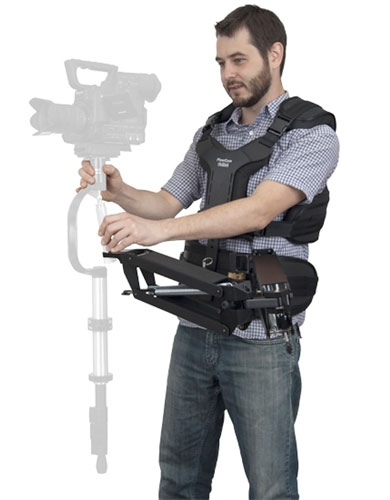
In the meantime, let's be honest with how long we're holding one of these. If you're using a one handed gimbal, you're adding gimbal shots to a production that includes regular camera angles and support as well. You're not holding it all day long. If you do want to operate a gimbal all day, you're most likely looking at fully rigged setups that keep all the weight off your hands, and keeps you injury free for a long career of steadicam operation.
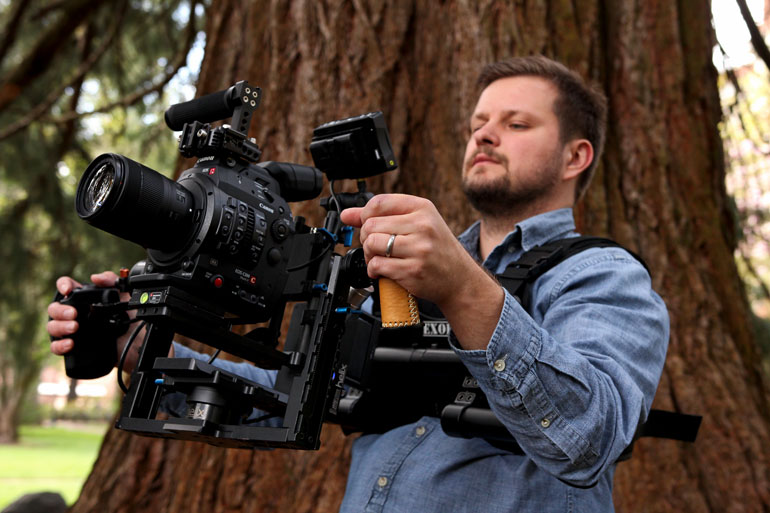
Letus Exo17 gimbal support vest for all day shooting
One handed gimbals are meant to be used to spice up productions, to shoot 15-20 minutes here and there, take a break, shoot some more later. In this case, even with a heavy cinema camera, you can use the Ronin-S throughout the day.
That wasn't always the case with two handed gimbals like the Ronin M, which tended to put a lot of strain on your triceps as you held it in an awkward position with your hands far apart. So comparatively, the weight and design of the Ronin S is perfectly suited for the most common production use cases.
Ronin-S one handed vs Dual Handle operation
With the Ronin S, as soon as you turn on the powerful motors, they've got your camera locked. You can walk, run, jump, hold the gimbal in multiple spots with one or two hands. The motors are not going to jitter or go haywire like the gimbals of yore.
So as we mentioned above, you don't just have to hold the rig up with one hand. You've got plenty of space along the base of the Ronin S, and you can even fold up the tripod accessory and hold that with another hand. We've found it very comfortable to brace the whole thing against your body, and even let the little tripod legs push against our hip.
If desired, you could certainly add an accessory like the Zhiyun TransMount Mini, which fits conveniently between the bottom of the grip and the top of the tripod accessory. It gives you a way to hold the Ronin S with two hands.
You can also add other accessories above the TransMount grip, like a monitor or a microphone.
We'll go into external monitors a bit more in the review below. But this is a very affordable solution if you want to hold the Ronin-S with two hands right away.
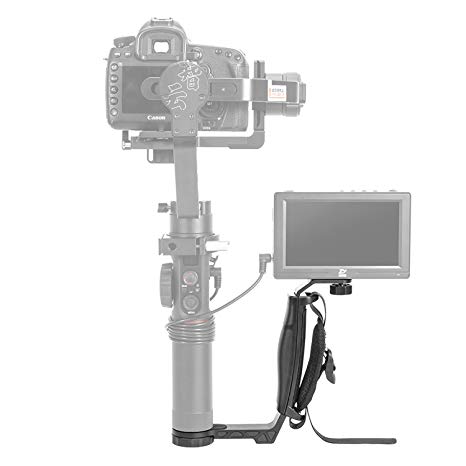
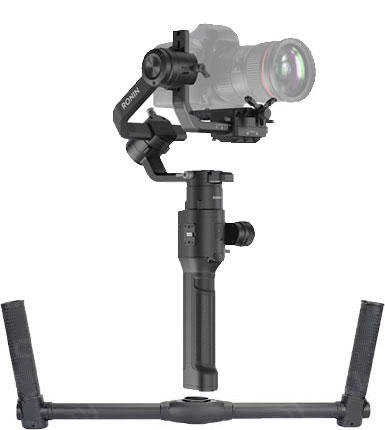
There are also other two handed accessories that you could attempt to fit onto the Ronin S, or even create your own DIY solution.
The main thing is when you add additional handles, you don't want your hands to sit at such a distance below where your camera and motors are.
That will make it so your every little move becomes a much bigger move for the camera. It's like when you're operating a jib - a few inches of movement by your hands can mean the camera sitting feet away from you will move quite a bit.
So, you want your hands close to your body, so they're comfortable rather than really widely spread apart, and you want them close to the camera and gimbal. Ideally, DJI's own two handed accessory for Ronin S will give us everything we want with two handed operation.
When is the two handed accessory coming out? We have no idea. It could be months or longer. Or maybe even never. But when it does, the Ronin-S is going to be a no brainer purchase for many video shooters.
A tripod Stand when you need it
The included tripod accessory does make the already long Ronin-S even longer, especially if you flip down the legs. But it's so damn useful.
The biggest problem with nearly all previous generation gimbals is that you had to carry around a stand to hang the rig on, or to adjust balance. That's what made the unique design of the Letus Helix different. The Pilotfly H2 two handles could be rotated in such a way that you could also set it down on a flat surface to balance. But other gimbals designed for medium sized cameras didn't have that ability.
Many shooters have figured out DIY stands, such as ones hanging off the side of a car, or placing a gimbal on a tripod, or the simplest stand ever: handing it to an assistant. Without a stand, many gimbals and expensive cameras spend a lot of time bundled oddly on the floor somewhere during a shoot.
The beauty of the Ronin-S tripod legs is it's completely removeable if you don't want it. But if you do, it does a great job of supporting even a heavy camera on top of the already-heavy Ronin-S.
Using an External Monitor With the Ronin S
Although we prefer to keep the camera gimbal setup as simple as possible, many shooters will want to use an external monitor with their gimbal. Some camera screens are difficult to see in the daytime, or you need a monitor for a client or producer/director to be able to see what you're doing.
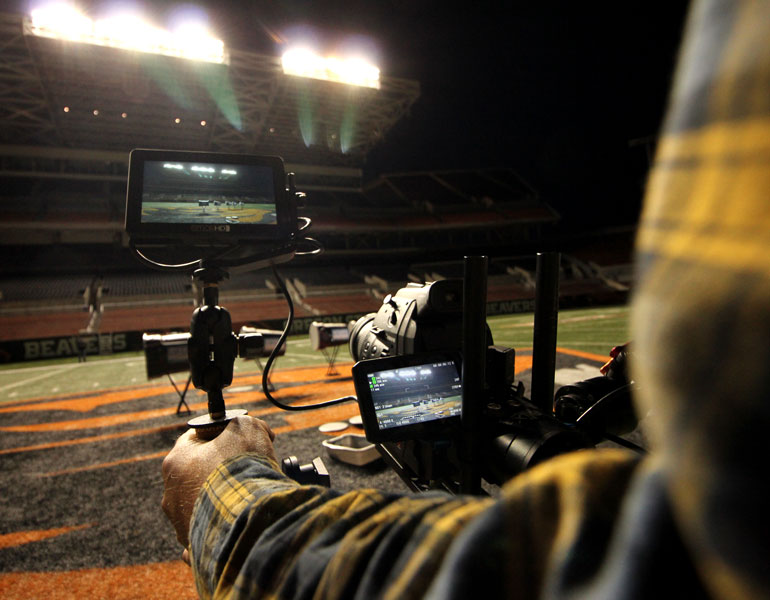
A SmallHD Focus is the perfect daylight viewable gimbal monitor
At the moment, you have a few different options for attaching a monitor to the Ronin-S. You can use something like the Zhiyun TransMount Mini mentioned above, which has a monitor thread built into the handle. Or you can use a similar accessory called the Simple Gimbal FMJ. You'll most likely need an accessory arm to rotate it to where you can see the monitor best.
Other Ronin-S users have pointed out that the two accessory ports have threads in them that can be used for an external monitor mount. One of the ports has the Focus Wheel attached to it by default, though it's easily removed.
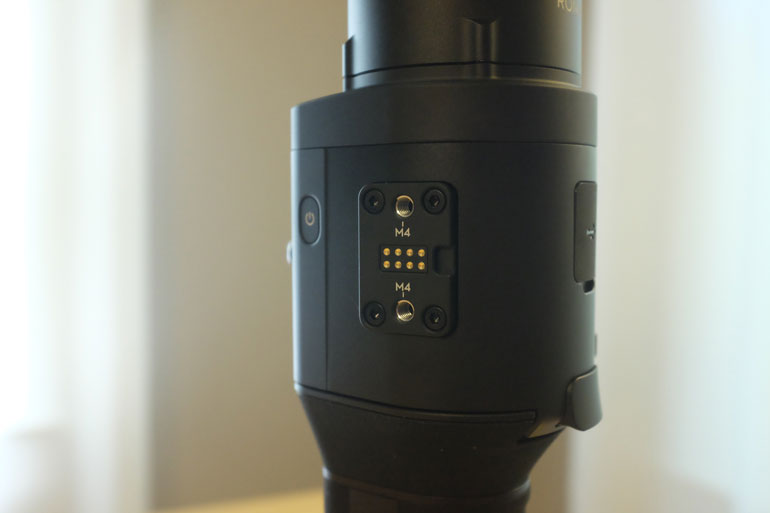
So if you take off the protective plate from the accessory port, you can place a SmallRig 1960 Cold Shoe Adapter which has space for DJI's default screws to be used. And then you can attach any shoe accessory like this SmallRig Mount to your monitor.
For us, one of the main advantages of the Ronin-S is the design of the motors are meant to keep the camera's LCD screen completely visible. And if you use a camera like the 1DX mkII that has touchscreen autofocus, you can continue to hold the camera with one hand while using the other hand to adjust focus.
That's a huge improvement to the previous shoots we've had the 1DX on two-handed gimbals, where we've had to ask an assistant to touch the screen to lock focus while both our hands were occupied. Or we've had to set the rig down to fix the focus. This one-handed operation is just a ton simpler.
Camera Control with the Ronin-S
In addition to the upcoming two handed accessory unit, DJI has other big plans for the Ronin-S, and the camera control ports are where the action will be. But it will take cooperation from camera manufacturers to make these future features work with a wide variety of cameras.
For now, there's the included Focus Wheel. With a compatible camera, you can pull focus with the included cable that connects to the camera. Right now, the focus wheel only works with the Panasonic GH5 or GH5S, with their electronic servo lenses.
Currently, the most natural and popular lens for the GH4 and GH5 is the Panasonic 12-35mm II, and it has built in power zoom. So if you're going to use one of those cameras on a Ronin-S, the 12-35mm is a no brainer.
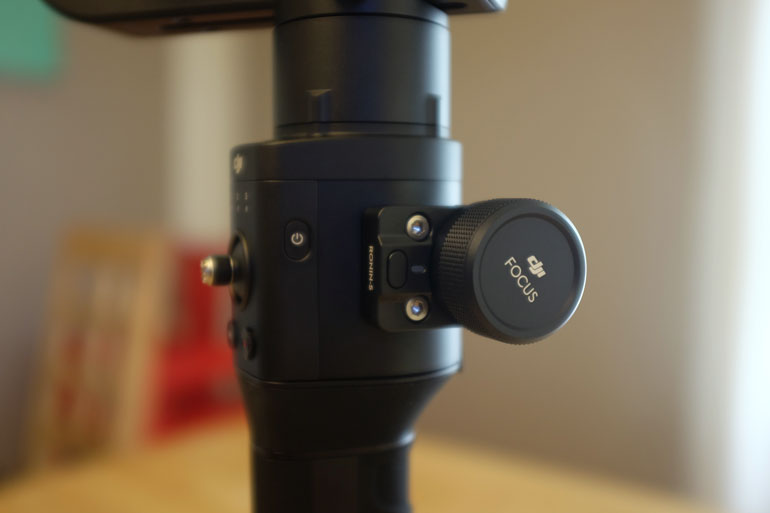
There is also an integrated Start/Stop button on the Ronin-S, and DJI provides a full list of currently supported cameras that can use this feature, but you're on your own for providing the right cable.
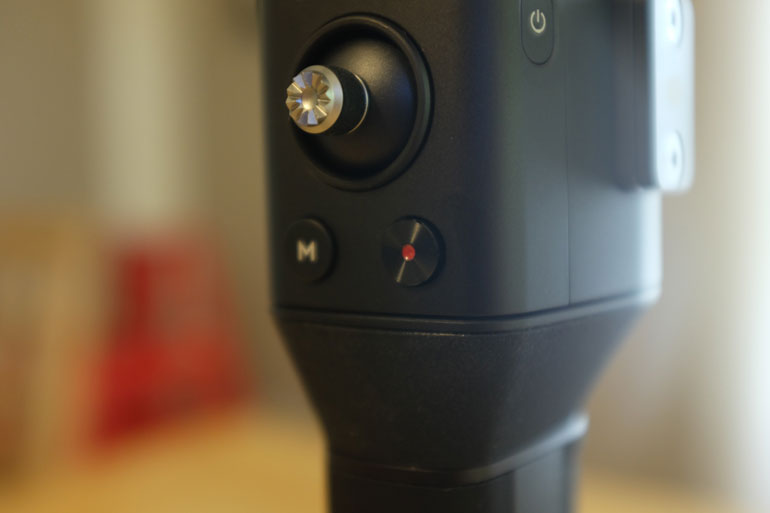
While these bonus features are certainly nice and we're open to trying them out, honestly when you're shooting on a gimbal you most often are using an ultrawide to wide lens with either a deep depth of field. Autofocus on most cameras will work fine, and you can readjust focus drift while you're shooting thanks to the motor strength of the Ronin-S.
For more zoomed in gimbal operation, or for zooming while shooting, chances are you'll need to upgrade to a considerably more sophisticated gimbal system with wireless focus and exposure control, cinema lenses, and probably a buddy to help you do all that.
DJI Ronin-S Shooting Modes
The Ronin-S has a few buttons on it that give you different shooting options. The joystick toggle, of course, adjusts the pan and tilt. It moves too fast to use in a smooth shot, so don't even consider it as an option during recording.
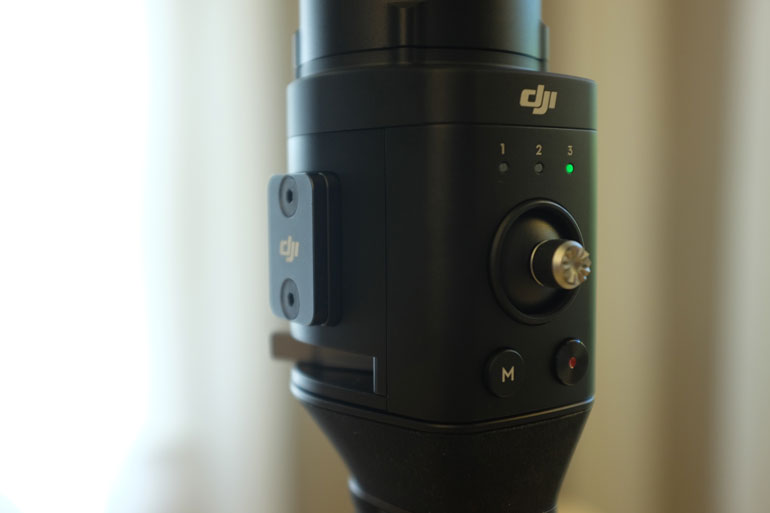
The 3 user modes, however, have varying default speeds of the motor follow. We prefer super slow, cinematic moves, and User 3 is the slowest. User 1 is good for ultra quick motor response, for sports or using in a car.
Yes, the Ronin-S has a selfie mode, and with just the press of the trigger button the Ronin-S will do a complete about face. Vloggers will love that.
There's also the very popular Flashlight Mode, or better known as "Inception" mode, that enables you to do a full 360 degree rotation. Neat shot, but how often would you use it? More typically it could be used from above a table scene, since a rotation shot like that would be hard to do on a tripod.
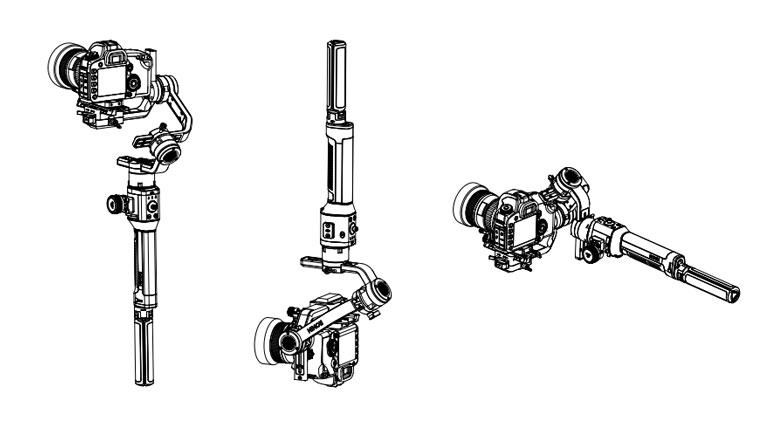
Truly the most common alternative shooting mode is simply the inverted mode, where the camera sits below the gimbal handle. That makes low angle shots a lot easier, such as following behind people's footsteps. Unfortunately the transition from low angle to normal angle is not smooth, like the way the Letus Helix works from briefcase mode to normal operation.
DJI Ronin-S App
Finally we get to the core of why the Ronin-S is better than any other gimbal out there for medium sized cameras. The app.
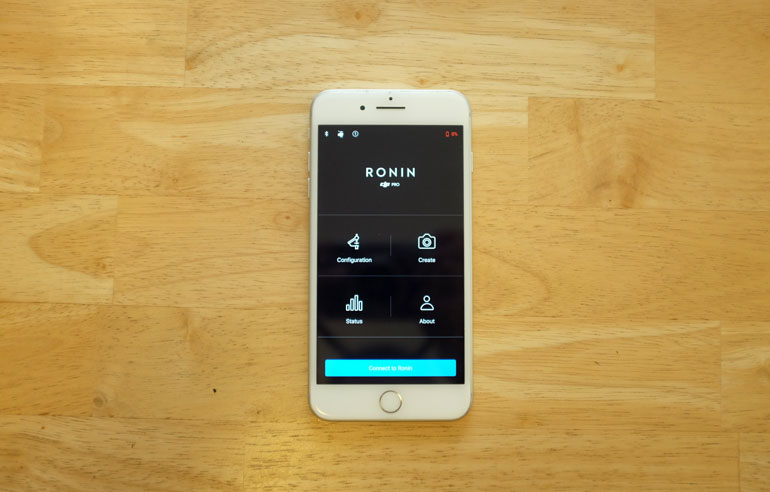
To connect the Ronin-S to the app, you have to both power the gimbal on and turn on the motors, and the app will then recognize the gimbal. You don't need to go into your Bluetooth menu anymore, or turn off your internet in order to connect via WiFi, like some other gimbals.
It couldn't be any simpler. Although you do need to enter the password, which by default is 12345678.
Ronin-S Auto Tune
Once you're in the app, connected, and you've got your camera balanced on the Ronin-S, we arrive at what we believe is the holy grail of gimbals: the auto tune.
It takes a few minutes, and you'll hear what sounds like a tiny jack hammer performing some kind of construction inside the Ronin motors. But really, this is magic.
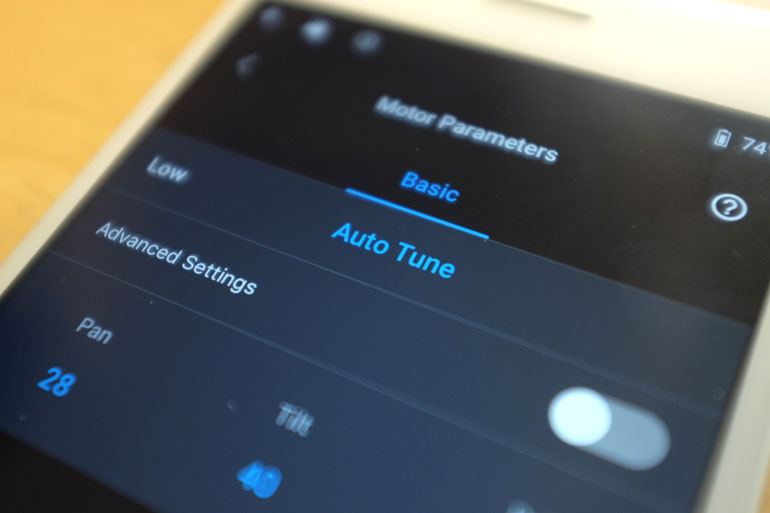
The fact that this is even an option is the result of DJI's massive R&D resources that most other companies simply can't compete with. If you recall, a few years ago Varavon teased a prototype of auto balancing and auto tuning gimbal that was going to go for $20,000.
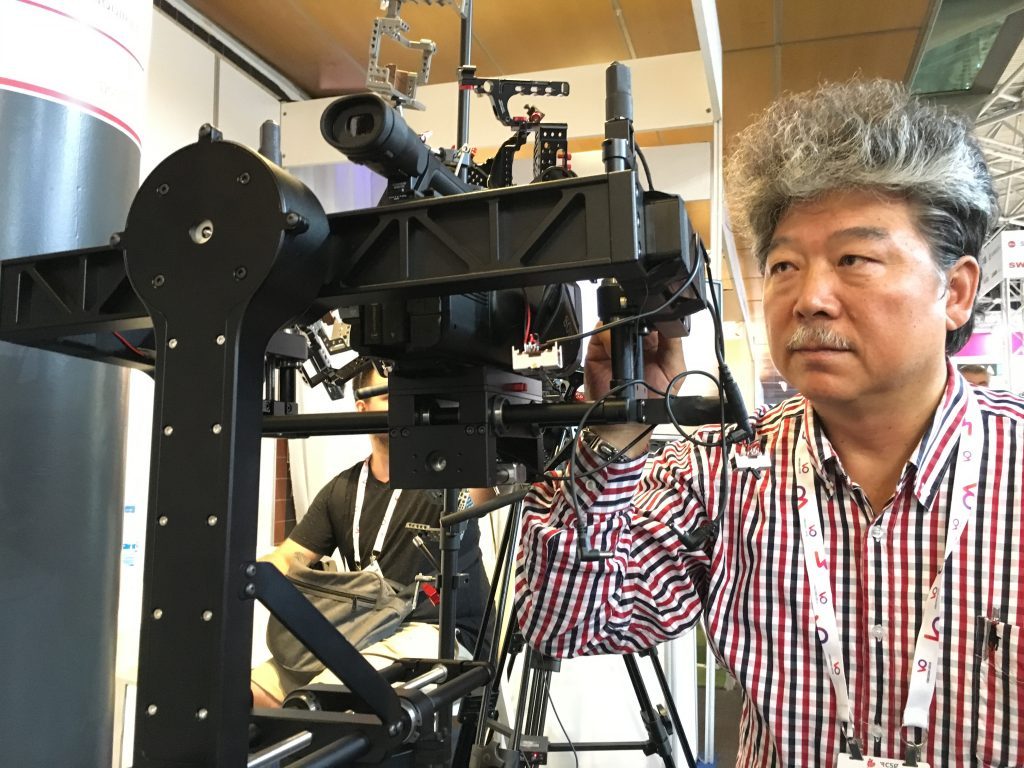
The amazing thing is there are more than a few production companies out there who would probably shill out $20k for a gimbal that eliminated all the headaches of tuning. That's how frustrating the gimbal PID tuning process can be. We've spent untold amount of hours in this SimpleBGC screen and we hope to never have to look at it again.
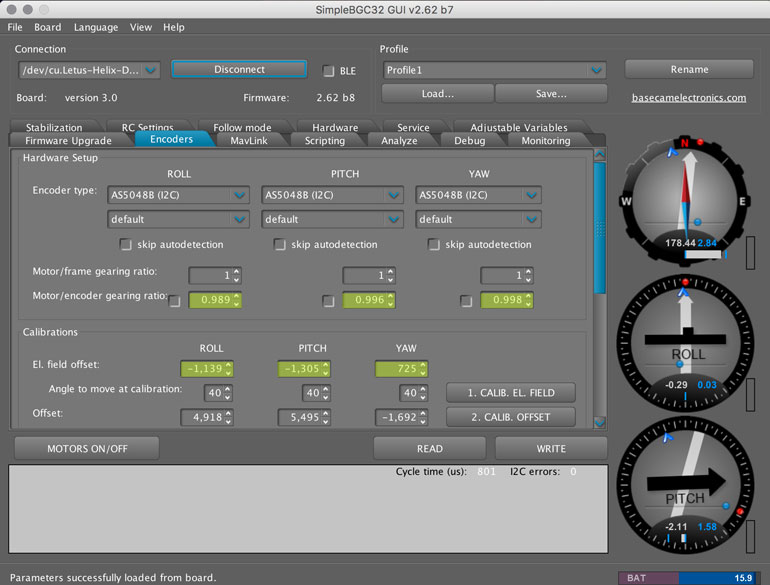
You also had to use the SimpleBGC GUI to adjust the follow speed of the pan and tilt motors on even easy gimbals like the Pilotfly H2. Before you can even get to that stage, you have to download and install a number of drivers so that the SimpleBGC program will connect to your gimbal.
Now, you can adjust the speed of the motors in one of the Ronin-S simple menus. By default, the Ronin S comes with 3 modes, fast, medium, and slow follow. You can go in and make all of them slower, or pick one and monkey with it as you wish.
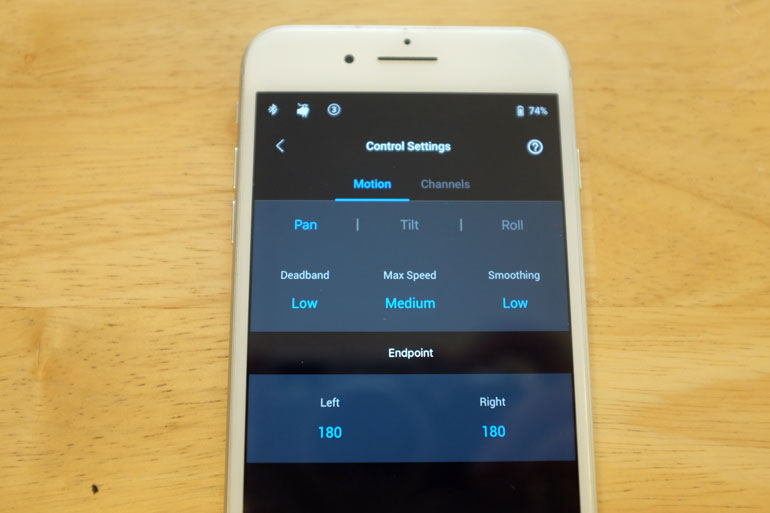
If you really want to geek out, you can still access the advanced gimbal settings like PID, notch filters, etc. Not sure why you'd want to do that if you don't have to, but it's there.
Maybe when the two handed unit comes out, we'll start seeing much heavier and more sophisticated camera systems being flown on the Ronin S.
In which case, there may certainly be a need for a technician to go in and adjust the micro details of the motor strength, stiffness, and filters.
For us, we're happy to not look at this screen ever.
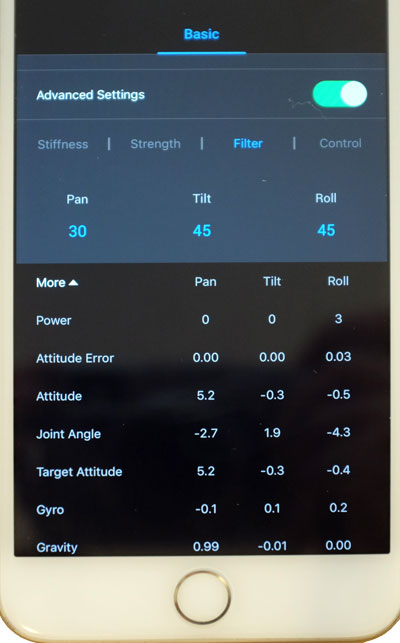
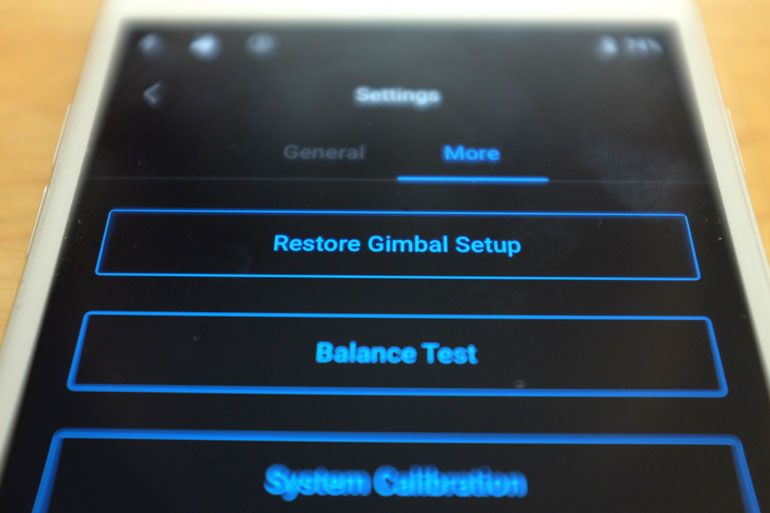
And if you really mess up while fooling around in the app, or if you perform an auto calibration while your camera isn't balanced properly on the Ronin S, you can always go in and just reset the thing to its default factory settings.
Believe us, this is a sigh of relief. No matter how simple or easy a gimbal might seem, there are always stories in the forums about people who have messed with their gimbal settings too much, rendering them completely unusable. Without a reset option, it's taken a few weeks of sending a gimbal into the manufacturer for repair, if they'll even do that for you.
Ronin S app Create Modes
In the app, there are also additional options like Timelapse, Motionlapse, Panorama, and object tracking.
To be honest, we've never bothered with using gimbals for things like timelapses, because for one, we couldn't trust most gimbals to keep their horizon or direction for more than a few minutes while holding it, so why would we trust it to execute an hour-long move?
Truthfully, a 180-degree panorama is just not that interesting of a shot, even if it's an hour long timelapse. An iPhone can do it now, so we've all seen it a hundred times and it's meh.
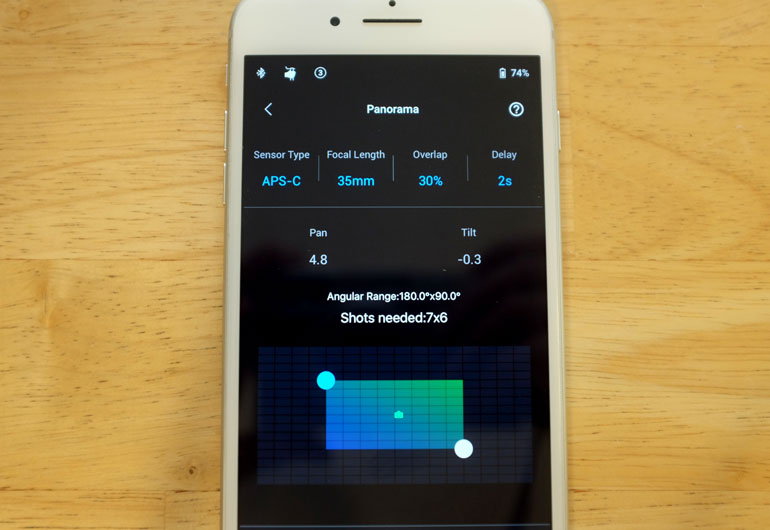
But an hours long panorama, like over the course of a day, now that would be interesting. Before the Ronin-S, you really couldn't depend on any gimbal to execute a smooth timelapse that long. But maybe now we'll start seeing interesting long shots created with gimbals that we haven't seen before.
DJI Ronin-S - priced low enough that you'll actually use it
Finally, we come to the end of this review, and we go back to the whole reason why the Ronin-S is a great addition to many documentary and corporate filmmaking kits. It's portable, dependable, and just works.
It's super unlikely for a one man band or even a small crew to add a gimbal to their documentary or corporate shoot, if it takes a whole separate suitcase to carry all the components, and then it takes a long time to setup the gimbal and camera before using, and then you have to carry around a stand to balance it on, everywhere you go.
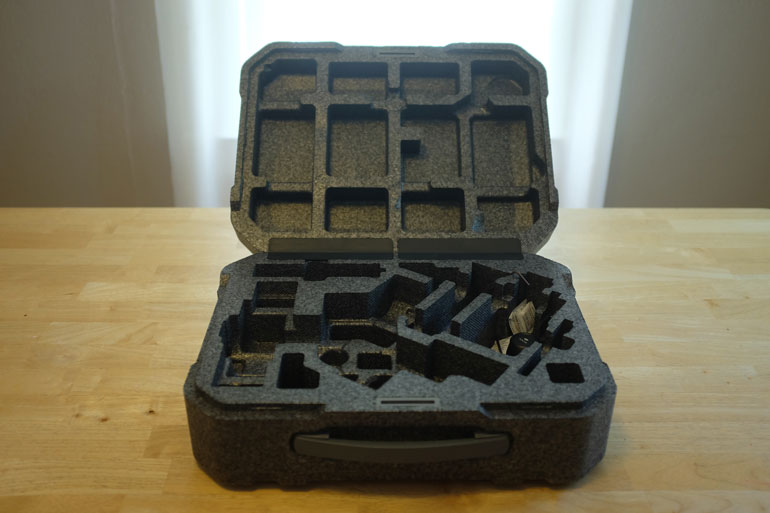
The Ronin-S does come in a nice package where everything is protected by a nice styrofoam and is cut to the exact dimensions of the gimbal and its various parts.
You're going to want to put this carrying case aside - not throw away, because it's nice for long term storage - but it's unnecessary for even air travel.
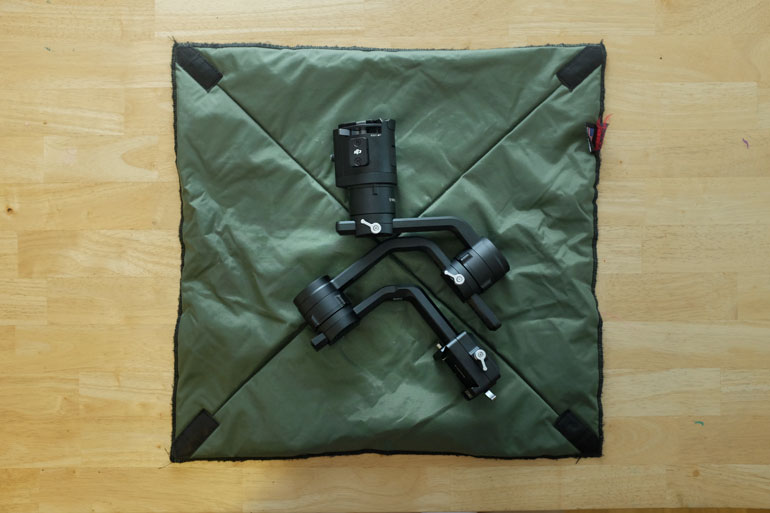
To get the Ronin-S ready for travel, you simply remove the battery grip from the main unit, and then you use your favorite neoprene wraps you've already got, to protect the Ronin-S as it's packed in other bags or suitcases.
That's how you ensure you get a gimbal shot everywhere you go. You don't baby it like it's a showpiece. That's the beauty of the Ronin-S - it's built to be a workhorse, with the camera you already have, and priced low enough that you can feel good about using and abusing it. So now you have no excuse to not bring it along to every shoot.
DJI Ronin-S - check current price at B&H Photo Video
