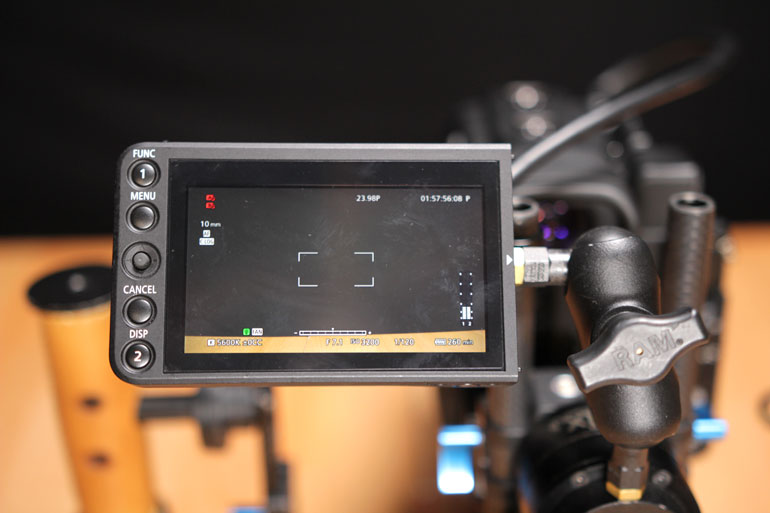
Canon C300 Mark II with LM-V1 Touchscreen Monitor
By Jon Roemer
Is it possible to add a game changing feature to a camera long after the camera was released?
The Canon C300 Mark II was announced in April 2015 and went on sale the following fall. It has stayed true to its form since then. Firmware updates have brought it the option of moving the camera’s waveform left or right, as well as bypassing the internal noise reduction, but other updates have been limited to adding lens compatibility or control.
In the meantime, Canon released the Canon C200, a lower price point camera which has its own advantages and disadvantages relative to the C300 Mark II. One of its big advantages is its touchscreen.
The Canon LM-V1 is a lightweight 4″ screen that is powered by the camera and adds a level of ease and finesse to Canon’s stellar Dual-Pixel Auto Focus (DPAF). DPAF allows you to lock a focus point, track an object within the frame, or to recognize and track a face. With the C200 you just touch the screen to select or move a focus point. It couldn’t be easier or quicker.
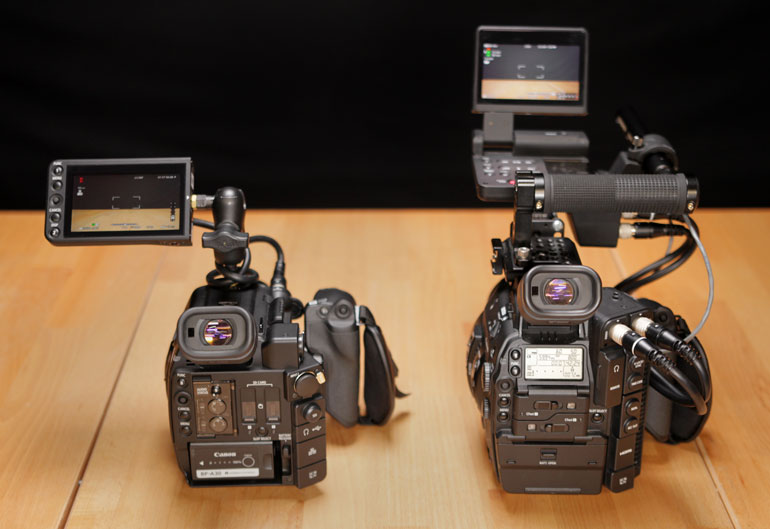
If you are not familiar with the C300 Mark II specs, it ships with an integrated audio/video unit that most folks call the clamshell. It requires two cables, one each for audio and video, and it has a 4″ screen and two XLR ports along with audio control settings. The screen can flip up, rotate, flip down, and the clamshell’s control panel can rotate as well.
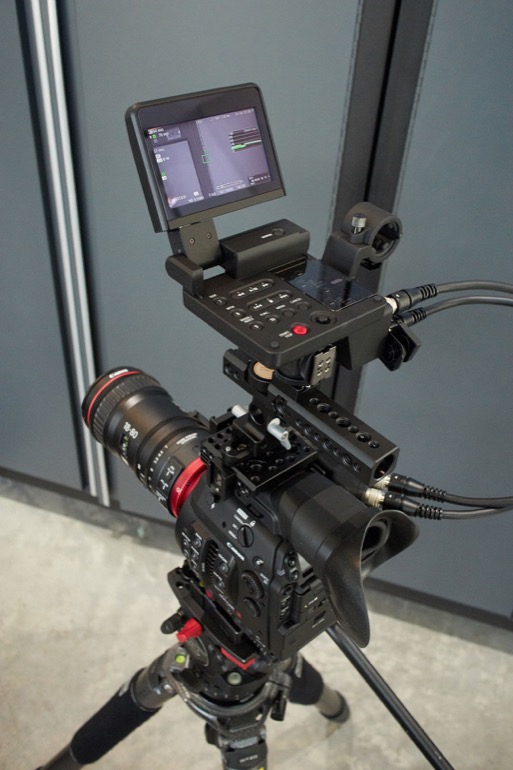
Canon C300 Mark II with its as-shipped clamshell style audio/video unit sitting atop a Wooden Camera NATO Plus Handle.
The C300 Mark II, like the C200, has Dual-Pixel Auto Focus, but it’s an earlier version with no touchscreen. It relies on the operator using one of the camera’s joystick nubs; one each on the body, monitor, and grip; to select and or move a focus point. It works but it’s inelegant.
If you need to select an AF point while filming, it can take a moment too long to do it. You can often overshoot the area you want to hit, and you risk jostling the camera as you use the joystick. If you are face-tracking and more than one face is within the frame, having to use the joystick adds to the time it takes to select the face you want to track.
Touchscreen Autofocus on the Canon C300 mark II
Enter the C200’s touchscreen, the LM-V1. This past fall Canon announced a firmware update for the C300 Mark II which lets it use the LM-V1 touchscreen to select and control focus points just like on the C200.
The firmware update is free but you’ll need to buy the Canon LM-V1, and to supply a way to rig it to the camera. The LM-V1, unlike a third-party monitor, does not need a battery, since it draws power and video through either of the two cables which came with the C300 Mark II’s clamshell.
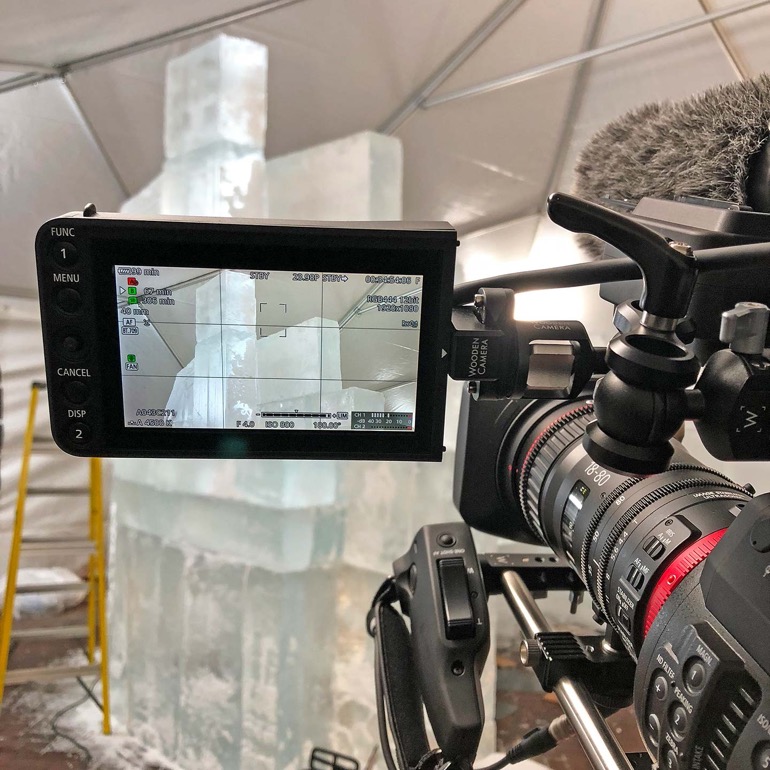
The Canon LM-V1 touchscreen on a C300 Mark II.
I’ll get to the rigging in a bit, but most importantly, how well does adding the LM-V1 to the C300 Mark II work? In a word, it’s great!
If you are a DPAF user on the C300 Mark II, the LM-V1 adds an unparalleled ease of use. No more futzing with the joystick. Lightly touch the focus point you want and it is done. Similarly, if you want to rack focus to another point within the frame, to set a point for focus tracking or to choose between faces when face tracking, just touch the screen.
The LM-V1’s display is also a bit better color corrected than the C300 Mark II’s clamshell LCD. All in all, I have felt less of a need to use my SmallHD 502 as an external monitor with the C300 Mark II when using the LM-V1.
Here's a quick test of the LM-V1 on the Canon C300 Mark II with a Canon 50mm f/1.2 L EF lens:
Canon LM-V1 Outside with Hoodman Sunshade
The LM-V1 is not a high-bright monitor. It does work outside but I’d recommend a hood for it. Hoodman makes a nice hood which fits the screen but still leaves the LM-V1's buttons accessible.
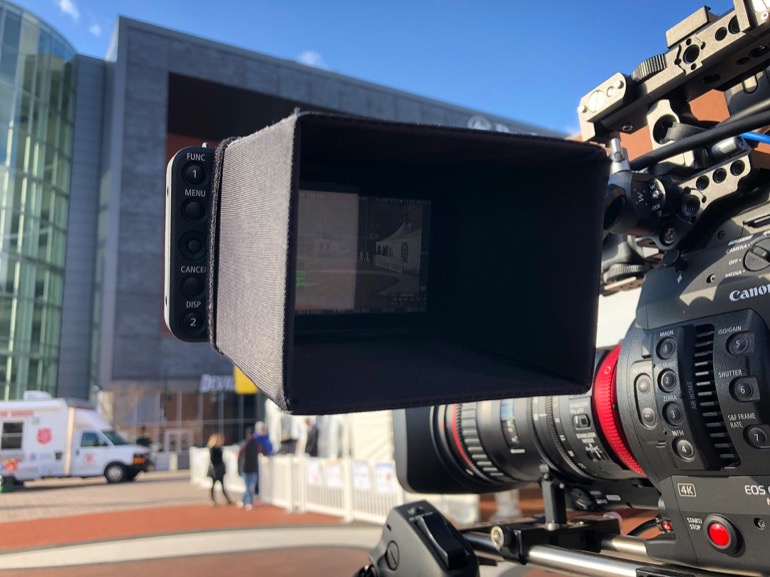
Hoodman HD Hood on a Canon LM-V1 screen and a C300 Mark II outdoors on a sunny day.
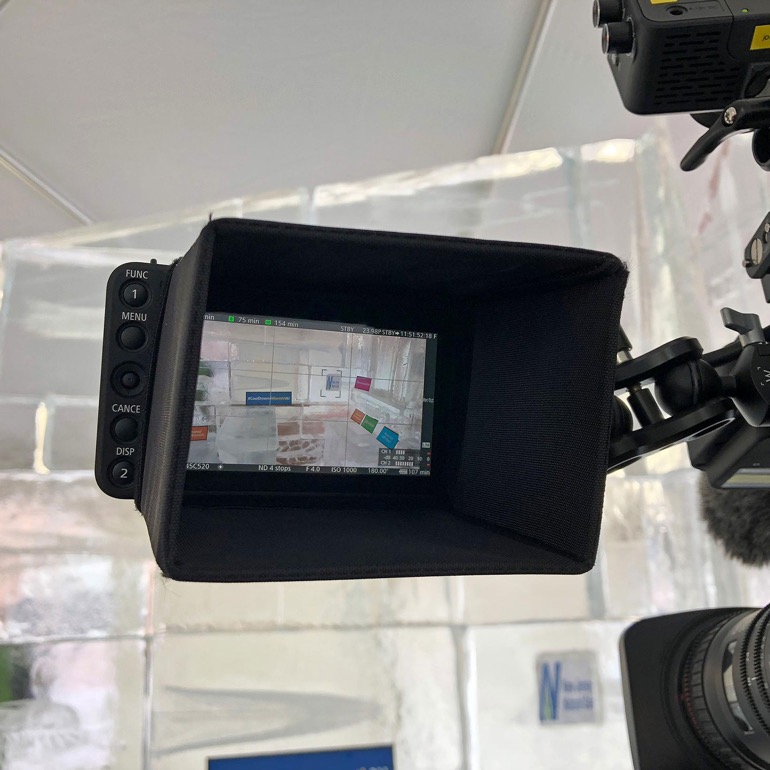
Canon LM-V1 screen with a Hoodman HD Hood for the Canon C300. It shades the screen area while leaving the buttons accessible. You will have to reach into the hood to change the focus point.
The LM-V1 has five buttons and a small joystick selector. Two of the buttons are user assignable. One button, not visible in the photo, is a Mirror Button to switch the image orientation, should the monitor be mounted upside down. These are less controls than are found on the C300 Mark II’s clamshell. The clamshell has six buttons plus video review controls, a record start/stop button, a mirror button, and a joystick selector. Four of its buttons are user assignable.
In practice, going from the clamshell design to the LM-V1’s more limited button array has not been an issue for me. The clamshell’s buttons and controls replicated what was already on the camera body. The LM-V1’s are similar. One customization I did do on the LM-V1 was to change the #1 “Function” button to a Waveform button for quick access to the waveform.
Canon MA-400 XLR Accessory on C300 Mark II
As a C300 Mark II user, if you opt for the LM-V1, you are faced with an audio decision. The LM-V1 is a screen only. It doesn’t have the XLR ports or audio controls of the clamshell. If you use only the LM-V1 on the C300 Mark II, you are restricted to camera’s 3.5mm audio jack. You could run the LM-V1 alongside the clamshell to get your XLR inputs and controls back, but you are adding a lot of weight.
Luckily, a third solution is available. Canon has an audio only microphone adapter, the MA-400 Microphone Adapter. Like the clamshell, it has two XLR inputs with levels controls and input settings (Auto, Manual, Line In, Phantom Power).
This latter solution has become my preferred method of working. I don’t want the extra weight of the clamshell if I am not using its screen, and I like having some flexibility when it comes to the placement of the MA-400. The MA-400, like the LM-V1, uses either of the two cables which came with the C300 Mark II’s clamshell.
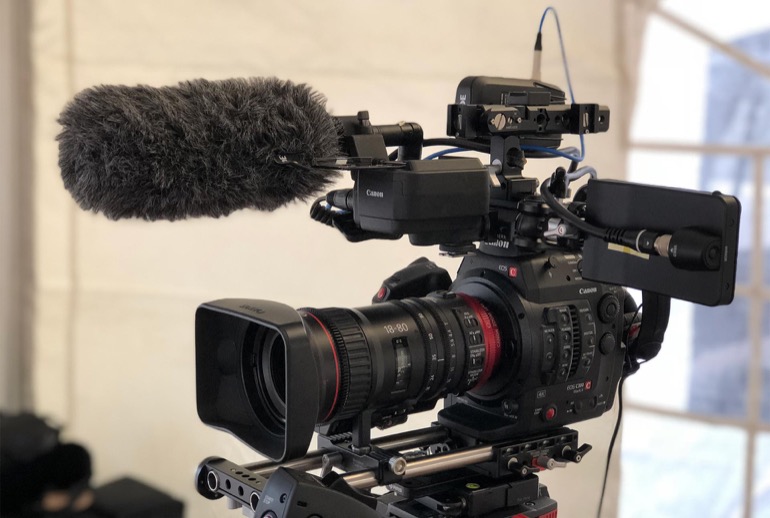
The Canon MA-400 Microphone Adapter rides out front over the lens with a shotgun mic attached. It is mounted to a cold shoe on a Wooden Camera C300 Mark II top plate.
Rigging the LM-V1 Monitor on the C300 Mark II
And that brings us to rigging the camera. One advantage of the C200, which any Canon user can surely appreciate, is that Canon finally integrated the audio XLR ports and controls into the camera body. So, the C200 only needs one cable running to the LM-V1. Simple!
The C200 also comes with a handle that has an adjustable holder for the LM-V1. But adding the LM-V1 and the MA-400 to the C300 Mark II is a different story, since it requires attaching the two accessories to the camera. The LM-V1 has two ¼-20 mounting points and the MA-400 has two cold-shoe feet and a ¼-20.
At a minimum, to attach these to the C300 Mark II you’ll need a small arm for the LM-V1 and a cold-shoe for the MA-400. Two ¼-20’s and a cold shoe are built into the C300 Mark II body and they can be used. Similarly, if you use Canon’s C300 Mark II handle it has multiple mounting points for both.
Another option still is to get the Canon C200 Handle and its LM-V1 holder. The handle will mount on the C300 Mark II top plate, which Canon shipped with the camera, and that setup foregoes the need for an additional arm to mount the LM-V1.
I am a big fan of Wooden Camera gear and I prefer to have quick release access to my camera’s handle and any attachments. Canon’s handles, while much better in stability than in previous iterations, are not quick to attach or remove. So, I always rig my C300 Mark II with a Wooden Camera top plate and NATO handle.
The handle attaches via a NATO rail and both it and the top plate are cheesy, offering many ¼-20 and ⅜” mounting holes. With that as a base, I have rigged the LM-V1 to a very small Wooden Camera Ultra Arm which can connect to the top plate or the handle.
The MA-400 can mount via cold-shoes to either as well. With the MA-400, this gives me options which make it easier to access the audio controls regardless of how the camera is situated. This was often a problem with the C300 Mark II’s clamshell: its audio controls could end up out of sight or hard to reach.
Here are a few mounting options for the LM-V1 and the MA-400:
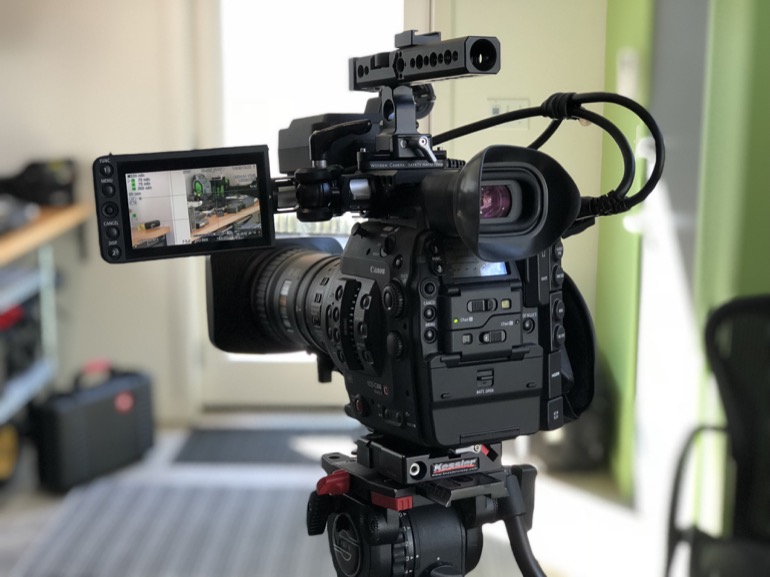
The Canon LM-V1 and the MA-400 attached to a Canon C300 Mark II via a Wooden Camera Ultra Arm, top plate, and cold shoe. The Canon LM-V1 and the MA-400 attached to a Canon C300 Mark II via a Wooden Camera Ultra Arm, top plate, and cold shoe.
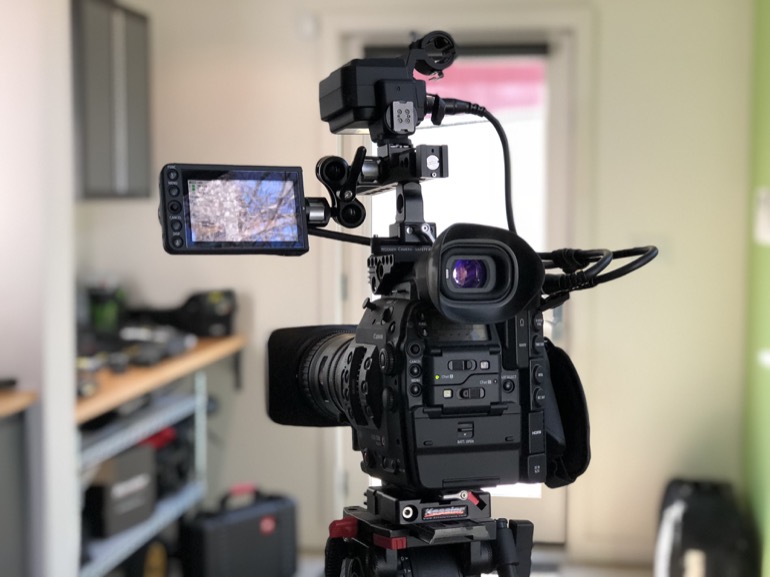
The Canon LM-V1 and the MA-400 attached to a Canon C300 Mark II via a Wooden Camera NATO Handle Plus.
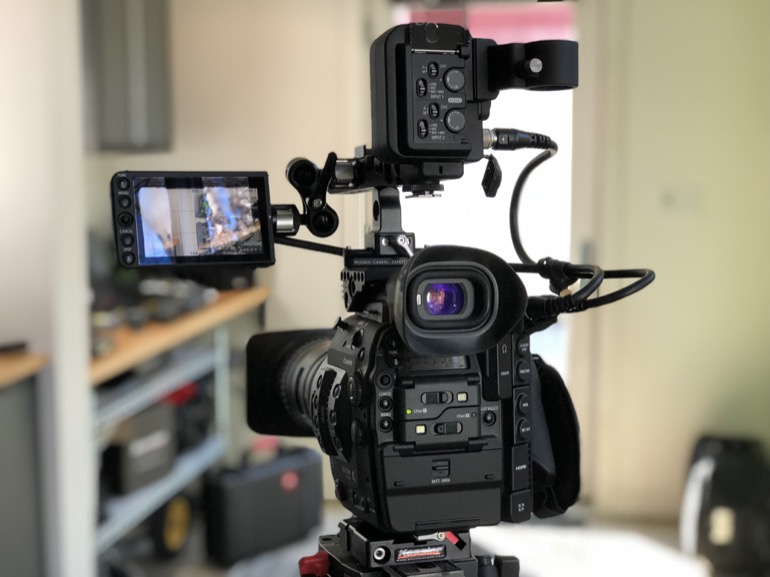
The Canon LM-V1 and the MA-400 attached to a Canon C300 Mark II via a Wooden Camera NATO Handle Plus. The MA-400 faces back toward the camera operator for easy access to its controls.
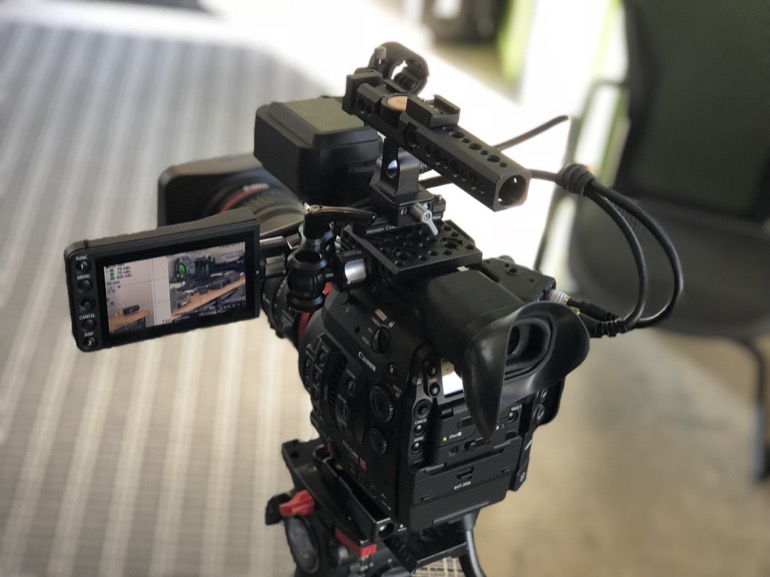
The Canon LM-V1 and the MA-400 attached to a Canon C300 Mark II via a Wooden Camera Ultra Arm, top plate, and cold shoe. The MA-400 rides in front over the the lens. The Canon LM-V1 and the MA-400 attached to a Canon C300 Mark II via a Wooden Camera Ultra Arm, top plate, and cold shoe. The MA-400 rides in front over the the lens.
One addition I have made to the setups seen above was to add small NATO rails and clamps to the LM-V1 and the Ultra Arm. As seen in the header photo and the photo below, it makes the LM-V1 and the Ultra Arm quick release components, which results in faster setup/breakdown times and more reliable mounting solutions.
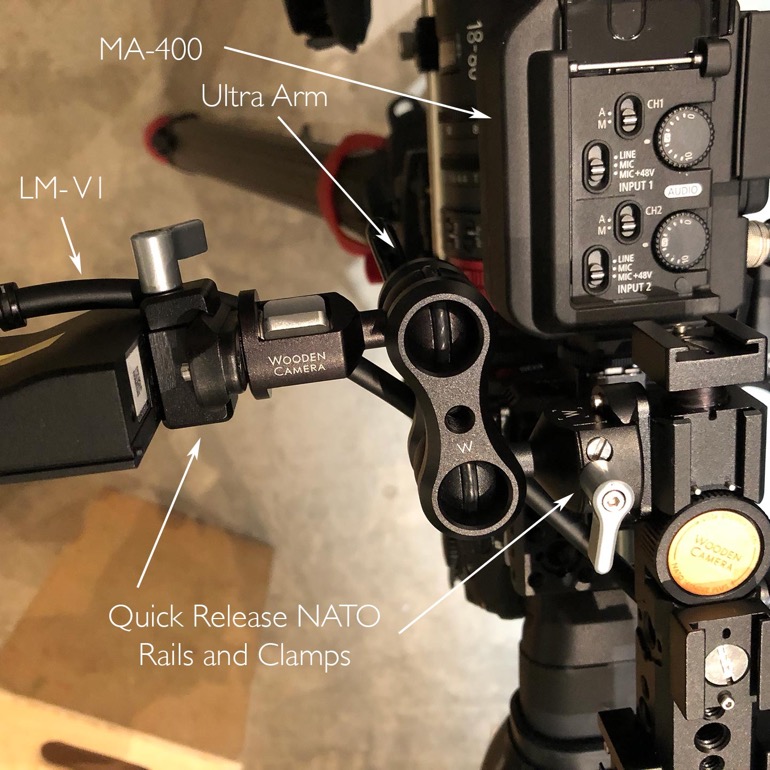
Adding NATO compatible clamps and rails makes the LM-V1 and a third-party arm quick release attachments. These accessories are from Wooden Camera but many companies make NATO products.
Conclusion
The weight of the LM-V1 and MA-400 combined is pretty close to that of the C300 Mark II”s clamshell. What I like, though, about using the new screen and audio unit instead of the clamshell is that it allows me to divide and conquer. I can keep each component where I want it, spreading the weight around and maximizing access. I can also, in most setups, keep the camera’s center of gravity lower. I don’t have to have both audio and video up high on the handle. I can have one or both running off of the top plate.
My preferred setup has been to favor the top plate mounts, putting the LM-V1 to camera left via the Ultra Arm, and the MA-400 forward over top of the lens. In essence lengthening the camera body a bit.
I like this setup so much that I have yet to use the clamshell since getting the LM-V1 and the MA-400. I’m sure a C300 Mark III is not too far away but I think that Canon should consider selling the C300 Mark II with the LM-V1 and the MA-400 as a kit, foregoing the clamshell audio/video unit completely.
Additional Notes:
If you want to fly the LM-V1 further away from the C300 Mark II body you’ll need to get a longer cable. The Canon UN-10 is 100 cm (39″) and is twice the length of the cables that ship with the C300 Mark II’s clamshell.
Firmware Version 1.1.0.1.00 has been replaced with version 1.1.1.1.00
This newest firmware, released 04/08/18, adds a sensitivity adjustment for the LM-V1 Monitor’s screen among other features.
This is an edited version of Jon's original article on his website.
Jon Roemer is a photographer turned filmmaker based in Princeton, NJ. His work can be seen at jonroemer.com
