Letus Helix Jr and Standard
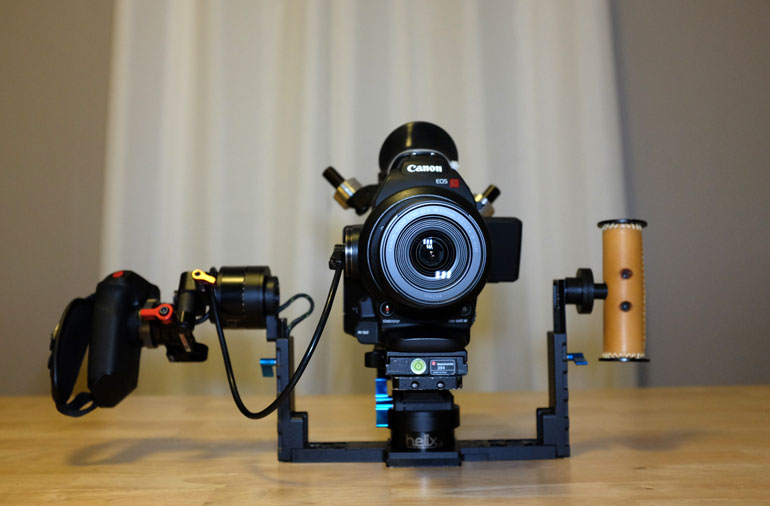
Something in this picture is a big deal. Can you guess what?
Almost two years ago we bought the Letus Helix Jr., hoping to use it with our C100 on a few corporate video shoots here and there.
What happened was we ended up using the Helix Jr. with our C100 on every single shoot we went on. Not only on the promo or commercial video shoots, but also on music videos and live performances, nonprofit fundraising appeals, university student marketing videos, in cars, helicopters and planes, on the backs of bikes, on motorized scooters ... you name it.
Most of all, we brought along the Helix Jr. on cross country documentary trips where luggage space was tight, and shooting time was extremely short. (Check out our article on Newsshooter).This gimbal has raised our production value so signficantly that we couldn't imagine much changing in the way of improvements.
But two major improvements just set our next year (or two or three) on a different path altogether. One of the advances comes from Letus, and the other comes from a lightbulb DIY moment that will make Canon C100 and C300 users very happy.
Letus Updates Helix Jr and Standard Motors With Encoders
If you're not entirely sure what encoders are or what kind of engineering magic went into making them work on the Helix motors.... well neither do we.
But what we do know is the encoders make the motors a lot powerful. Here, take a look at this short video we made to showcase the new Helix Jr and Standard motors.
What do the new Encoder motors do?
The motors make these already great gimbals even better, kind of like the difference between a great Toyota and a supercharged Porsche.
Even with a heavy and oddly shaped camera like the C100 and C300, you can tilt and pan as fast and as far as you'd like, without fear of overloading the motors.
At any time while the motors are running, you can grab the camera and hold for a few seconds to re-adjust the horizon. This is a huge deal for anyone who shoots in cars, helicopters, planes, on boats, or anytime where you don't have a level surface to set the Helix on and restart it.
You can basically bump the gimbal, grab the camera, treat it as aggressively as any other piece of gear - without worrying about it losing its position or spinning out of control like other gimbals.
Because the motors are more powerful, they don't have to work as hard, which means the batteries now last a lot longer - up to 5 times longer.
If you like to set your pan follow speed to really slow (like we do, for more cinematic moves), but sometimes wish you could force the Helix to pan a little faster around a corner? Now you can.
The camera doesn't have to be perfectly balanced to work, so if you change lenses or zoom in a little bit, the motors will handle the change fine. (But you should still balance correctly when you can).
We're not sure why, but the encoded motors are a little more rigid and "sticky" when they're off, which surprisingly makes balancing a lot easier. Hey, we'll take it.
All in all, the encoded motors just make the Helix better, and we're excited to take it on many more trips and shoots for the next few years. But don't fret, if you already have a Helix Jr or Standard without the new motors, you can upgrade them any time. Or not, if it's treating you well just as it is!
Quick tip: If you're thinking about getting a Helix Jr or Standard, it's cheaper to add the encoded motors up front when your gimbal gets built, rather than waiting to update it later, which requires more labor and time.
Use Your C100 hand grip as your Letus Helix Jr Handle
Okay so the encoder motors is a big deal, but we think this is a biggie too - maybe because we've been racking our brains for a couple years now trying to think of how to achieve this, and the solution was so simple all along.
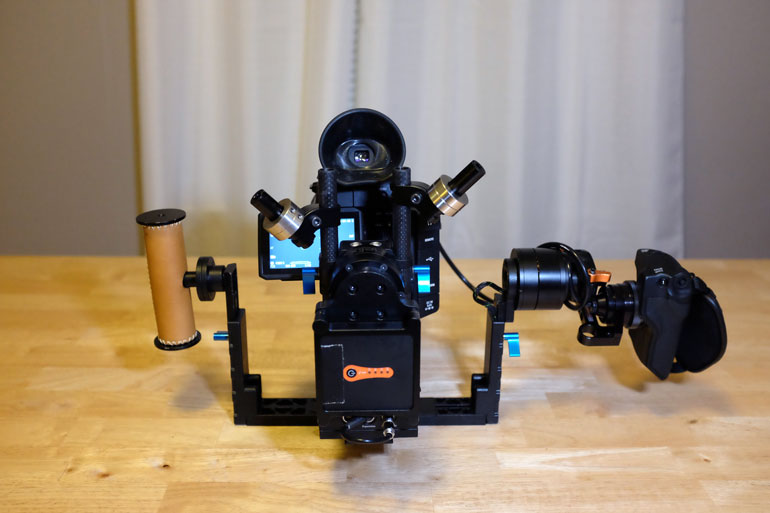
The main reason we love to use the C100 on the Helix Jr is because the Dual Pixel Auto Focus works so well, we can nail all kinds of shots without having to rig up an assistant to help operate the gimbal.
A second operator would require you to have some sort of wireless monitoring system, along with a wireless focus control. And that still wouldn't take care of your exposure and white balance adjustments.
So for us, having the C100 hand grip on the back of the Helix Jr has worked great. We can make quick adjustments on the fly, start/stop recording, and toggle autofocus on and off.
But man, wouldn't it be easier to control all of that with your right hand, and be able to toggle autofocus on and off more precisely?
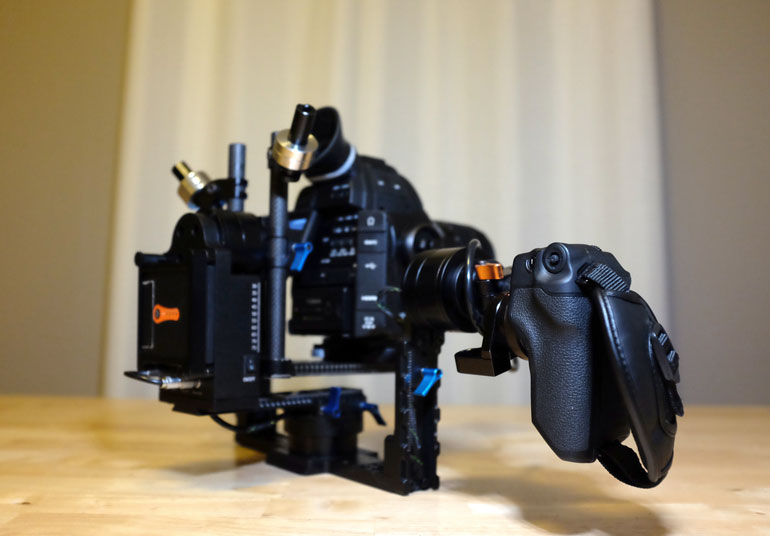
Yes it certainly would be, and it is! Plus the grip can still tilt the Helix Jr up and down, it doesn't change the balance, and it's actually quite comfortable to have your hand in there.
Seriously, you can hold and shoot this rig for hours, and control everything with your right hand. You could use this for a single shot movie and control the ISO, white balance, aperture, focus...everything except zoom (at least for now).
Instructions for how to DIY your C100 hand grip to the Helix Jr are below. But wait there's more!
Use your C300 Hand Grip as Your Letus Helix Standard Handle
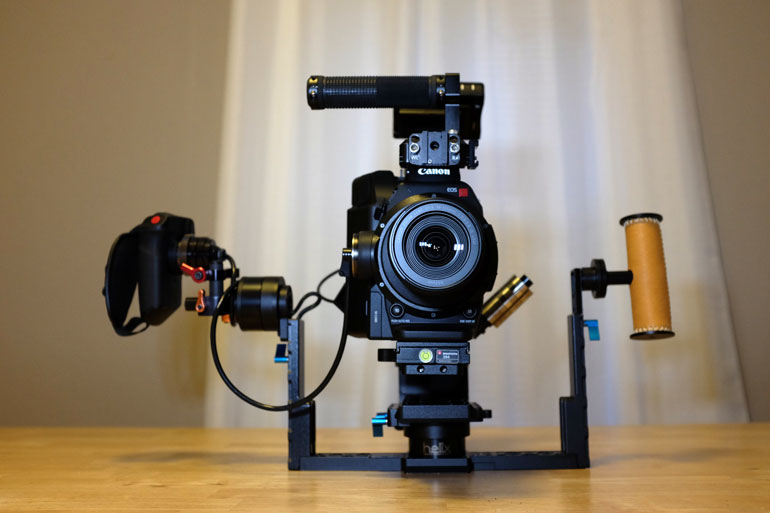
Ain't she a beauty? What you're looking at is a powerhouse - a filmmaking machine in a tight package.
The C300 Mark I is heavier than the C100, and the C300 Mark II is even heavier. The Helix Standard is bigger and heavier too. So all told, this is not nearly as easy to hold for a long time as the C100/Helix Jr combo.
But it's still immensely less complex than any other gimbal rig we've seen for the C300. Some of which require several additional pieces of kit just to hold the rig up.
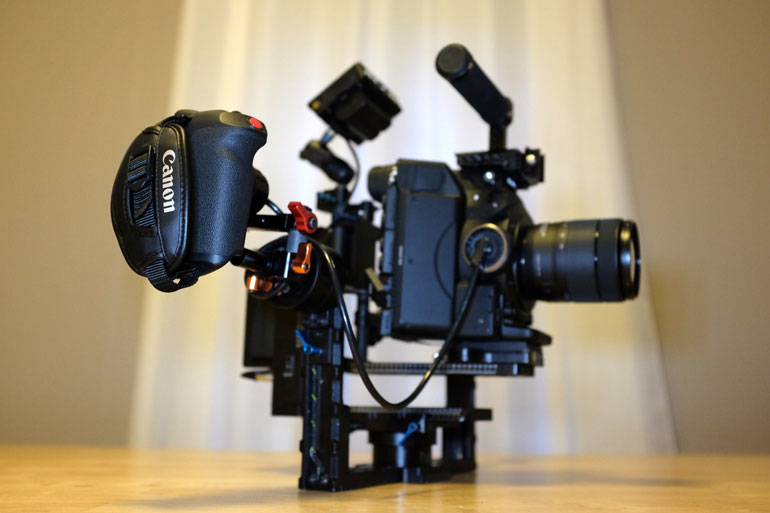
Of course the hand grip DIY replacement makes this rig even better. Where many gimbal shots are taken with wide or ultra wide lenses, simply because focusing is difficult without a second operator, imagine what you can do with the AF toggle now, along with the C300II built-in auto focusing tools. You could shoot with a steady scene with an 85mm, or longer..
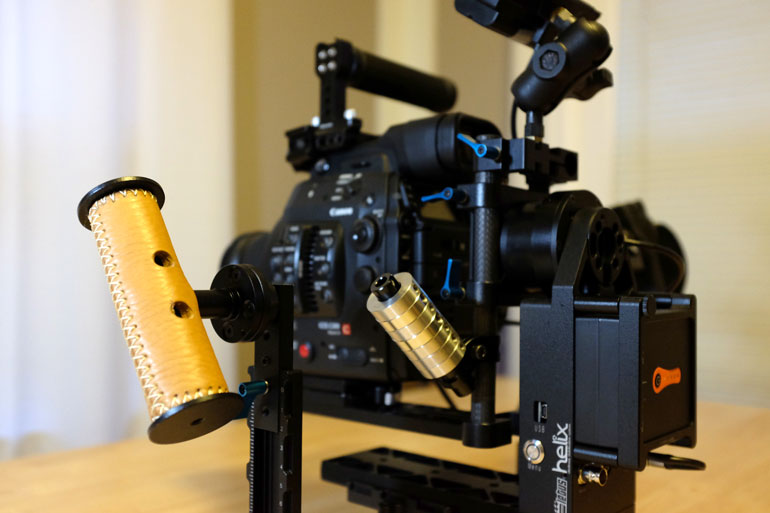
And with the hand grip attached now removed from the C300 body, you don't need to use nearly as many counterweights on the left side of the Helix.
And best of all, you can re-assign the C300 hand grip wheel to adjust ISO instead of aperture. So you set your aperture at its widest, and then simply toggle focus and adjust ISO as you move from shot to shot.
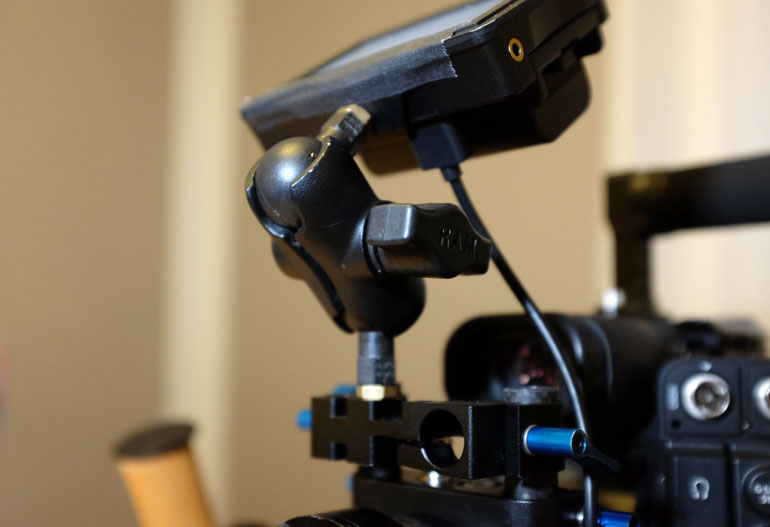
Whereas the C100 built-in LCD screen is good enough for most use, and keeps the whole rig quite simple and hassle free, the C300 and C300 mark II need an external monitor when using a gimbal. The LCD/Audio unit is simply too heavy to leave on the C300, although you could probably get away with attaching it to the back of the Helix to use as a counterweight. Hmm...
Anyway, we decided to use the ultra lightweight Ikan 3.5" monitor, which runs off standard Sony NP or Canon LPE6 batteries and plugs into the C300's HDMI port.
Letus offers a very nicely designed Monitor Mount for their Helix gimbals, and it works well without any additional hardware. It's very modular and can be attached in a number of different ways. However, we like to be able to rotate and adjust the angle of the monitor quite a bit, so we attached a Cinevate Universal Accessory Mount to the Letus Monitor Mount and it works like a charm.
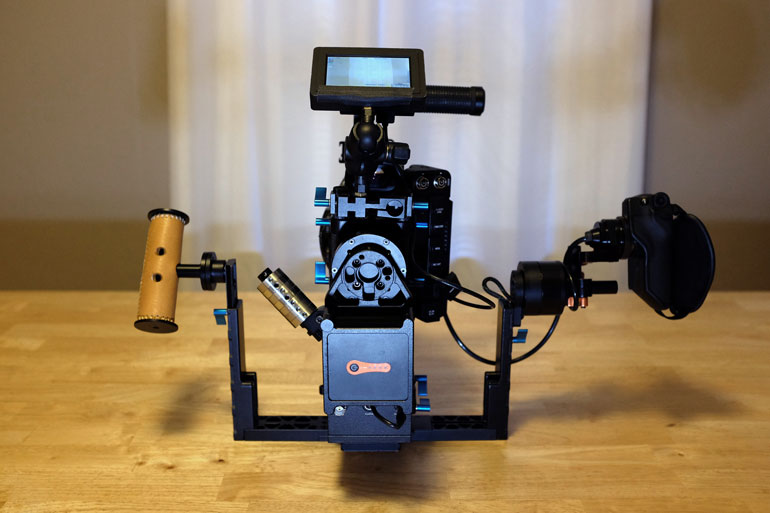
How about one more pic, before we move on?
Videography Gear Recommendations
We interrupt this article for to briefly shill our three most popular and informative articles on gear, and the two kits that we are constantly changing and evolving.
Documentary Filmmaking - We've traveled hundreds of thousands of air miles on many shoots, to bring you our list of recommended filmmaking equipment.
Promo Videos - Check out our complete corporate video production guide, including not only gear but how to approach new clients, choose your niche, and how to price yourself.
The Business of Videography - find out exactly what kind of video your client wants with our handy video production services infographic.
DIY Gimbal Handle Replacement for Letus Helix and Canon C100/C300
There's nothing about this simple solution that wouldn't work for other cameras with removable grips, such as the Sony FS7 and FS5. But they don't have the AF Toggle to really make this a sweet deal.
what you need
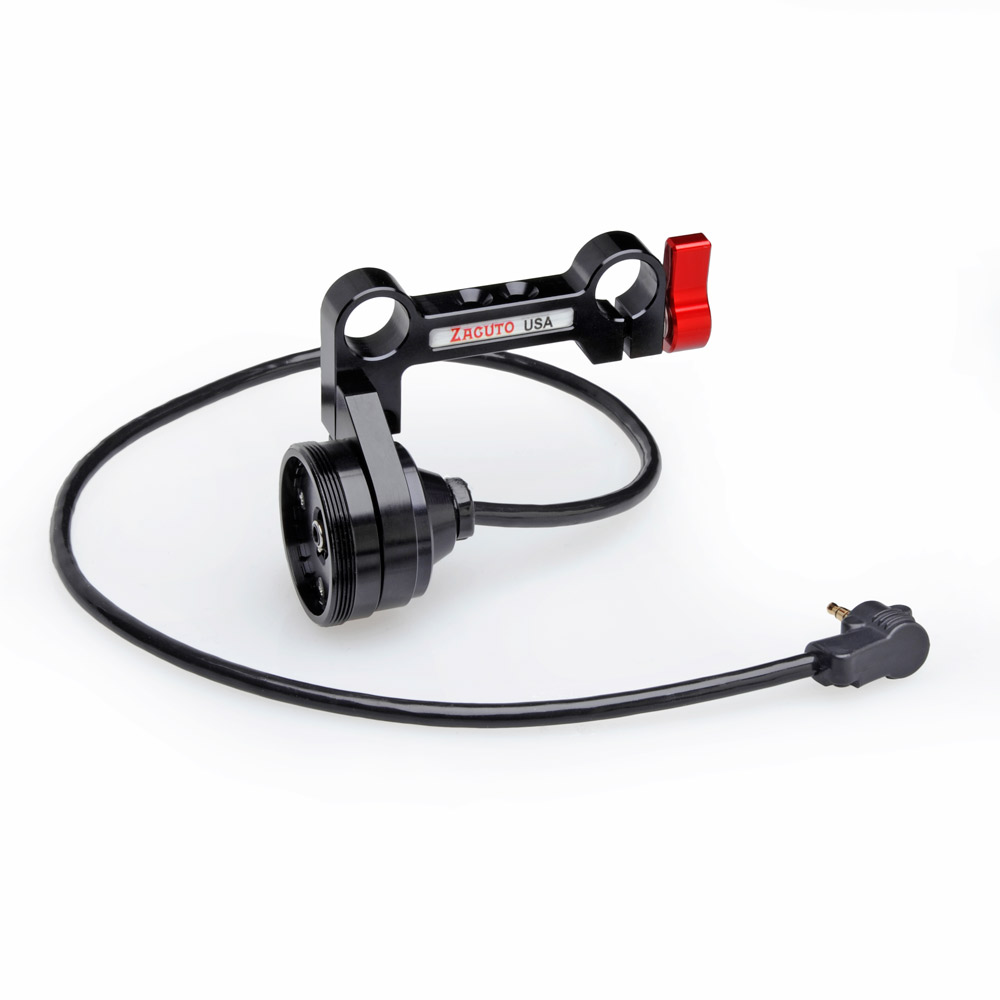
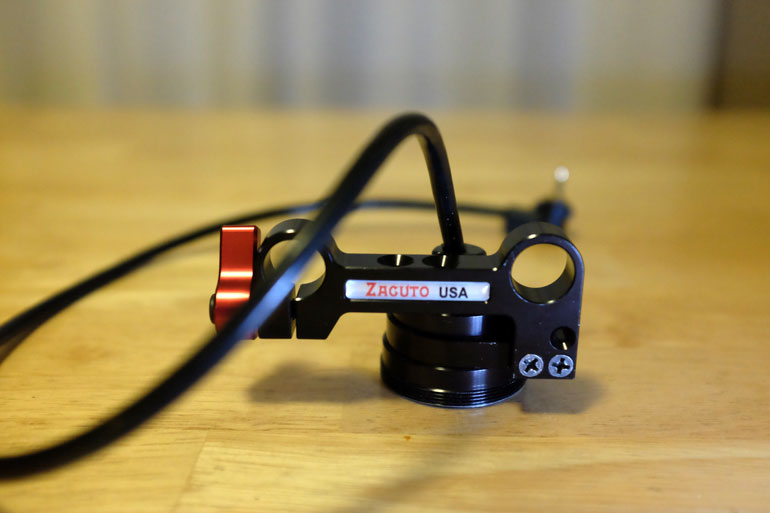
Zacuto C100/C300 Grip Relocator
Plus an allen wrench and philips screw driver.
Redrock Micro 2" 15mm Rod
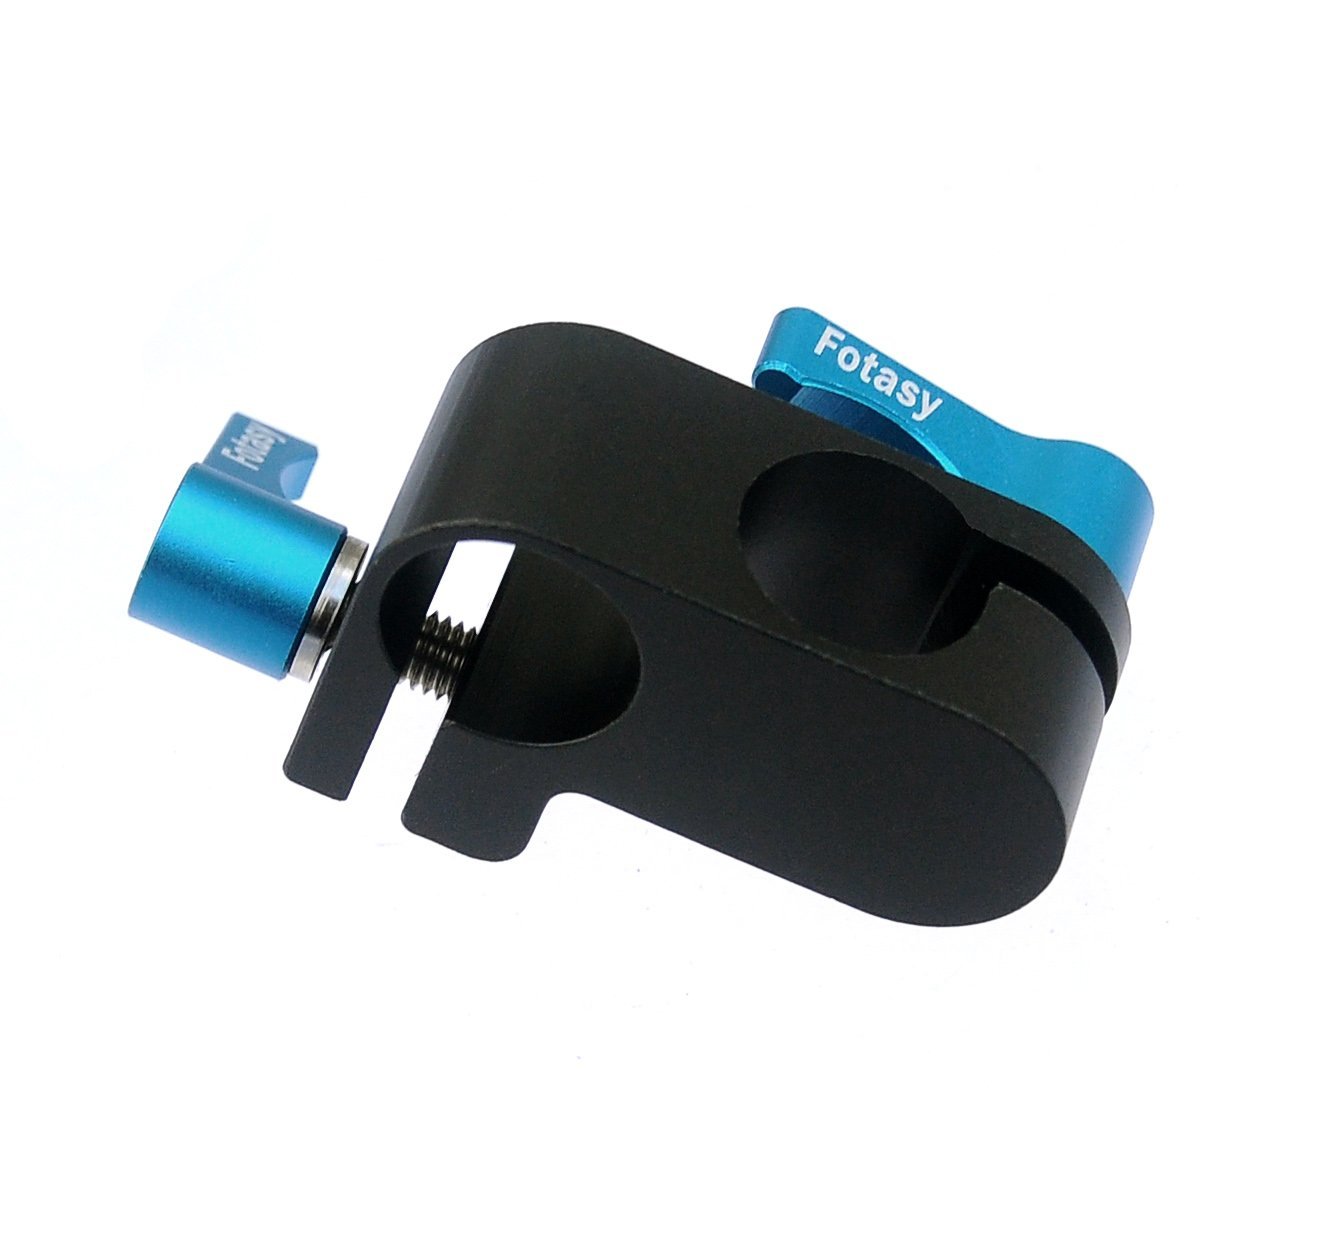
90 degree 15mm rod adapter
Step 1: Remove the right handle from the Helix Jr or Standard
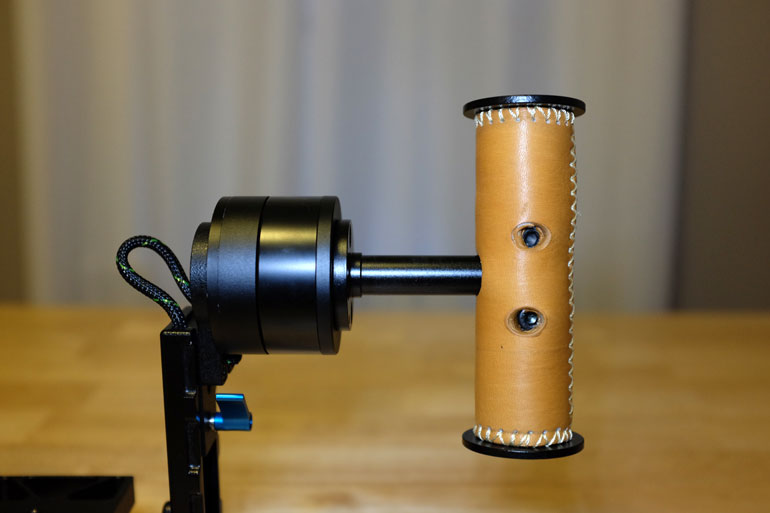
The handle is kept in place by two allen screws. Unscrew both of them and you'll be left with the bare 15mm rod.
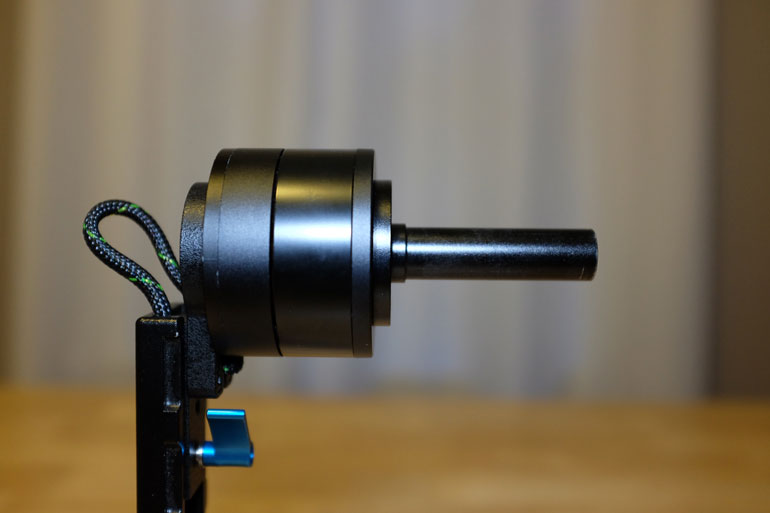
Step 2: attach the 90 degree rod adapter
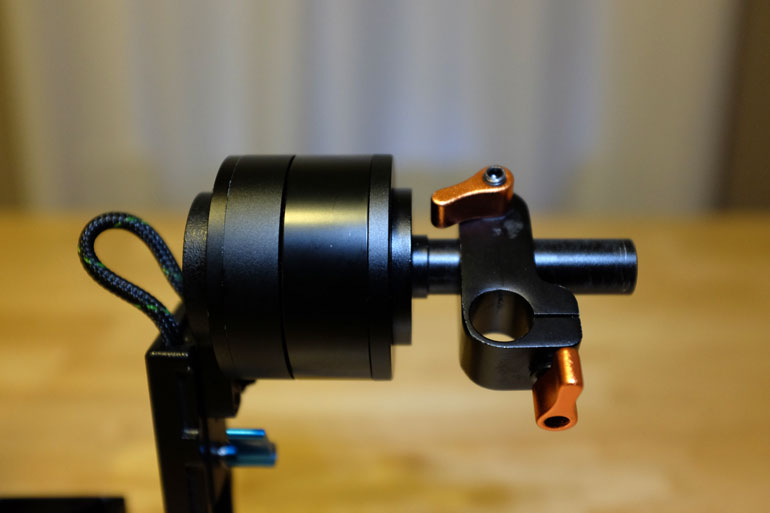
Make sure to leave enough room between the motor and the rod adapter for the clamp to tighten. Note: my rod adapter is from an old rig I had laying around, but I assume other ones pretty much function the same.
Step 3: attach the redrock micro 2" rod
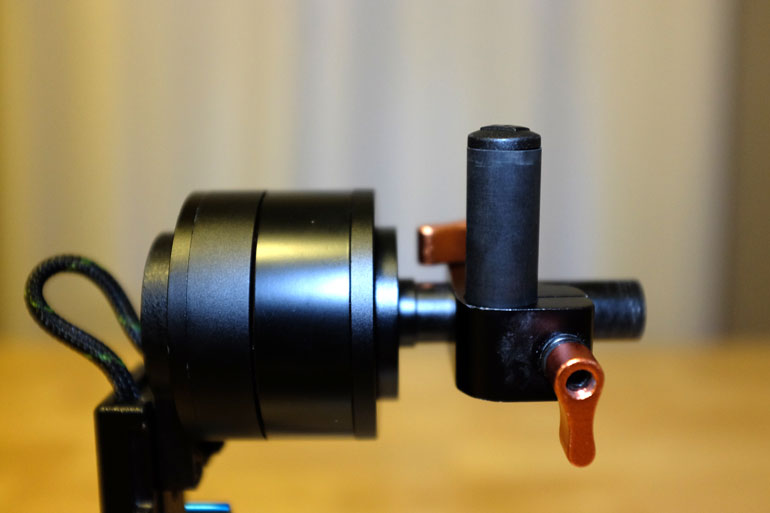
Step 4: reverse your zacuto grip relocator position
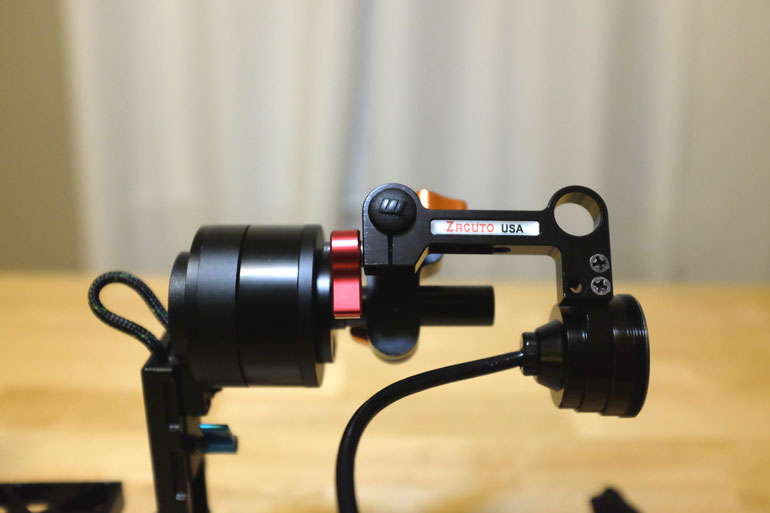
The Zacuto C100/C300 Grip Relocator ships in a different position than the way we want it. It's a pretty simple adjustment with just two screws. If you leave it as is, the handle will still work but will be a little further away from the motor.
Take it apart
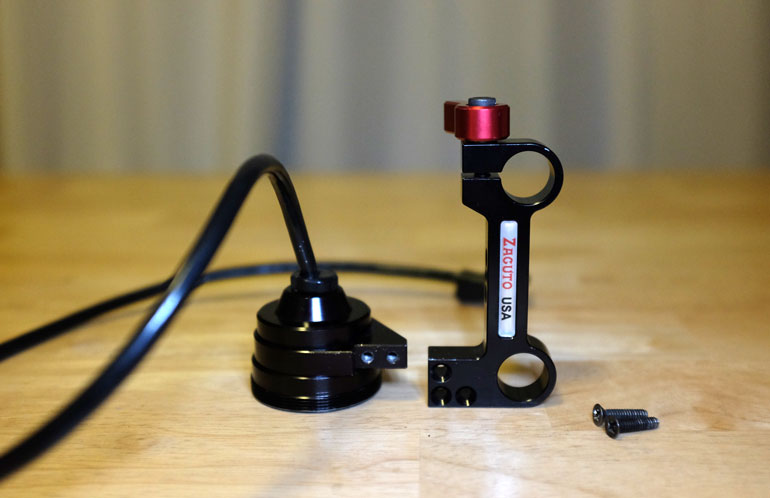
Attach like this
Step 5: Attach the zacuto grip extender
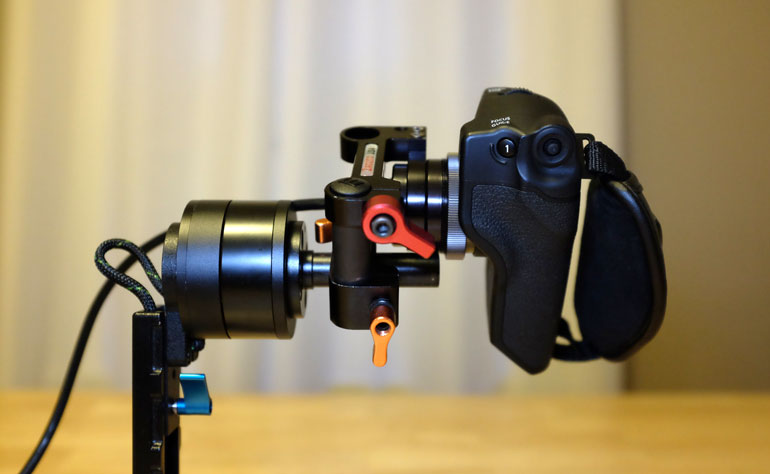
You can also attach it in a different position, to have it rest a little higher or lower than the motor.
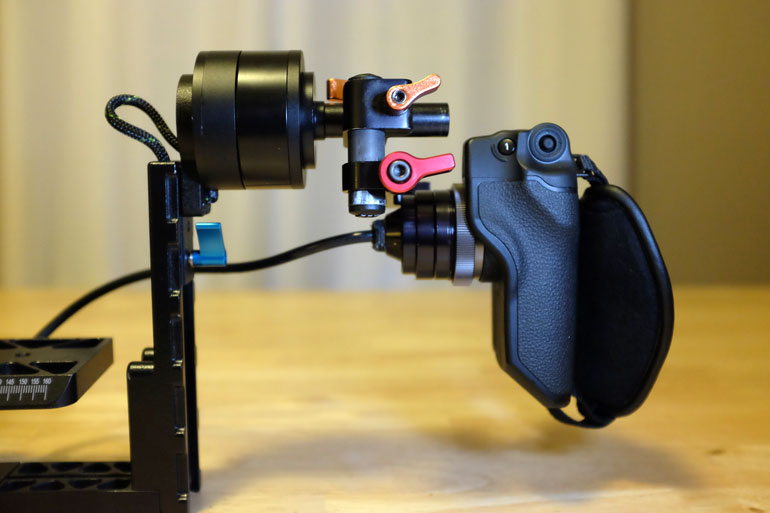
And if you chose not to rotate your Zacuto Grip Relocator in step 4, here is where your handle will sit.
Bonus: c100 balance and pid settings for letus helix jr.
Knowing how challenging the initial balance and PID adjustment can be, here is what's working for us. We're using a C100 Mark I with a small battery, the top handle removed, and with a Canon 10-18mm and Canon 18-135mm.
Position of Handles: 3.1 on both the left and right side.
Letus Standard Camera Plate about 3/4" above the base.
With the 10-18mm, we have the beginning of the base at the 45mm position along the z-axis.
To check for tilt balance (without the Helix handle), hold the right side of the right motor, lift the rig, and then rotate the left side of the motor with your thumb.
We also use a Manfrotto 394 Quick Release on everything, so our balance may be different from yours.
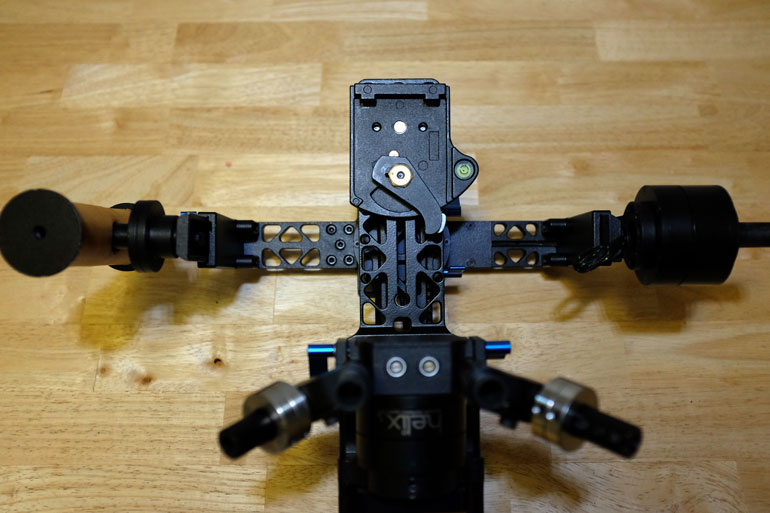
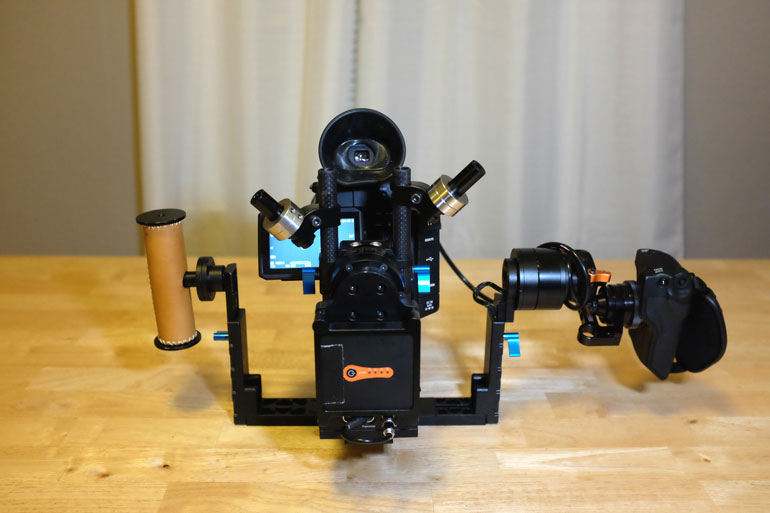
Both the C100 and C300 are right-side heavy, so you'll need to tinker with the left balance. As you can see with our C100, we have an equal amount of counterweights on the back Helix Jr. rods, but the left ones sit slightly below, and are rotated back a little. Now when we tilt the camera either way, it'll stay in position, which means we're good to go.
Conclusion
If you can't already tell, we love the Helix Jr and Standard gimbals for our Canon C100 and C300 cameras. Compared to the heavy and bulky alternatives, we can use the Helix gimbals without fatigue for long periods of time. They've transformed our video production business in many ways.
And with the handle grip modification, we foresee a whole new future for using the Helix gimbals in our productions, perhaps more than just spice shots here and there.
But in order to get the Helix working the way you want it to, you first have to balance your camera rig and then tune the PID settings. We wrote up a step by step guide to PID tuning your Helix here.
As always, happy shooting!
