Audio Repair in Videography
We’ve all been there. You try your hardest to shoot a great interview, you ask the right questions, you pick the right lens, your framing looks great, the three point lighting setup makes you feel like you kind of know what you’re doing…and in addition to your lav mic, you thought ahead and placed a boom mic over the subject.
And yet, when you get back to your computer, and you give the interview a quick listen, it becomes apparent that something is terribly wrong. Your blood starts to boil, you want to blame the audio guy. Except there was no audio guy. It’s all on you.

This stock photo has nothing to do with the article, but it looks cool.
So you do what any reasonable person would do and turn to the internet for help. Youtube and Google would take weeks to sort through, so you post a question on a video gear forum: “My interview audio has problems. Is there any way to fix it?”
And cue the obligatory reply: “Yes. Go back and record the interview again.”
How to fix bad audio in video post production
How many audio problems have you come across in your videos? For us, we have no shame in hiding our blunders.
We've made every mistake in the book: a rubbing lavaliere mic, an improperly placed boom mic, audio levels were set either too low or too high. And we still do.
And then there are things that just go wrong on their own accord, like signal interference on your wireless microphone setup, batteries running out, cables going bad, your boom pole falling over. Oops.
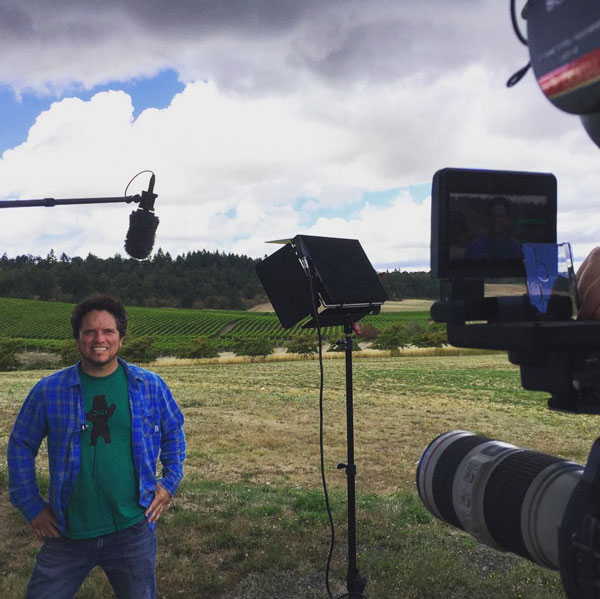
Our boom mic caught some bad wind on this interview
The simple reality is that if you do on-location interviews, you're going to run into bad sound, no matter how careful you are.
Also have you noticed that everything sounds perfect until the moment you start your interview? And then all of a sudden the world gives you a leaf blower, lawn mower, garbage truck, barking dog, an overhead airplane, air conditioner, clinking heat pipes, and best of all (this just happened to us), an unscheduled Boy Scouts meeting next door. To do what, you ask? To practice group singing, of course.
In those situations, you either have to live with poor audio (also known as: cover it up with an intense music track), or you can attempt to learn some really advanced audio software that can sonically isolate problem areas and remove them from your waveform. It's audio forensics and it's really amazing what you can do.
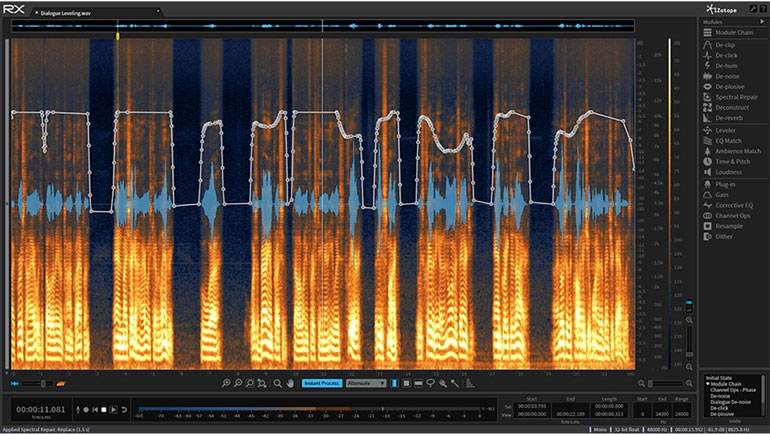
Izotope RX Editor in action
But this is an article for videographers and small crew video producers. And let’s be honest, if you didn’t hire a sound guy, you probably don’t have the budget for an audio post guy, and you definitely don’t care enough about audio to learn the art and science of advanced sound engineering.
Just kidding, you do care about audio. But you’re a video person, and video pays the bills, so sophisticated audio surgery is not really in your wheelhouse.
Where are we going with this? Oh yeah, if you have really bad audio, there’s no way around it. Like the sound expert on the video gear forum says, “Sorry, go back and re-record your interview.” (Has anyone ever actually done this? How do you look the interview subject in the eye the second time around?)
Luckily with most interviews, you’ll have an audio track that is kind of bad but not completely, utterly unsalvageable. So if that’s you, read on!
Audio Repair in FCPX
We edit in Final Cut Pro X, so these tools are specific to the software. But, these are really basic audio plugins, so equivalent tools exist in other editing programs. And third-party plugins work nearly the same, no matter what NLE you use.
And for the record, we’re video people, so our audio knowledge is specific to the needs of video production and video editing. So don’t get mad if we use the wrong terminology or something.
1. Low Level Audio
Here is a quick fix if your interview audio track is so low, that using the volume slider alone is not enough, since it only allows you to increase the level by 12 db.

In the effects panel, add the Gain tool to your clip, and then adjust the gain to say, +6db or +12db even. Now you can fine tune the levels with the volume slider, since it’s now at the default 0db level.
2. Background Noise Removal
The built-in background noise removal tool is actually quite useful, as long as you don’t overdo it. Go into the Audio Enhancements options, and you’ll see Loudness, Background Noise Removal, and Hum Removal. In our experience, Loudness and Hum Removal make your interview audio sound pretty unnatural, so avoid those.
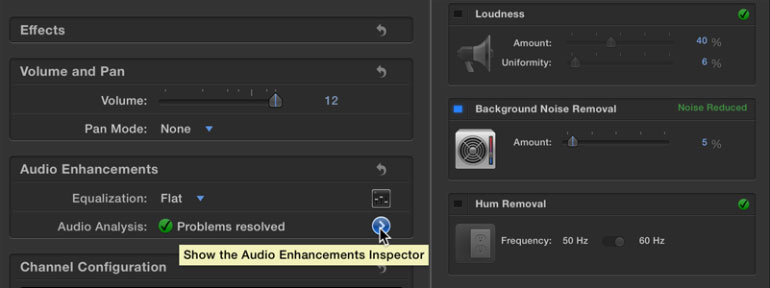
But Background Noise Removal works great at low amounts. We set it to 2-10% on average.
3. FCPX EQ
There are a few default equalization presets we use in FCPX, including Voice Enhance, Bass Boost (for women), Bass Reduce (for men), and the manual EQ settings.
With manual EQ settings, however, the issue we’ve run into is that the EQ settings get reset the moment you leave the window and go to another clip. It’s a strange bug in certain versions of FCPX, and probably fixed in the newest version, but still could be a problem for some of you. Essentially, once you manually adjust the EQ, and then leave the clip, when you go back and click on the manual adjustment tool the EQ levels will be visually reset. Even though the clip continues to utilize your previous adjustments.
4. Enhance Male and Female Interviews with EQ
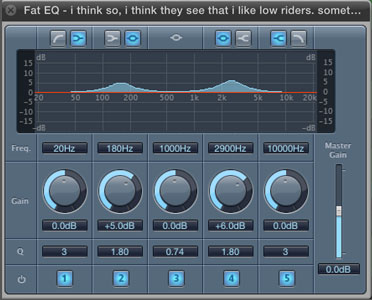
Instead of using Final Cut Pro’s built-in EQ tool, we recommend using one of the other EQ plug-ins that come with FCPX: Fat EQ - under the Logic plugins.
In general, you can adjust the frequency to pinpoint the precise area you want to boost or reduce, and then use the gain wheel to make your adjustments. A good starting point is to increase and decrease each default frequency until you can hear the specific problem area go up or down, which helps you identify which frequency you should focus on.
One of the best ways to use Fat EQ is to create a couple presets for male interviews, female interviews, and music - and then you can apply them to any interview audio.
For female interviews, we set the second wheel to 400hz, boost the gain to +5db, and increase the Q - or overall adjustment feather, to 2. Then adjust the fourth wheel to 4000hz, add +5-6db, and increase Q to 2.
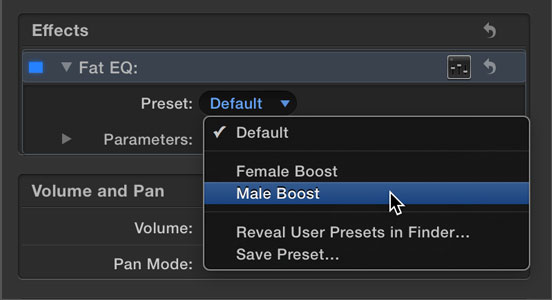
Of course if you follow these steps, the gain will automatically round down to 390hz and 3900hz, and the Q will round down to 1.8. We don’t know why.
For male interviews, we do everything the same except the second wheel is set to 200hz and the fourth wheel is set to 3000hz. Again the plugin will round down to 180hz and 2900hz, and Q to 1.8, for whatever reason.
[Here's a great article](larry jordan male female eq) from Larry Jordan about how to improve interview and dialogue clarity and sound with Fat EQ and other equalizer filters.
5. Reduce the Music EQ
Using Fat EQ, you can also isolate the specific area where humans speak - 200hz-4000hz, and reduce the gain in the music bed in those frequencies. This really does enable the interview audio to punch through.
You can create a preset like the Male and Female Boosts, or you can adjust the EQ manually depending on the music track you’re using. We prefer to keep it flexible and reduce the music EQ manually, based on what sounds good.
6. De Esser
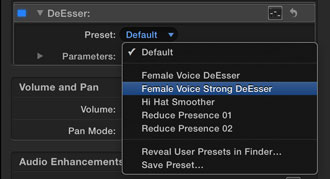
Sometimes your interview audio will have a lot of sibilance. Maybe it’s because of your microphone choice and technique, or recording format, but often some people just interview with more prominent esses, usually women.
A simple solution to repair sibilant audio is [De Essing](de esser wikipedia). FCPX has a built-in DeEsser. Drag it over your audio, and then adjust the presets to what sounds good.
7. Cover the cuts
These two tips aren’t really about repairing audio, but more just quick tips for splicing interviews.
When you’re editing interview audio, the entire goal is to cut the audio in a way that makes the speaker sound totally natural. But if you try to add a gap between two interview sections, in order to create a natural pace for what the speaker is saying, you’re going to want to cover up the gap with a piece of room tone. This is especially true if you have a lot of hum or background noise in the recording.
The listener won’t notice a constant hum or tone in the background, but they will notice an abrupt change when the room tone goes away briefly during a cut.
If you didn’t record room tone, try to find a few seconds of silence during the interview audio, and copy and paste that a couple times. It’s sometimes helpful to overlap the clips, so you don’t hear the cut points even in room tone. We also recommend detaching the audio from the video clip, and renaming them "room tone," to make life easier.
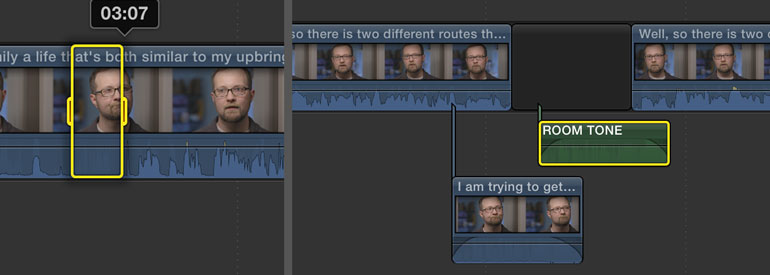
Another easy way to merge two pieces of interview is to use a crossfade on them. That will cover up any little bits or pieces that make your cut point obvious to the listener.
There is a free plugin called “[Sound Only](alex4d sound only)” - made by the FCPX plugin developer Alex4d - which applies an audio crossfade on two clips, without applying the visual transition as well. It’s really useful. You may find yourself using it on all your cuts.
Audio Recording Problems
NPR has an ear training guide for beginners, and it’s quite useful. They have examples of some of the most common sound recording problems during interviews, such as distortion, plosives, handling noise, hiss and hum, wind buffeting, and a reverberant room.
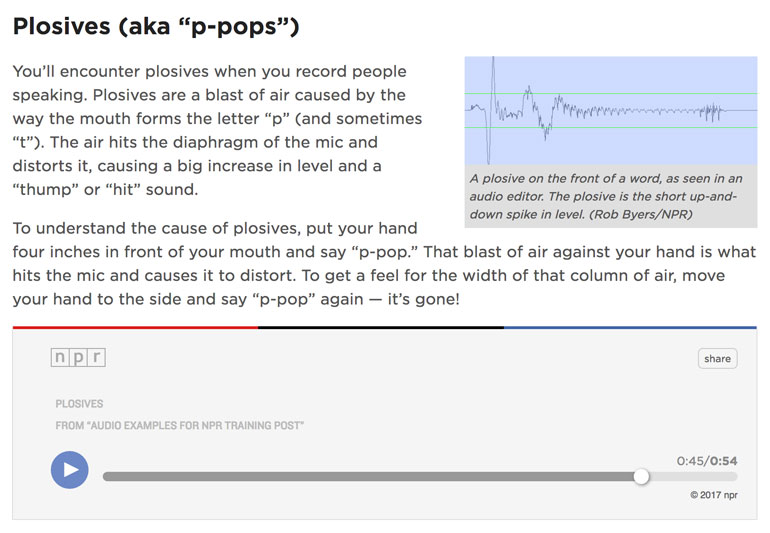
screenshot from NPR's Ear Training website
But apart from a few short examples of how to adjust microphone position, the advice that NPR gives for fixing any audio problems? Hire a sound engineer or an audio expert.
Still, it's a good read to see what the common audio problems are for people who make audio recording their careers. In fact, we've worked at an NPR station for a number of years, and we came across a lot of issues you would never expect from a radio station. Most of those issues stemming from letting a couple video guys work on radio stories. Anyway...
You might also be tickled to know that while working at a PBS/NPR station, we continued to use FCPX to edit even our audio-only stories. The truth is, most video and audio storytellers don't really get into the super advanced sound editing tools that music producers and professional sound engineers use. So use whatever program is second nature to you.
Dereverberation: How to remove room echo
And finally we get to the meat of this article. Probably the most common audio problem you’ll come across is not even that big of a problem, but it can make your videos sound amateur.
Room echo, room reverb, roominess - these are all ways to describe what happens when your subject doesn’t sound like they were recorded in a professional voice over booth. Because most likely they did not record in a professional studio. Actually, even in a professional studio, you could still come away with an interview that has a little bit too much room reverb.

High ceilings and reverberant furniture and floors are tough
Again, most often if you ask a sound expert what to do in this situation, they’ll advise you to re-record the interview. And this time bring in rugs, drapes, better microphones, and a sound guy.
You're probably not going to resort to that, especially if the audio isn't that bad, but just sounds like it's coming from a large hall. Isn't there something a simple audio filter could do to fix the reverb or room echo? For a long time, no, not really.
But recently there have been a couple plugins that do the unthinkable - they remove the roominess and make your interview sound like a million bucks.
Izotope RX De-Reverb
Isotope is probably the most popular plugin for videographers who need occasional de-reverberation. It’s easy to apply to your clips, and then you can use a couple presets, or start to tinker with the settings until your audio sounds better.
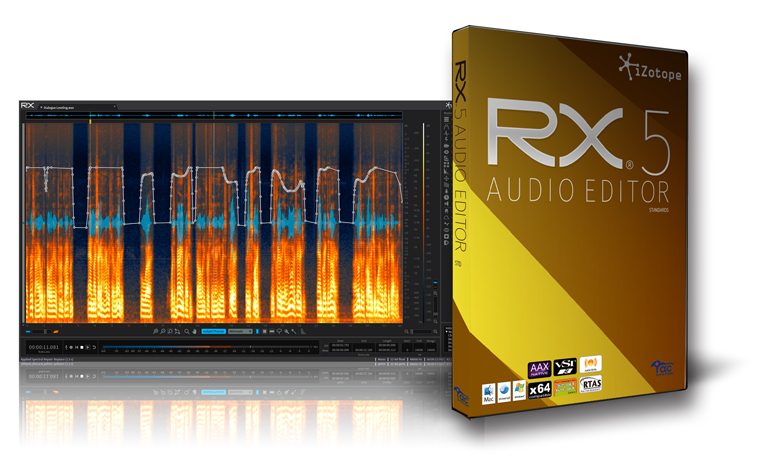
The Izotope RX 5 Audio Editor comes with an assortment of other audio repair tools, including De-Noise, De-Hum, and De-Click, which can come in handy more often than you think. For example, when your subject has excessive mouth clicks and smacks, or if you get an unfortunate buzzing sound from a wireless lav or cell phone interference.
The RX 5 Audio Editor Standard comes with a stand-alone editor, but several of the individual tools are available in plug-in versions. So you can easily run some of the most common tools within FCPX.
The star of the plug-in pack is the De-Reverb plugin, which can make roomy interview dialogue sound like it was recorded in a professionally treated recording booth. The trick is to avoid going nuts and applying too much of the effect, which will make your speaker sound like they’re a space alien.
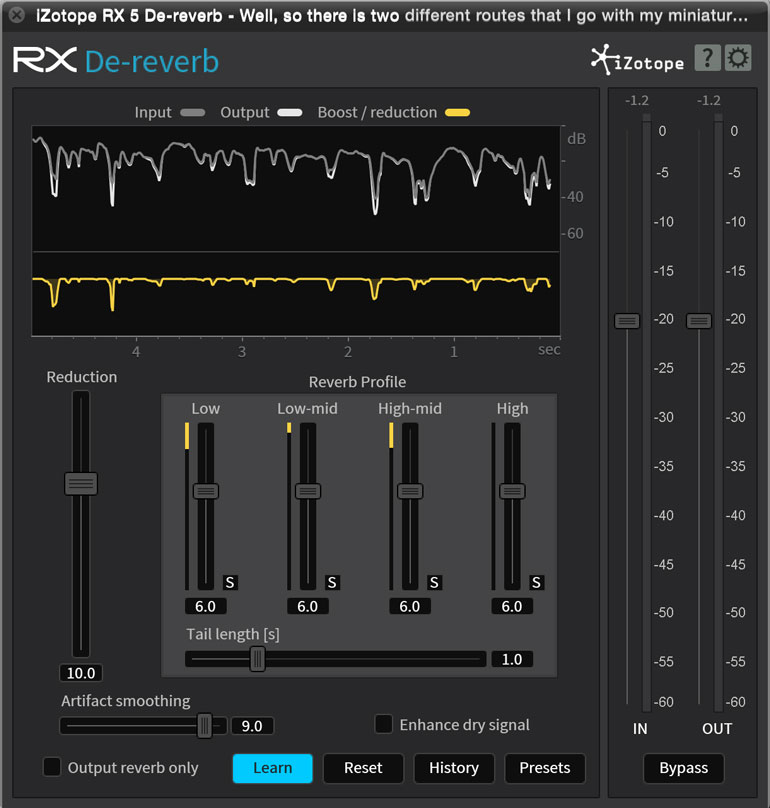
One of the nice features of Isotope RX De-Reverb plugin is the “Learn” feature. Essentially, it will listen to your audio and determine the best settings for de-reverberation.
For how much it can do, the Izotope RX 5 Audio Editor is quite a bargain, and it works with most NLEs. The nice thing is you can download and use a trial for 30 days, and export your project without demo limitations or watermarks. So keep this plugin in the back of your mind and when you need it last-minute for a critical project, download it, use it, export your project - and you'll probably end up buying the plugin.
Zynaptiq Unveil
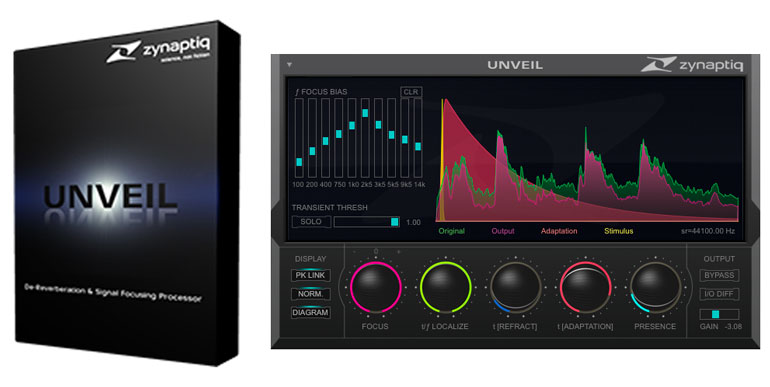
Finally, we get to our favorite audio plugin ever. Zynaptiq Unveil actually does the same thing that Isotope RX De-Reverb does, in that it makes your roomy interview sound like it was recorded in a sound booth.
Although the plugin is designed for all sorts of recording applications, such as music and performance, we’re only interested in dialogue here.
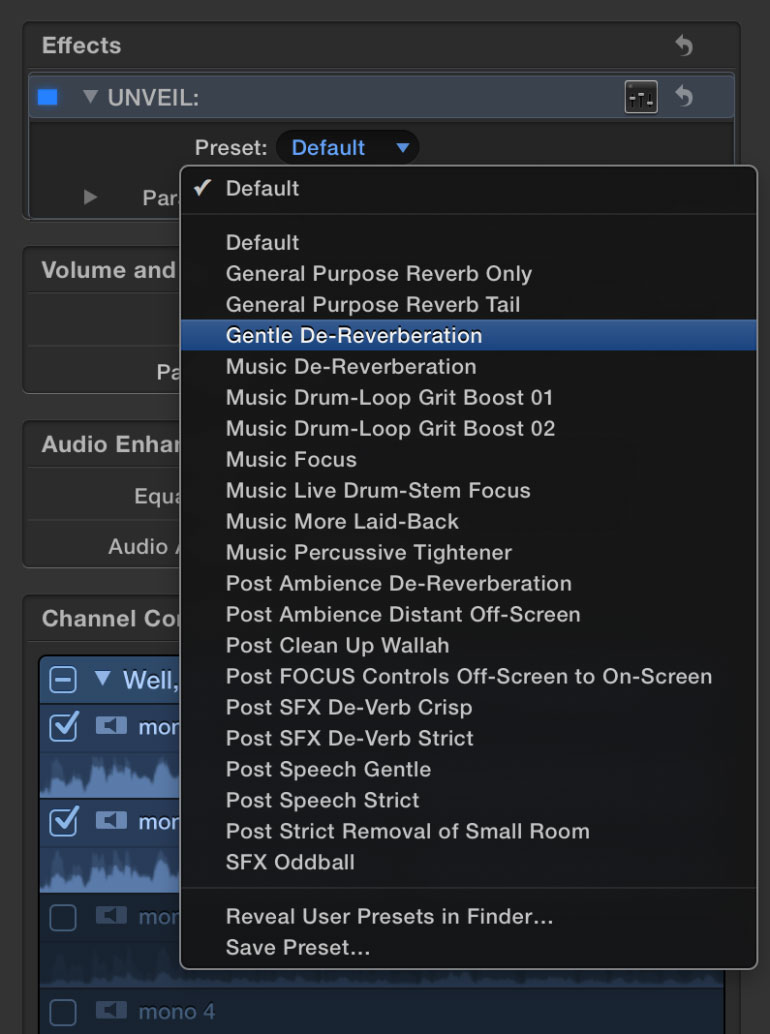
So there are two presets we use, Gentle De-Reverberation, and Post Ambiance De-Reverberation.
Go with the post-ambiance version only when your interview audio sounds like it was recorded in a cathedral. Otherwise, Gentle is good enough.
For the most part, the preset is often good enough in its default state to really improve your interview audio.
But once you've applied your preset, you can go in and fine tune the settings even more. We’re not sure what all the adjustment knobs do, but the main tool is the Focus knob. It’s aptly named, since the whole point of this plugin is to increase the presence or closeness of your interview, so you can focus on it, and avoid hearing the room space.
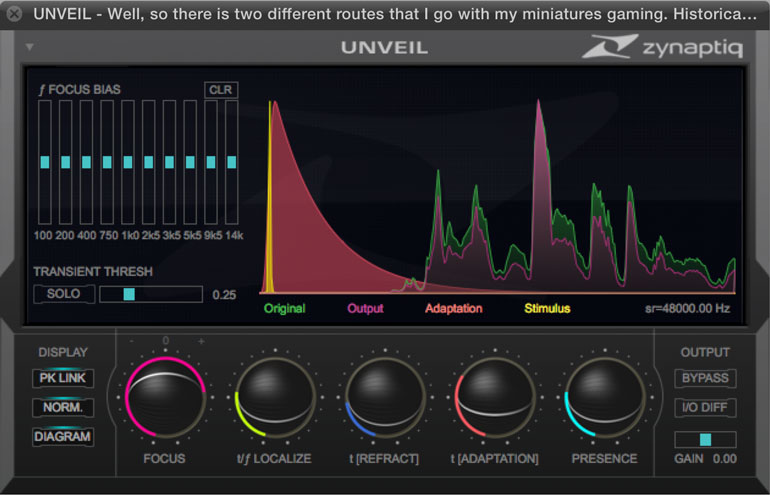
Even though it’s pricey at $379, we feel it has paid for itself numerous times. In fact, Zynaptiq Unveil has been our little secret weapon - it’s made us feel completely confident that our videos will sound brilliant, no matter where we record. It allows us to be flexible and creative when we pick our interview locations, rather than placing all the decision-making on the sound of the room.
It also allows us to not worry about the microphone we’re using. Zynaptiq Unveil can make bad mics and poor mic placement sound a lot better. It’s our favorite audio tool, hands down.
But of course, there are downsides. Apart from, you know, overdoing it and making your subject sound like a space alien, the plugin is very processor heavy and can bring your editing flow to a crawl. For that reason, it’s best to apply it at the end of the edit, before you render and expert. Keep in mind, however, that Zynaptiq Unveil will increase the overall levels of your audio, so after applying the plugin you may have to go in and adjust the levels on all your clips.
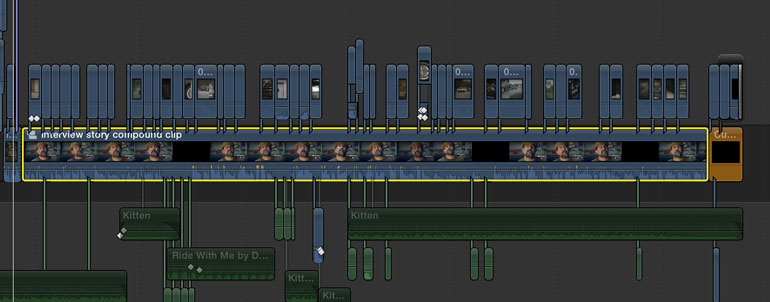
Finally, here’s a quick tip for applying Zynaptiq Unveil to multiple interview clips. You can, of course, apply it to one clip, make your adjustments, and then copy and paste attributes to the other clips (with a shift select to grab all the clips). Alternatively, once you’re done editing your radio edit and feel pretty confident in the story, you can create a compound clip of your interview timeline, and then apply Zynaptiq to the compound clip.
Izotope RX De-Reverb vs Zynaptiq Unveil
Both of these plugins do a similar job of transforming your field interviews into professional sounding recordings, but they use different technology to achieve it.
The cost of the Zynaptiq Unveil plugin is roughly the same as the Izotope RX5 Audio Editor (Standard, not Advanced version), except that Izotope comes with many more tools and features. So for simple de-reverberation, which offers the best results for the price?
It's better for you to judge with your own ears, and you can try both plugins for free before you buy them. For us, however, we love Zynaptiq's default presets without any tinkering, and sometimes that savings of time is worth the added cost. But having other features like De-Click and De-Hum would be quite useful in a lot of typical video interview edits.
Got another audio repair tip for videographers? Email us and we’ll be happy to share with readers!